
One of the standards of children’s crafts is sock creatures, usually starting with puppets and moving on to more complicated projects from there. Sock creatures can be cheap, quick, and easy, which is exactly what you need with kids who can be easily frustrated when learning a new skill. As a bonus, basic sewing is something that everyone should learn, and sock creatures are a great way to teach sewing without it even seeming like a lesson.
I have made tutorials for two simple sock creatures based on characters from popular children’s movies. The first is Chibi-Totoro, who is the smallest of three adorable forest spirits from the 1988 movie My Neighbor Totoro. The second is a tiny snowman created by snow queen Elsa called a Snowgie, from the 2015 short Frozen Fever (which takes place in the same world as Disney’s Frozen).
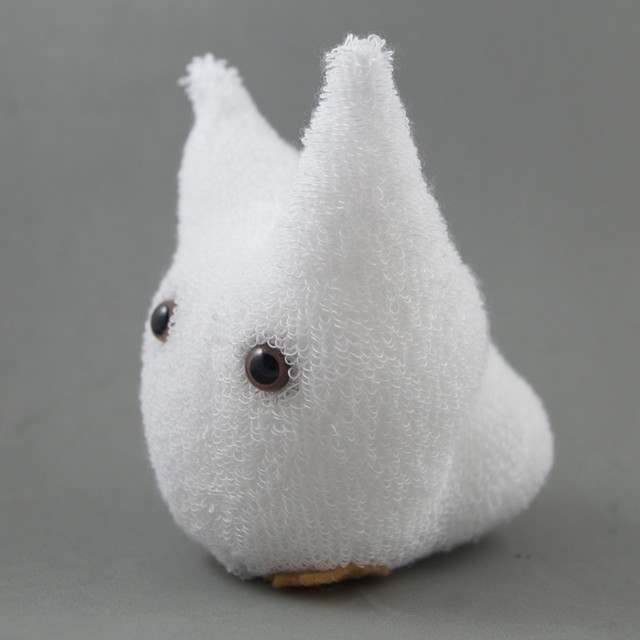
Chibi-Totoro
Sock Chibi-Totoro Stuffie
Supplies Needed:
– one white sock
– 2 safety eyes or black buttons
– scraps of tan or peach felt
– polyester stuffing
– sewing needle
– white thread
– sewing scissors

1. Lay the sock on a flat surface.

2. Using sewing scissors, cut the sock as per the above photo. Discard the ankle and the toe, or save scraps for another project.

3. Turn the remaining piece of fabric sideways, so that the heel (which will be the tail) is at the back. Cut a deep vee into the top of the sock. The actual measurements of the vee will depend on the size of sock you use.

4. Whip-stitch the top of the vee closed; this will become the ears.

5. Turn the sock inside-out to hide the seam and to make the Chibi-Totoro as fluffy as possible. Attach safety eyes or sew on buttons.

6. Stuff the creature with polyester stuffing. Sew the bottom closed using an invisible closing seam; this will also ensure that the seam lies mostly flat.

7. Take a large stitch across the back of the stuffie where you want the join between the tail and the body to be. Pull the stitch tight and tie off, hiding the ends inside the body.

8. Cut out little clawed feet out of the felt and stitch them to the bottom of the body.

9. I discovered that my Chibi-Totoro would not stay up because its tail went down too far, so I took a big stitch from the back of the body to the top of the tail and pulled tight. This decreased the angle between body and tail so that the stuffie would stand up on its own.

Now your simple Chibi-Totoro stuffie is ready to be played with!

Snowgie
Sock Snowgie Stuffie
Supplies Needed:
– two white sock
– 2 safety eyes or black buttons
– scraps of dark blue and white felt
– polyester stuffing
– sewing needle
– white thread
– sewing scissors

1. Lay one sock on a flat surface.

2. Using sewing scissors, cut the sock as per the above photo. Discard the ankle and the toe, or save scraps for another project

3. Do a running stitch around one end of the tube, then pull tight and tie off.

4. Turn tube inside out so that fluffiest side is on the outside. Attach safety eyes or sew on buttons. Stuff the creature with polyester stuffing.

5. Gather the bottom of the tube together and sew tightly closed. Don’t worry if this isn’t perfect, as it will be hidden by the feet.

6. Wrap a doubled piece of thread around the middle of the tube and tie tightly, creating a head and a body.

7. Cut two rough circles out of the widest part of the second sock. These will become the feet.

8. Stitch a running stitch around the edge of one foot, fuzziest side of the fabric facing out. Stuff the foot. Pull the running stitch as tight as possible and tie off. Repeat for second foot. Sew both feet onto the bottom of the body of the stuffie.

9. Cut mouth and teeth out of felt scraps and sew onto face of stuffie. Your Snowgie is now complete!
