Ribbed For Her Pleasure Sock Pattern

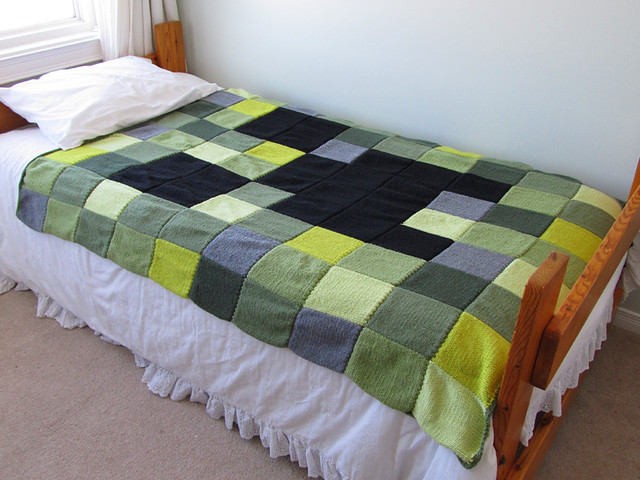
As with my Minecraft Creeper Blanket Pattern, I wrote this pattern years ago — July of 2007, to be precise. It is actually the first knitting pattern I ever wrote. When I took down my old blog, the patterns went with it, and since then I have had request to re-publish some of my old work.

My Ribbed For Her Pleasure Sock Pattern is a very simple sock that, due to its repetitive nature, is great for working on in front of the TV, while on the bus, or while watching small children. It works well with most sock-weight yarns and showcases self-striping yarns beautifully. This is the updated version from 2011, when I fixed an error in the heel.

Ribbed For Her Pleasure Socks
Adult Women’s Size

Materials
– Two 50g (1.764oz) 152m (166yrd) balls of sock yarn, size 1 super fine
– One set of four size US 3 (3.25mm, UK 10) double point needles

Gauge
– Sock Yarn: 28 stitches and 36 rows = 4″ x 4″ (10cm x10cm) square on US 3 (3.25mm, UK 10) needles

Instructions
– Loosely cast on 60 sts. Divide into 20 sts on 3 needles. Join and work in (K2, P2) ribbing for 1.5″ (3.81cm).

– Work in (P2, K2) for an additional 3.5″ (more or less if taller or shorter socks are desired; make sure you have additional wool if you want taller socks).

Arrange heel sts:

– Slip 6 sts from end of 1st needle onto beginning of 2nd needle, and slip 6 sts from beginning of 3rd needle onto end of 2nd needle. This should give you 14 sts on the 1st needle, 32 sts on the 2nd needle, and 14 sts on the 3rd needle.

– Divide the 32 sts on the 2nd needle onto two needles of 16 sts each and leave for the instep.

– (P2, K2) the 14sts off the first needle onto the 3rd needle. Working on these 28 sts proceed as follows:

– Next row: (WS) K1. P12. P2tog. P12. K1. (27 sts on needle)

Make heel:

– 1st row: (RS) K1. Slip 1. Repeat across row ending row with K1.
– 2nd row: K1. Purl to last stitch. K1.
– Repeat these two rows for 2 inches, ending with 1st row.

Shape heel:

– 1st row: (WS) Slip 1. P14. P2tog. P1. Turn.
– 2nd row: (RS) Slip 1. K5. SL1. K1. PSSO. K1. Turn.
– 3rd row: Slip 1. P6. P2tog. P1. Turn.
– 4th row: Slip 1. K7. SL1. K1. PSSO. K1. Turn.
– 5th row: Slip 1. P8. P2tog. P1. Turn.
– 6th row: Slip 1. K9. SL1. K1. PSSO. K1. Turn.
– 7th row: Slip 1. P10. P2tog. P1. Turn.
– 8th row: Slip 1. K11. SL1. K1. PSSO. K1. Turn.
– 9th row: Slip 1. P12. P2tog. P1. Turn.
– 10th row: Slip 1. K13. SL1. K1. PSSO. K1. Turn.
– 11th row: Slip 1. P14. P2tog. Turn.
– 12th row: Knit. (16 stitches remaining in heel)

Make instep:

– Slip 32 sts for instep onto one needle.

– 1st needle: With RS of work facing and using the heel needle, pick up 13sts. Knit 11 of these sts, then purl 2 of these sts.
– 2nd needle: Slip the two purled stitches from the end of the 1st needle to the beginning of the 2nd needle. (K2, P2) the rest of the way across instep sts.
– 3rd needle: Pick up and knit 13 sts along other side of heel.

– Sts are now divided as: 27-34-13

– Knit 7 sts from beginning of first needle onto end of 3rd needle.

– Sts are now divided as: 20-34-20

– 1st round:
– 1st needle: Knit to last 3 sts. K2 tog. K1.
– 2nd needle: (P2, K2) to the end of needle, ending with P2.
– 3rd needle: K1. Slip 1. K1. psso. Knit to end.

– 2nd round:
– 1st needle: Knit.
– 2nd needle: (P2, K2) to the end of needle, ending with P2.
– 3rd needle: Knit.

– Repeat these two rounds to 13sts on 1st needle, 34 sts on 2nd needle, and 13 sts on 3rd needle (60 sts total).

– Continue knitting as in 2nd round until foot, from picked up sts at heel, measures 5″ (12.7cm). (Alternately, continue knitting until the needles sit at the first knuckle of the big toe when this sock is tried on the foot on which it will be worn.)

Shape toe:

– Slip 2 sts from start of 2nd needle onto end of 1st needle, and slip 2 sts from end of of 2nd needle onto start of 3rd needle. This should give you 15 sts on the 1st needle, 30 sts on the 2nd needle, and 15 sts on the 3rd needle.

– 1st round:
– 1st needle: Knit to last 3 sts. K2tog. K1.
– 2nd needle: K1. Slip 1. K1. psso. Knit to last 3 sts. K2tog. K1.
– 3rd needle: K1. Slip 1. K1. psso. Knit to end.

– 2nd round: Knit.

– Repeat these two rounds until 28 sts remain (divided 7-14-7). Break yarn and graft 2 sets of 14 sts.

Recycled Crayons Tutorial

Back in Girl Guides, we recycled our crayons by melting them in the microwave or in a double boiler, then pouring the different colours in layers into muffin tins (waiting for the wax to cool a bit between layers so they didn’t mix). I wanted to do something a little simpler than that with my kids yesterday — since they are younger than I was when first did this craft, I wanted a process that involved less handling of molten wax. However, this is still an activity that is done with kids, as opposed to setting them up and letting them go.

Recycled Crayons

Supplies Needed:
– old crayons
– molded cookie pans OR silicon molds rated for use in an oven OR muffin tins
– flat cookie pans
– utility knife
– large, heavy knife OR clear zipper bag and hammer
– cutting board

1. Sort through the kids’ crayons and separate out the old, broken ones, along with the ones that just don’t colour well.

2. Remove the paper wrappers from the crayons. The labels can be peeled off with your fingernails. However, the quickest way is to run the blade of a utility knife lightly down the paper to slit it, then peel it off. When I was doing it with my kids, I would cut the paper, and they would take it off.

3. Sort the crayons by colour.

4. Protect the work surface with a cutting board, then use the large knife to chop up the crayons into chunks that are approximately 1cm (0.4″) long. Sharp knives should be handled by an adult. Alternately, put each colour of crayon into a clear zipper bag, seal the bag, and smash the crayons into large chunks with a hammer. This may damage the surface underneath and will be noisy, so I suggest working on a concrete surface with a cutting board over top, and using ear protection.

5. Fill the molded cookie pans or silicon molds or muffin tins with the chunks of crayon. The molds should be almost overflowing, as the air pockets between crayon chunks will be filled as they melt. To create colour-coordinated crayons, fill each compartment with different shades of the same colour. To create more contrast, add chunks of coordinating colours. Be careful not to mix too many colours, though, as the colours will mix and they may turn an unlovely brown.

6. Preheat the oven to 200°F (93°C) (the oven temperature needs to be low so that the wax doesn’t catch fire). Put the crayon-filled molds on top of the flat cookie pans for support; this is especially important if using silicone molds, which are flexible. Anything to do with the oven should be done by an adult.

7. Bake until crayon chunks are thoroughly melted, 15 to 30 minutes, checking every 5 minutes after first 15 minutes is up to see if there are still any lumps. Remove trays carefully from oven, being careful not to spill the wax.

8. Cool the recycled crayons thoroughly before removing them from the molds. To make removing them easier, place them in the freezer (or anywhere outside in winter in Canada, so long as it’s protected from precipitation) until thoroughly chilled. Wax shrinks when it gets cold, so it will pull away from the sides of the mold and slide out more easily.

When I made these candles, I used three different kinds of molds:

– metal, nonstick Wilton PEEPS Bunny Shaped Cookie Pans ($3.00 each at the dollar store), which released easily
– a silicone Wilton PEEPS Chicks and Bunnies Treat Mold ($4.00 each at the dollar store), which released with a little more difficulty, but cleanly
– a silicone flower-shaped IKEA PLASTIS Ice Cube Tray ($1.99 at IKEA), which stuck to the wax, obscured detail, and were very difficult to remove

All in all, I much preferred the metal pans to the silicone versions.

We packaged these crayons up into little spring-themed bags and put them aside until the week before Easter to give out at school. Of course, we had to leave a few out for the kids to colour with right away, too.

Booboo Bunnies and Chicks Tutorial

It’s day two of March Break, and it’s still much too cold for this time of year. That means more crafts with the kiddos! Today’s craft was booboo bunnies and chicks, for which I have created a brief tutorial. They’re really very simple.

You may be wondering why are they called “booboo” animals. Well, it’s because the hole in the back of the animals caused by a loop in the fabric makes a great place to tuck an ice cube. The ice cube can then be applied to a child’s booboo without it getting their hands cold, and without it dripping all over the place. As an added bonus, the cuteness of the animal distracts the child from their injury. But don’t think that this is their only use! The hole in the back makes for a great place to stash an Easter candy; I’ve seen them made with beach towels so that one of those jumbo Kinder Eggs can fit inside. I’ve also seen them used as a creative way to present washcloths at a baby shower.

Booboo Bunny

Supplies Needed:
– one facecloth or dish cloth (without a pattern is best)
– 12″ of thin ribbon
– one pink pompom
– one white pompom
– two small googly eyes (with button shanks if you plan to sew them on)
– glue gun and glue OR needle and coordinating thread
– sharp scissors

1. Trim tags off of the cloth, if there are any.

2. Starting at one corner, roll the cloth diagonally until you have a tube.

3. Keeping the tube rolled tightly, fold it in half.


Top view.


Side view.

4. Keeping the tube rolled tightly, fold the open ends of the tube backwards. Secure by tying the ribbon tightly around the cloth, about 2/3 of the way along.

5. Tie the ribbon into a bow. Trim the ends with the scissors.

6. Using the hot glue gun, stick the two halves of the face securely together (otherwise it will look like a bum). Glue the eyes, nose, and tail to the bunny. Alternatively, sew the face together, and sew on the eyes, nose and tail. Sewing is the preferred method if you plan on using the cloth for other purposes at a later date.


Bunnicula Booboo Bunny

Don’t forget, booboo bunnies can be any colour of the rainbow! I just made white ones because that is the easiest colour of face cloth to find (and the cheapest). Don’t be afraid to experiment with decorating the bunnies, either. Above I added some glued-on felt “fangs” and used red googly eyes to create a “Bunnicula”, after a creature from a favourite childhood book. Be creative!

Booboo Chick

Supplies Needed:
– one facecloth or dish cloth (without a pattern is best)
– 12″ of thin ribbon
– scraps of yellow felt
– two small googly eyes (with button shanks if you plan to sew them on)
– glue gun and glue OR needle and coordinating thread
– sharp scissors

1. to 3. Follow steps 1-3 of the Booboo Bunny tutorial.

4. Instead of folding the cloth roll back on itself, fold it to either side, creating an “M” shape. Secure by tying the ribbon tightly around the cloth, about 2/3 of the way up.

5. Cut out scraps of felt for the beak and feet, proportionate to the size of the cloth that you are using.

6. Glue both sides of the head together, then glue on the felt pieces and googly eyes. Alternatively, sew the face together, and sew on the eyes, beak, and feet.

Once again, be creative! A chick easily turns into a penguin if you use a black cloth.

Bunnies and chicks! Now you’re all set for spring.

Minecraft Creeper Blanket

I originally posted about my Minecraft Creeper Blanket on my old blog back in 2013. I written anything new for that blog for years, and I just assumed nobody had looked at it in equally as long. As it turns out, someone had been trying to follow the pattern I’d posted — and then I took it down! So I am re-posting my old entry. I plan on doing this with more of my old work, subject to requests, so if there’s an old post you’d like to see, just ask.

On July 16th, 2012, I almost lost my little brother to a house fire. The fire started in the room where he was trying to sleep away a flu, and he was lucky to get out alive and relatvely unhurt; he suffered some mild burns and smoke inhalaton. My parents, of course, threw a couple of things in a suitcase and started the drive to Halifax to take care of my brother in the hospital (he was there for almost a week) and then help him once he was out. With two young children at home, I couldn’t manage a 16-hour drive and indefinite hotel stay on practially no notice, but it didn’t mean that I didn’t want to be there. He’s my baby brother, man. I couldn’t just sit on my hands and do nothing. As it became more and more obvious that, between the fire damage and the water damage from puttng the fire out, my brother had lost just about everything, I started to wonder if there was anything I could make for him. Sure, the insurance should pay to replace most of the essentials, but what about those personal touches? That’s where the idea for this blanket was born.

For those not into such things, the blanket pattern is based on the face of a Creeper, which is a bad guy in the game Minecraft. I chose the design simply because I know that my brother loves the game. Perhaps I should have played the game before I knit the blanket, because I found out that the whole point of this villain isn’t so much that it kills your character (there is minimal penalty in this game for dying), but that it destroys the creations that you’ve spent a long time building. You know, like a house. I swear I didn’t know this before I knit the blanket. This doesn’t seem to bother my brother much, or maybe he takes it as ironic. At least I hope so…

This is what a Creeper looks like in game:


Source: D+PAD

It took me six months of knitting to finish the blanket. At first I thought it would be ready for my brother’s birthday, then Christmas… In the end, it was a delayed Christmas present that I gave him in February. I swear I tried to make the Christmas deadline, but I still had at least 25 squares to go by the time December 25th rolled around. I mean, it took me almost a month to sew all 100 squares together. I now have a HUGE respect for anyone who undertakes this kind of project on a regular basis. My hat is off to you, sir or madam.


It’s amazing how all that work folds up into such a small package.

Here is the pattern that I designed if you’d like to try to knit the blanket yourself. I knit it as simple stockinette stitch squares, cast on 25 stitches and knit until they were square. This makes a blanket that is big enough to generously cover a single bed, or barely cover a double. I’d give you exact dimensions, but the blanket is already with my brother in Halifax. I tried to find an acrylic yarn (brother has pets, it has to be easily washable) with as many shades of green as possible to make the Creeper appear authentic. This is the best selection I could find.

The legend as follows:

Minecraft Creeper Blanket

Yarn: Loops & Threads Impeccable yarn from Michaels
Needle Size: 5 mm (8 US)
BL = Black (01040), 20 squares (2 balls)
TG = True Grey (01044), 11 squares (1 ball)
F = Fern (01222), 17 squares (2 balls)
FO = Forest (01243), 20 squares (2 balls)
G = Grass (01223), 10 squares (1 ball)
DF = Deep Forest (01242), 10 squares (1 ball)
SF = Soft Fern, (01221), 12 squares (2 balls)
Square Total: 100 squares, approx. 1200g
Border: 2 rows of single crochet around edge in Forest (01243), approx. 50g (1 ball)
Total yarn required: 11 balls

If you try this pattern yourself or if you need more information before you give it a shot, please let me know!