
March Break didn’t really turn out as planned. A tickle in my throat at the flea market on Saturday turned into a full-blown chest cold by Sunday; Monday through Thursday I spent most of my time between decongestant doses with a hot barley bag over my face to decrease the pressure in my sinuses. The rest of the family didn’t fare much better, with my husband missing work and the only reason the kids didn’t miss school being that it was already a holiday. All of our plans for outings and most of the fun things to do at home went straight down the toilet.
However, I had made myself a promise of one thing I was going to do over the break: find a rescue kitty who would fit well into our home. This was not a spontaneous decision, since my husband finally agreed that it was time for a new cat since Christmas (our previous cats passed away of extreme old age over ten years ago). But we also knew that we were going to be in Madrid in February, and we didn’t think it was fair to adopt a cat and then go away for ten days just as it was settling in.
So over the March Break I visited the Humane Society as well as many of their Pet Adoption Locations. While I think I petted and cuddled every cat who was willing (which is honestly a nice way to spend your time anyway), it wasn’t until right before closing on Wednesday night that I found Fizzgig (originally named Violet).

Fizzgig is a female 9-month old brown tabby with green eyes who is very curious about the world around her. She is a little bit shy, but deals well with our boisterous, noisy family.
So, in honour of the new member of our household, I thought that a cat toy craft was in order. Since March 14th is Pi Day, a pie-shaped toy seemed particularly fitting! If you don’t have a cat who would have any use for this toy, it also makes fun play food for a child.
Strawberry Pi Pie Cat Toy
Materials:
– 1 sheet of tan felt
– coordinating tan thread
– red embroidery thread
– polyester stuffing
– OPTIONAL: dried catnip
Supplies Needed:
– sewing needle
– scissors
– circular item (to trace)
– pencil
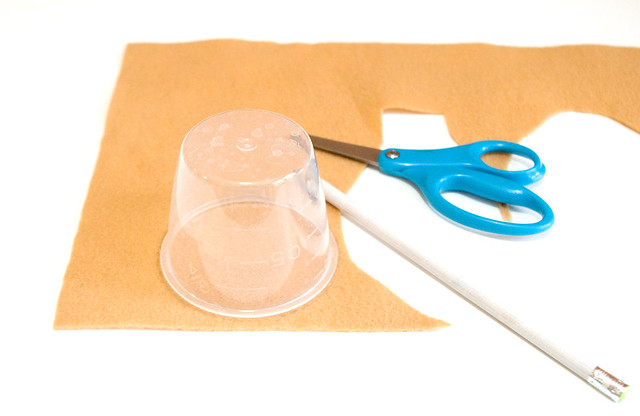
1. Using a circular glass or container about 7cm in diameter, trace a circle on your felt.

2. Cut out the circle and a strip of felt about 2cm wide. The strip should be an inch or two longer than the circumference of the circle. The easiest way to determine the circumference without math is to wrap the felt around the bottom of the glass/container you used to to make the circle.

3. Using coordinating thread, whip stitch the long edge of the strip of fabric to the circumference of the circle.

4. Overlap the ends of the long strip, and then trim off the excess so that they only overlap by about half a centimeter. Whip stitch along the exterior edge to join the strip into a circle.

5. Using your stitched portions as a guide, draw a rough circle about 1cm larger all the way around than the original base. Cut it out.

6. Turn the circle over so that the marked pieces are on the bottom. Draw the symbol for Pi π in pencil at the center of the “top crust” you just cut out.

7. Using red embroidery thread and your favourite stitch (I am a fan of the split stitch, which is #3 in this article), embroider over the pencil markings you have made for the Pi symbol.

8. Using a large whip stitch (which will result in the fabric bunching around the edge to create the “crimped edge” of the top crust), sew the top crust to the rest of the pie. When the crust is about 3/4 of the way attached, stuff the pie with polyester stuffing and, if you so choose, a little bit of dried catnip. Then finish stitching the pie closed.

Your strawberry pi pie cat toy should be ready to go! We didn’t use catnip for ours, but Fizzgig likes it just the same. Her favourite thing to do is bat it down the stairs and then go chase after it. I tried to get a picture of her playing with it, but this was the best that I could do — she’s basically just a motion blur at this age!
