New for the 2020 Holiday Season: Colour Your Own Mask Kits

Customer demand has led to me creating colour your own mask kits for the 2020 holiday season! (Hopefully a vaccine will be found sooner rather than later and we won’t need these next year.) The kits make great stocking stuffers, or the masks can be decorated as one-of-a-kind gifts to be given by kids and adults alike, or they can be a family activity to add some creativity and colour to a grey winter day.

The non-medical masks in the kits conform to the current guidelines from the Government of Canada: they are three layers, 100% cotton on the outside sandwiching a layer of non-woven polypropylene in the middle. For the greatest amount of comfort, the ties are made from stretchy T-shirt fabric and are adjustable. Adult and child sizes are available.

The masks lie flat except where they are shaped by darts at the nose and chin. This allows for easy colouring. The design and three-layer construction also helps keep the fabric from touching the face (except where the edges create a seal), which many find more comfortable, especially if they are prone to claustrophobia.

INDIVIDUAL KIT $25

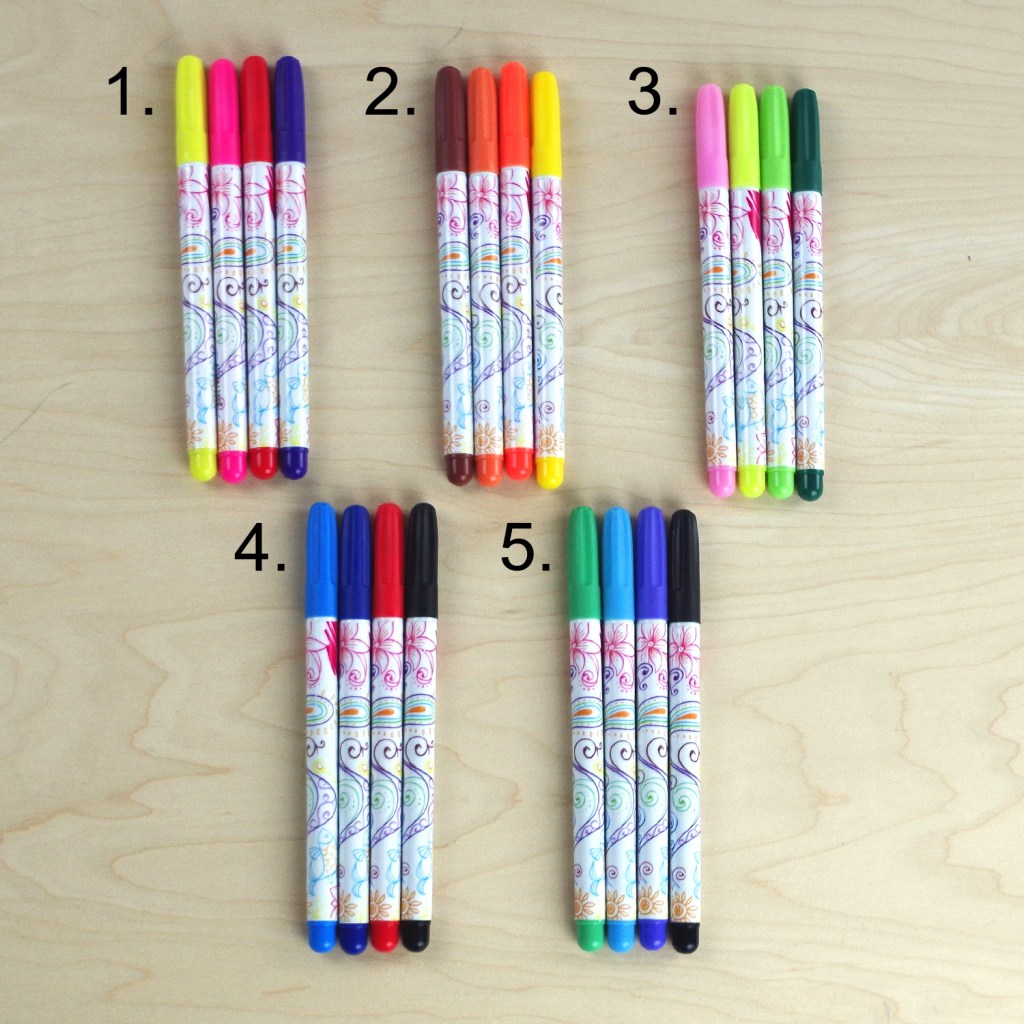
Each individual kit contains one handmade non-medical mask, four permanent fabric markers, and instructions. The kit comes ready to gift in in recyclable packaging. Kit may be ordered in child/teen and adult size. There are five different colourways to choose from (please specify which you’d prefer at the time of ordering).

FAMILY PACK $90

The family pack is your best value, with four masks (in any size combination, because families come in all shapes and sizes), twenty markers, and instructions.

SINGLE MASK $15

Perhaps you already have all of the fabric markers you could ever need, or perhaps your family is more than four people. Whatever the reason, you can order a single mask with no markers for $15.

DELIVERY OPTIONS

Free curbside pick-up or delivery in the east end of Ottawa.

Alternately, shipping is via Canada Post to anywhere in Canada. I’d encourage orders that are to be shipped this way to be made early because Canada Post has warned that shipping is likely to be slower than usual this holiday season.

Individual kits and single masks shipping (each): $3.50

Family packs shipping (each): $5.50

HOW TO ORDER

I am currently accepting orders by email sent to owntwohandscanada@gmail.com Be sure to specify which kit you would like, what size(s) of mask(s), and what colours of markers (if applicable). Payment is by e-transfer.

Order ASAP to make sure your kits arrive in time for the holidays!

Strawberry Pi Pie Cat Toy Tutorial

March Break didn’t really turn out as planned. A tickle in my throat at the flea market on Saturday turned into a full-blown chest cold by Sunday; Monday through Thursday I spent most of my time between decongestant doses with a hot barley bag over my face to decrease the pressure in my sinuses. The rest of the family didn’t fare much better, with my husband missing work and the only reason the kids didn’t miss school being that it was already a holiday. All of our plans for outings and most of the fun things to do at home went straight down the toilet.

However, I had made myself a promise of one thing I was going to do over the break: find a rescue kitty who would fit well into our home. This was not a spontaneous decision, since my husband finally agreed that it was time for a new cat since Christmas (our previous cats passed away of extreme old age over ten years ago). But we also knew that we were going to be in Madrid in February, and we didn’t think it was fair to adopt a cat and then go away for ten days just as it was settling in.

So over the March Break I visited the Humane Society as well as many of their Pet Adoption Locations. While I think I petted and cuddled every cat who was willing (which is honestly a nice way to spend your time anyway), it wasn’t until right before closing on Wednesday night that I found Fizzgig (originally named Violet).

Fizzgig is a female 9-month old brown tabby with green eyes who is very curious about the world around her. She is a little bit shy, but deals well with our boisterous, noisy family.

So, in honour of the new member of our household, I thought that a cat toy craft was in order. Since March 14th is Pi Day, a pie-shaped toy seemed particularly fitting! If you don’t have a cat who would have any use for this toy, it also makes fun play food for a child.

Strawberry Pi Pie Cat Toy

Materials:

– 1 sheet of tan felt
– coordinating tan thread
– red embroidery thread
– polyester stuffing
– OPTIONAL: dried catnip

Supplies Needed:

– sewing needle
– scissors
– circular item (to trace)
– pencil

1. Using a circular glass or container about 7cm in diameter, trace a circle on your felt.

2. Cut out the circle and a strip of felt about 2cm wide. The strip should be an inch or two longer than the circumference of the circle. The easiest way to determine the circumference without math is to wrap the felt around the bottom of the glass/container you used to to make the circle.

3. Using coordinating thread, whip stitch the long edge of the strip of fabric to the circumference of the circle.

4. Overlap the ends of the long strip, and then trim off the excess so that they only overlap by about half a centimeter. Whip stitch along the exterior edge to join the strip into a circle.

5. Using your stitched portions as a guide, draw a rough circle about 1cm larger all the way around than the original base. Cut it out.

6. Turn the circle over so that the marked pieces are on the bottom. Draw the symbol for Pi π in pencil at the center of the “top crust” you just cut out.

7. Using red embroidery thread and your favourite stitch (I am a fan of the split stitch, which is #3 in this article), embroider over the pencil markings you have made for the Pi symbol.

8. Using a large whip stitch (which will result in the fabric bunching around the edge to create the “crimped edge” of the top crust), sew the top crust to the rest of the pie. When the crust is about 3/4 of the way attached, stuff the pie with polyester stuffing and, if you so choose, a little bit of dried catnip. Then finish stitching the pie closed.

Your strawberry pi pie cat toy should be ready to go! We didn’t use catnip for ours, but Fizzgig likes it just the same. Her favourite thing to do is bat it down the stairs and then go chase after it. I tried to get a picture of her playing with it, but this was the best that I could do — she’s basically just a motion blur at this age!

Flotte Socke Christmas

I am loving working on my sweater of many colours, but it has become just a little bit too large to comfortably carry around in my purse. I mean, I could always buy a larger purse, but I am generally most comfortable with one that fits my wallet, cell phone, a paperback novel, and a small knitting project. The last time I carried around a Mary Poppins-sized bag was back when the kids were really little and I always had to have diapers, extra onesies, blankets, and bottles on hand. I’m really glad to be past that stage, to tell you the honest truth.

But if I was leaving the sweater at home, I needed another, more portable project to occupy my hands during downtime. (I know that I can always read, but I can actually now read and knit at the same time, so long as the pattern is simple and I don’t have to hold a physical book open.) So I dug around in my stash for a ball of sock yarn that I bought before Christmas so that I could get started on gifts for next year — or maybe something for myself for a change? Who knows, it’s usually far in advance for me.

I bought the yarn during the Christmas stocking rush and I knew I’d drive myself crazy trying to complete yet another pair of socks in time for the holiday, so I didn’t even try. I’m really liking how it’s coming together now, though. The self-striping pattern is really cute and the yarn itself is actually quite soft (75% superwash wool, 25% polyamide). The yarn is Flotte Socke 4f Christmas by Rellana Garne in color 2401. One way or another, even if I knit the sweater at home and the socks on the go, these Christmas socks should be done in time for the holidays.

If it sounds a bit like I’m trying to justify starting a second project while the first isn’t complete, honestly, that’s exactly what’s happening. I learned a long time ago that if I have too many projects on the go at once, I end up finishing nothing! I try very hard to limit myself to one type of project at a time, i.e. one knitting, one sewing, one costume (except during final con crunch), etc. Working on this pair of socks seems like I’m breaking a rule somehow.

Sweater of Many Colours

I needed a new knitting project to work on after completing my socks of many clours and another pair of wrist warmers (which I swear I will post photos of eventually). Neither of these projects made a big dent in the bag full of sock yarn scraps that I was hoping to work my way through, so I thought I’d try a larger project. I decided on a top-down cardigan for Thing 2 based on my favourite how to improvise a top-down sweater tutorial.

It hasn’t been very fast going, since the yarn is a smaller gauge than I usually work with for sweaters. So far I have completed the shoulders and knit down the chest about halfway. But I have worked my way through reasonably-sized balls of leftover yarn, which is encouraging. I’m trying to progress gradually from oranges and earth tones (Thing 2’s favourite colours) into blues and cooler colours further down the sweater. So far, so good! Thing 2 seems very enthusiastic about the project, although at the rate I’m knitting it may not be complete until it’s too warm to wear it. Hopefully she won’t have grown out of this size by next fall.

Socks of Many Colours: Complete!

I’m still trying to adhere to my New Year’s resolutions, so I’ve been knitting away at my socks of many colours. I managed to get through a small pile of yarn scraps, but I haven’t made as big of a dent into my total accumulation as I was hoping.

It seems like I spent more time sewing in ends than I did actually knitting.

But I am rather happy with the final result! These super-warm woolen socks have a stretchy ribbed knit and are very comfortable. I rather like the colours, but I’m sure they’re not to everybody’s tastes. I rarely keep my knit items for myself, so I’ll have to figure out who has feet similar sized to mine who also likes this particular pattern mishmash. My kids would very happily wear them, but the size is much too large.

On to the next scrap project! I’m thinking that I need a new pair of wrist warmers, since my hands have been getting rather chilly when gaming in the evening.

Socks of Many Colours

In an effort to get an early start on the first of my New Year’s resolutions, I spent a good chunk of this weekend knitting socks. Not just any socks, but socks (well, one sock so far) of many colours. I have a bag of yarn odds and sods of sock yarn that I inherited from a crafty friend when she passed away, as well as many years worth of my own leftovers. I thought that it would be nice to use up this bag, but to do so means that I’m going to have to make some very interestingly-coloured socks.

So far this sock has used six different leftover yarns, and I hope to use one or two more before it’s done. I divided the balls in half by weight and pattern, so the second sock should mostly match — although the colour repeat on some of the yarns is so long that it won’t be perfect. In the end, the pair of socks will be completely unique and hopefully a lot of fun!

I still haven’t decided what I’m going to do with the other leftover sock yarn, of which there is quite a bit. I don’t have the patience to turn it into a blanket, but a shawl is not out of the question. Or maybe a scarf; an infinity scarf might be nice. I haven’t knit a scarf in years. I’ve already made a couple dozen mini sweaters as Christmas ornaments over the last few years, and I’ve run out of people to gift them to. Given how cold my hands get at night when I’m on the computer, I may have to knit a new pair of wrist warmers, though. Hmmmmmm…

Ottawa ComicCon 2013: Frigga and Thor

A reader named Anna contacted me about the Frigga costume I made for Ottawa ComicCon way back in 2013, wondering what pattern I’d used and adaptations I’d made. I originally posted about it back in my LiveJournal days, so I had to search around a bit for the old text and photos. But here it is, what little I wrote down. I hope it helps Anna, as well as anybody else who intends to dress up as Frigga in the future!


The costumes in question: me as Frigga and Thing 1 as Thor. It was Thing 1’s first Con.
Photo by Karen Turnbull.

“As of about four days before Ottawa ComicCon, my Frigga costume (from the 2011 movie Thor) still looked like this:

Um, whoops. In my defense, my house is still up for sale and I didn’t want to create a massive crafting mess in anticipation of showings. However, things got down to the wire on the Monday (I planned to wear the costume that Friday), and I started getting things ready, showings or no showings. Fabric, check. Notions, check. Pattern, check. Sewing machine… Crap, where did I put it?

After going through every closet and the disaster that is my garage/main storage, it turns out that I’d given it back to my mom while I was showing the house (mine needs repairs). Which I discovered Monday night, too late to do anything about it. I picked up the machine Tuesday morning and started on the costume during Thing 2’s nap time that day.

Here are the photos I was using for reference:


Screen shots from Thor (2011) © Paramount Pictures; used under fair use laws.

And here’s what the costume looked like for ComicCon, the morning after finishing it up at 2:00am:


Photo by Karen Turnbull.

Okay, mine is not a perfect replica, but it’s not bad considering I only spent about $35.00CAD on it. The dress is based on Simplicity 1773 pattern, which is definitely more Snow White and the Huntsman than Thor. I added two panels to the front (duplicates of the back panels, actually), made the sleeves a bit looser (the fabric I was using — light grey polyester suiting with silver thread — had absolutely no give and I needed to be able to use my arms), and added to the collar to change it from square to circular. The collar is machine-quilted and, if I have time, I think I’m going to add some cheap texture and sparkle to it before Halloween with some silver puff paint.”

Note from the future: I never did get around to doing that. The dress stayed as you see here.

“Oh yeah, and the hair? Mine. My mom put it up for me in rags the night before the con and I styled it the day of. And yes, I did have people who knew who I was supposed to be. Not many, granted, but some of that was just because I was dressed as a supporting character.


Photo by Karen Turnbull.

Yes, that is Thing 1 as tiny Thor. Her costume is a WalMart Halloween costume I bought for her tickle trunk on clearance after the holiday last year, but she insisted that it was the costume she wanted to wear to the con. I even suggested she go as Brave’s Merida again:

And I’d go as Queen Elinor, but she refused.Given the option to pretend to be a super hero or a princess, she chose a super hero. I don’t blame her, really, except that Merida is by far my favourite Disney princess.

Thing 1 was a little shy at first, ComicCon being a big place filled with lots of strange adults, but she got into it pretty quickly. When talking with her uncle about the con, she summed it up as, “And I saw Batman and a Storm Trooper and R2D2 and Spider-Man and everyone kept taking my picture because I am adorable.” Yes, people kept telling her that and asking to take her picture.


Photo by Karen Turnbull.

Thing 1 actually hid in the outer layer of my skirts for a bit while we waited our turn (at her insistence) to have our photos taken in the 1960’s Batmobile. This is one of the few shots where you can see that yes, the fabric of my dress isn’t just gray, it’s shot with silver sparkles.”

Despite all of my hard work, it was Thing 1 that ended up in the online edition of the newspaper that year, in her clearance-section Walmart costume. Ah well, it just goes to show that the provenance of your costume doesn’t really matter, so long as you’re having fun cosplaying. Also, when you’re four years old, you’re inherently much cuter than any adult and hence bound to steal the spotlight.

Family Sushi Night

One thing we share as a family is that every single one of us loves sushi. However, we do differ as to which one is our favourite — the best bribe ever to use on Thing 1 is salmon nigiri, while Thing 2 is a big fan of a California roll or any maki with shrimp tempura in it, my husband prefers hand rolls (temaki), while I actually like sashimi (just the fish/seafood), possibly with a bowl of rice on the side to fill me up.

That being said, I don’t know why it didn’t occur to me before now to make sushi at home. I used to do it all the time in high school and as a young adult; I actually hosted a few dinner parties where we all rolled our own sushi. However, it is very time consuming for one person to make a family’s worth, and I guess I just set it aside until I thought the kids were old enough to help me out. But the kids are both old enough now to assemble their own soft tacos or burritos, and sushi uses many of roughly the same techniques, so I thought it was time to give it a go.

Last night I made up a big pot of sushi rice and cut up all kinds of toppings: smoked salmon, cooked shrimp, scrambled egg with a bit of mirin mixed in, cucumber, carrots, and avocado. Then I dug out one rolling mat per person and let everyone assemble their own sushi.

The nice thing about making sushi this way is that everyone can have it just how they like it, although probably not as pretty as they’d like it, that comes with a heck of a lot of practice. I find it surprising that a lot of people around here still assume that sushi automatically equals raw fish, when it’s really all about the vinegared rice. You can top it or roll it with just about anything you’d like. You can even avoid fish or even all animal products altogether, although the purists may take objection to that. But let’s be honest, purists aren’t going to be rolling sushi at home with their six-year-old, they’re going to be paying a very skilled professional chef to create the perfect mouthfuls.

I really liked the combination of the saltiness of the smoked salmon with the sweet egg and the crunch of cucumber.

The egg-and-shrimp roll I made could have used a little more punch; perhaps I should pick up some spicy Japanese mayo for next time?

My husband’s rolls generally turned out nicer-looking than mine, except, of course, when I went to take a picture. His egg, cucumber, and shrimp roll tasted pretty good, though.

After a couple of messy (if tasty) attempts at maki sushi rolls, the girls tried their hands at hand rolls, which are the closest in assembly to a taco, which is where there experience lies.

We had a really good time making and eating this dinner, and I’m starting to think I should have introduced homemade sushi long before now. I loved watching the kids’ faces light up when I told them that we could actually make sushi at home. Not only that, but it’s a pretty healthy meal that’s infinitely customizable. We are definitely going to do this again, and soon. It needs to become a regular thing in my house again.

Handmade Noodles With Beet Pesto

I cooked up all of my beets and served them cold, chopped up with a bit of Dijon mustard and mayonnaise. But there was all kinds of beet juice left behind, so I thought I’d freeze it for use later. If it’ll stain anything, it should make a good colouring, right?

So I bought some 00 flour for my next pasta attempt, and I added my four eggs, and then a couple of cubes worth of beet juice. The problem was, that added more liquid, which meant I then had to add a bunch more flour in order to make the noodles the proper consistency. In the end, the colour didn’t change all that much. I was hoping for a vibrant beet red, but what I got was a kind of light peachy orange. I think that either I need to omit the eggs and use just beet juice (which will probably affect the flavour of the pasta), or boil the beet juice down an awful lot so that it’s very concentrated and doesn’t add much liquid with the colour.

To keep the pasta from sticking to itself, I made an improvised drying rack by putting wooden spoons or long cooking chopsticks under dishes in the cupboards with the long end sticking out. As silly as it looks, it worked! The noodles didn’t stick to each other at all. I think, though, if I’m going to do this a lot in the future, I’ll have to invest in a proper drying rack.

The pasta ended up being a fantastic shade of pinky red, though, because I used the jar of beet pesto. I also ran the pasta through the absolute thinnest setting this time and the consistency was just right! I’ve already learned so much after just two times working with pasta. I’m really looking forward to learning more!

Happy Birthday, Little Brother

My (rather late) package to my little brother arrived in the mail at his house today, so I can finally write about what I made him. My brother is a technophile, but sadly I can’t afford to buy him the latest and greatest gadgets on the market. Instead, I hope he will be happy with socks.

I knit these socks out of, um, well, I lost the ball band so I don’t remember the name of the yarn. They are a lovely hand-dyed merino sock yarn, though! They’re stretchy, comfy, and warm for this incoming winter. The pattern is a toe-up one that I devised years ago that is particularly great for using up absolutely all of a ball of yarn. First, you divide the yarn in half; then, with each ball, knit the foot, and then knit upwards from the ankle until you run out of yarn. I love it, and I keep meaning to write it down for others in a way that is actually readable. Right now, the pattern lives in my head and on the back of a slowly-deteriorating envelope. I know it’s best to get patterns and recipes out there where others can use them, so I’d better write it down soon!

This hilarious F-bomb was most definitely not a pattern of my own devising, though. This pattern was recommended to me by a friend; it’s The F Bomb by Jenifer Spock-Rank, and it’s available for free on Ravelry. I knit it out of leftover scraps of black, red, and cream Dalegarn Baby Ull. I doubled up the yarn and used a 3.0mm needle so it wouldn’t be ridiculously tiny. Those little threads you can see in the picture are actually fibrefill stuffing — that stuff sheds almost as badly as faux fur!