Spool-Knit Headband Tutorial

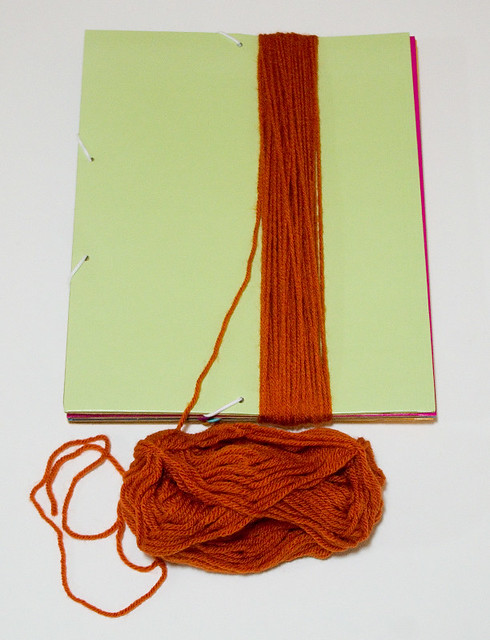
I loved to spool knit (also known as corking) as a kid. I would make yards and yards of multicolored I-cord, but I never quite knew what to do with it after that. So I thought I’d figure out a way to use some spool knitting in a useful way — and only a short length of it, too, so that little ones with not much patience could still make something fun.

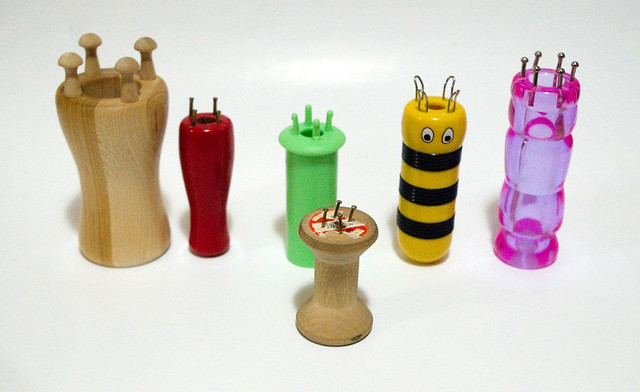
For this craft you will need a spool knitter or knitting spool, which is also known as a french knitter, a knitting dolly, a knitting mushroom, or a small knitting loom. There are probably terms I’ve never heard of as well, but they’re all the same tool! You can buy one commercially; they’re often found at thrift stores as kids tire of them, and sometimes at dollar stores in the craft section. Walmart even carries a few kinds if you don’t have a craft store in your area. But you can always make your own as I did with the one in the front, which is just four nails in an old wooden spool. The one that I’ve chosen to use for this craft is the pink one on the far right, which has six points instead of the more common four, just because I’ll be using a thin sock yarn. But you can use whatever kind you have handy!
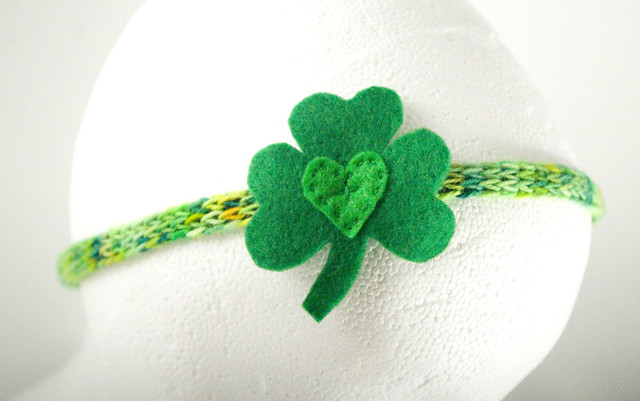
Spool-Knit Headband

Materials:

– yarn
– narrow flat elastic
– two shades of green felt
– green thread to match felt

Supplies Needed:

– knitting spool
– crochet hook or spool knitting hook
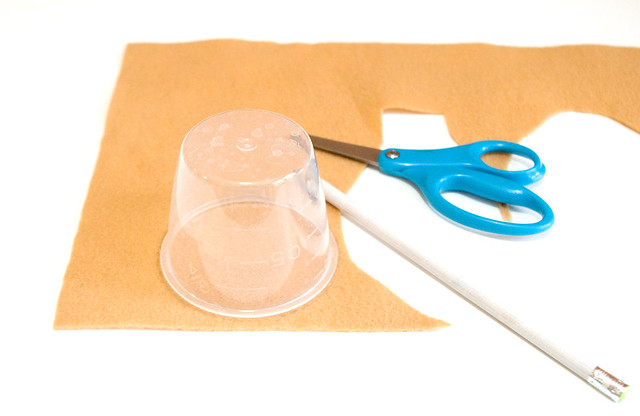
– scissors
– small needle for sewing
– darning needle
– pencil or marker

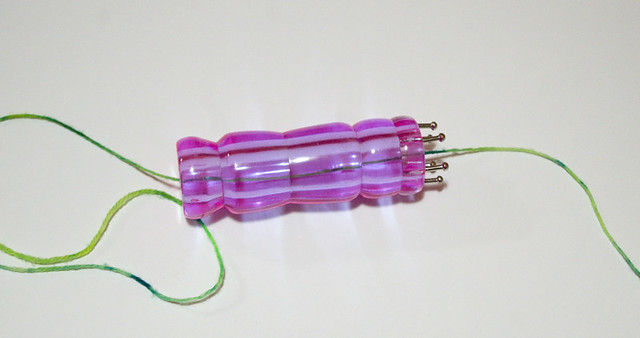
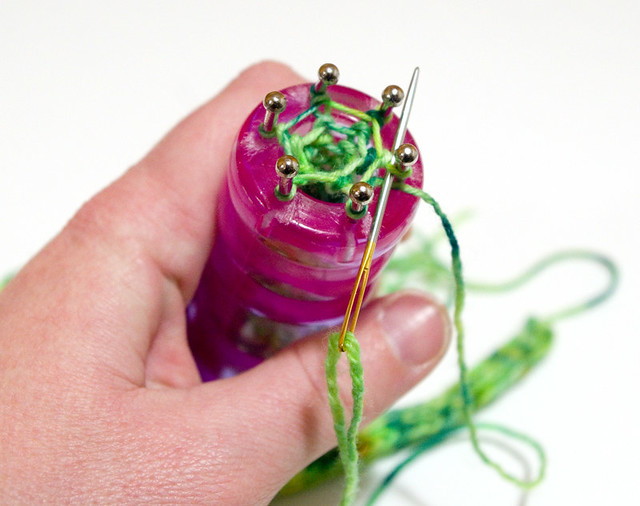
1. Thread your yarn through the knitting spool, leaving a tail of approximately 6″ dangling. The ball of yarn should end up at the end of the tool with the pegs.

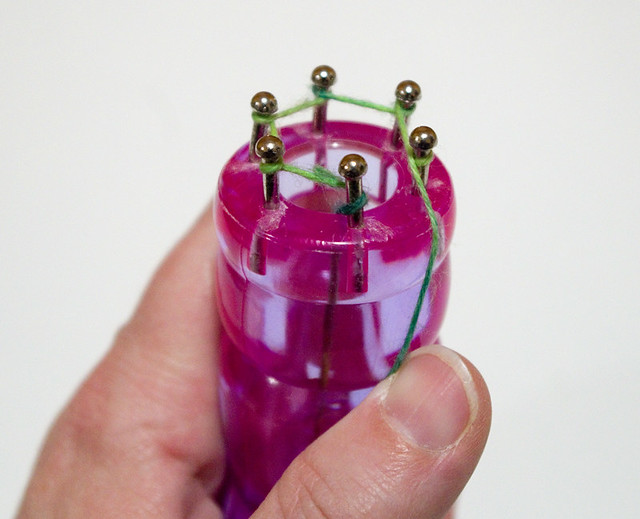
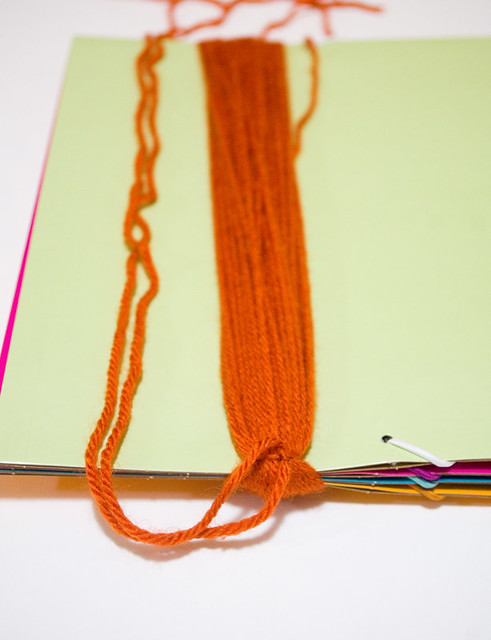
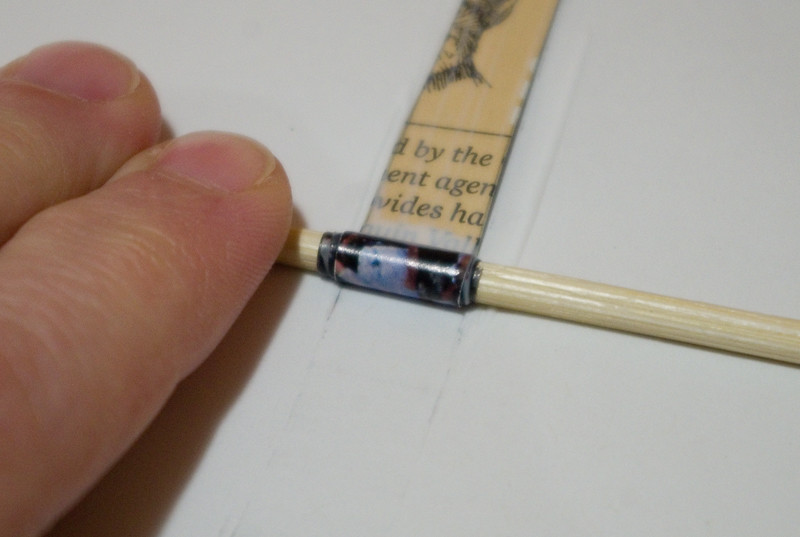
2. Keeping the yarn taut, wrap the yarn counter-clockwise once around your starting peg (all of the pegs are identical, just choose one to start from). Spin the knitting spool counter-clockwise in your hand until the next empty peg is directly in front of you, then wrap the yarn counter-clockwise once around that peg. Continue in this manner until all of the pegs are wrapped.

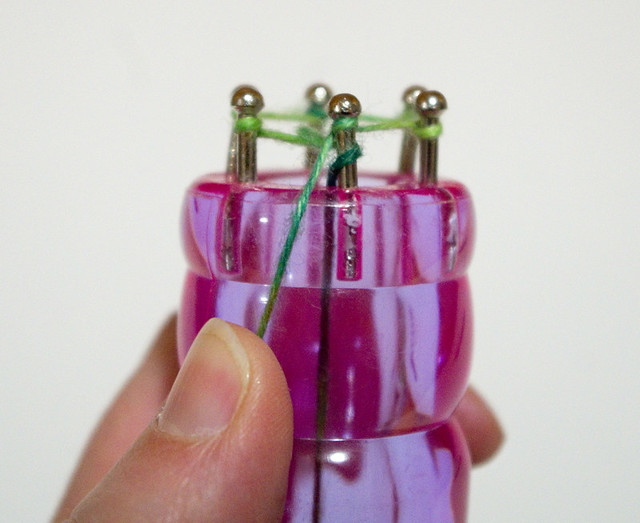
3. Wrap the starting peg a second time.

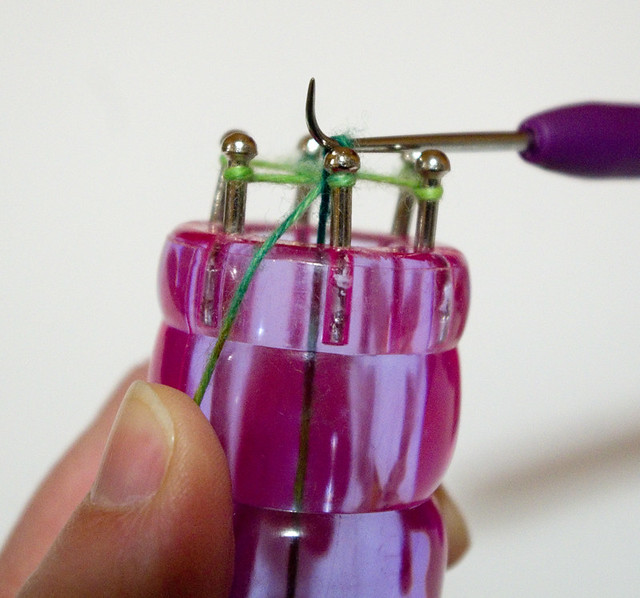
4. Using your hook, flip the first wrap over the second. Give the tail a gentle tug to set the loop.

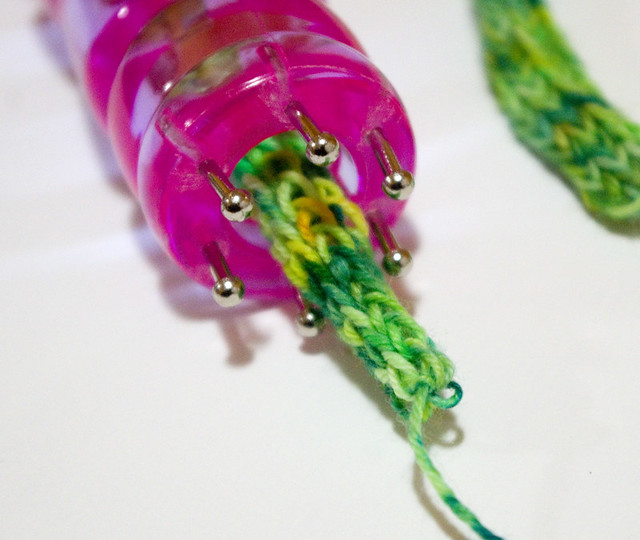
5. Continuing to move counter-clockwise, wrap each peg, flip the oldest wrap over the newest, and then give the tail a gentle tug. This will create a long spiral of spool knitting.

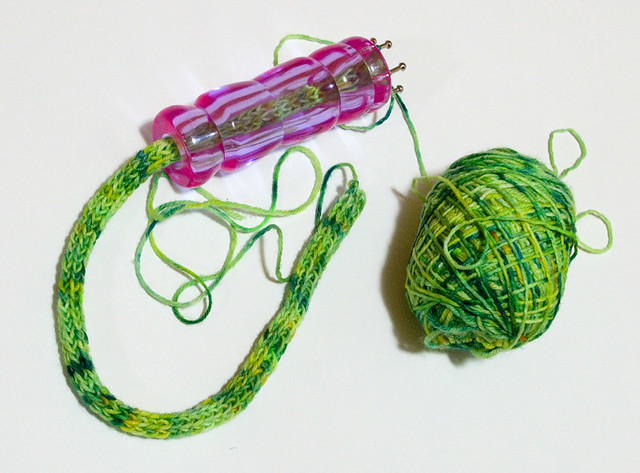
6. Continue in this method until the I-cord you have created is as long as the circumference of the head of the person who will be wearing the headband. Make sure that the measurement is taken without stretching the knitting.

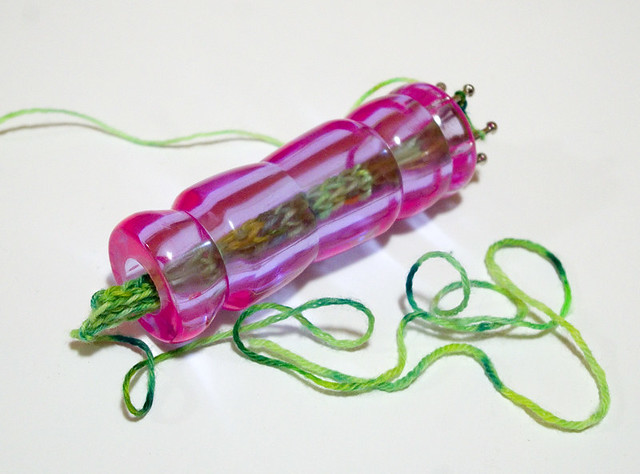
7. Cut the yarn about 6″ away from the peg end of the spool knitting. Thread the end of the yarn through the darning needle. Moving counter-clockwise from the last stitch, use the darning needle to thread the yarn through each loop.

8. Pull the loops off of the pegs, then pull the yarn taut. Tie the yarn securely so that the knitting will not unravel.

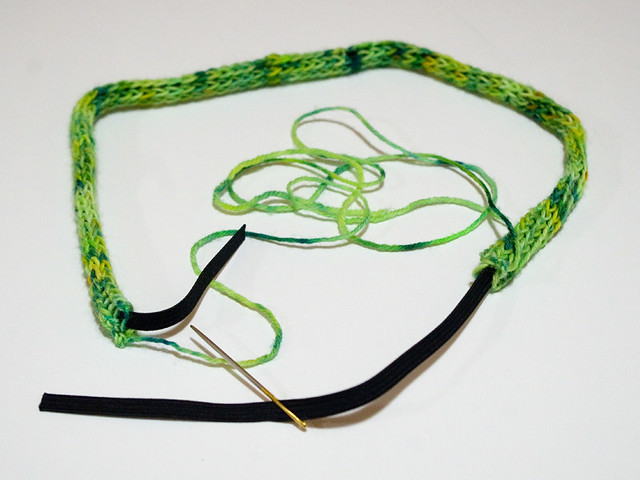
9. Remove the I-cord from the knitting spool. Thread the elastic through the darning needle. Use the darning needle to pull the elastic through the center of the “tube” of the I-cord.

10. Push the I-cord back on the elastic to create a clear working area. Cut the elastic to the circumference of the intended head. Overlap the elastic about 1cm and, keeping it flat, stitch the ends together.

11. Pull the I-cord back so that it covers all of the elastic. Tie the two tails of yarn together tightly, then pass them both through the darning needle and use them to roughly stitch the two ends of the I-cord together.

12. Use a pencil or marker to sketch a shamrock and a small heart out of two different shades of felt. Cut the designs out with scissors.

<img src="https://farm8.staticflickr.com/7856/46685216214_0aff433758_z.jpg" width="640" height="544"

13. Making sure that the non-marked side remains up, stitch the heart to the top of the shamrock.

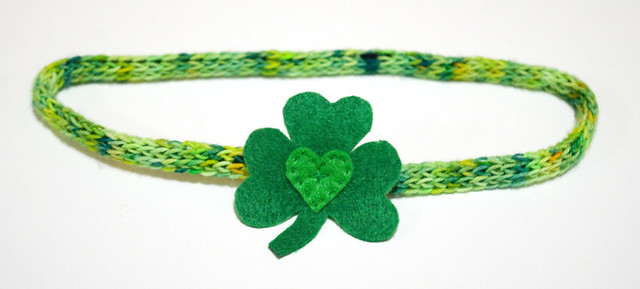
14. Stitch the shamrock over the area on the headband where the two ends of I-cord were joined.

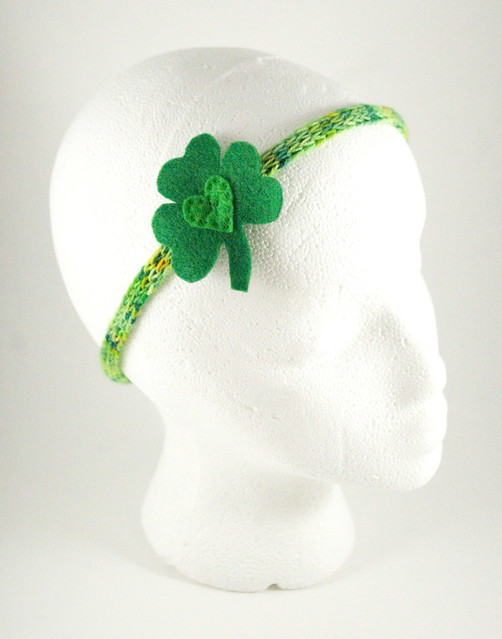
That’s all there is to it! Of course, any colour of yarn and any felt design can be used. I just thought that it would be nice to have something in the theme of Saint Patrick’s Day given that it was coming up on the weekend. But red, white, and pink with a heart design would be lovely for Valentine’s Day; red, white, and green for Christmas; you could make it in the colours of your favorite sports team or even Hogwarts House. Be creative!

Strawberry Pi Pie Cat Toy Tutorial

March Break didn’t really turn out as planned. A tickle in my throat at the flea market on Saturday turned into a full-blown chest cold by Sunday; Monday through Thursday I spent most of my time between decongestant doses with a hot barley bag over my face to decrease the pressure in my sinuses. The rest of the family didn’t fare much better, with my husband missing work and the only reason the kids didn’t miss school being that it was already a holiday. All of our plans for outings and most of the fun things to do at home went straight down the toilet.

However, I had made myself a promise of one thing I was going to do over the break: find a rescue kitty who would fit well into our home. This was not a spontaneous decision, since my husband finally agreed that it was time for a new cat since Christmas (our previous cats passed away of extreme old age over ten years ago). But we also knew that we were going to be in Madrid in February, and we didn’t think it was fair to adopt a cat and then go away for ten days just as it was settling in.

So over the March Break I visited the Humane Society as well as many of their Pet Adoption Locations. While I think I petted and cuddled every cat who was willing (which is honestly a nice way to spend your time anyway), it wasn’t until right before closing on Wednesday night that I found Fizzgig (originally named Violet).

Fizzgig is a female 9-month old brown tabby with green eyes who is very curious about the world around her. She is a little bit shy, but deals well with our boisterous, noisy family.

So, in honour of the new member of our household, I thought that a cat toy craft was in order. Since March 14th is Pi Day, a pie-shaped toy seemed particularly fitting! If you don’t have a cat who would have any use for this toy, it also makes fun play food for a child.

Strawberry Pi Pie Cat Toy

Materials:

– 1 sheet of tan felt
– coordinating tan thread
– red embroidery thread
– polyester stuffing
– OPTIONAL: dried catnip

Supplies Needed:

– sewing needle
– scissors
– circular item (to trace)
– pencil

1. Using a circular glass or container about 7cm in diameter, trace a circle on your felt.

2. Cut out the circle and a strip of felt about 2cm wide. The strip should be an inch or two longer than the circumference of the circle. The easiest way to determine the circumference without math is to wrap the felt around the bottom of the glass/container you used to to make the circle.

3. Using coordinating thread, whip stitch the long edge of the strip of fabric to the circumference of the circle.

4. Overlap the ends of the long strip, and then trim off the excess so that they only overlap by about half a centimeter. Whip stitch along the exterior edge to join the strip into a circle.

5. Using your stitched portions as a guide, draw a rough circle about 1cm larger all the way around than the original base. Cut it out.

6. Turn the circle over so that the marked pieces are on the bottom. Draw the symbol for Pi π in pencil at the center of the “top crust” you just cut out.

7. Using red embroidery thread and your favourite stitch (I am a fan of the split stitch, which is #3 in this article), embroider over the pencil markings you have made for the Pi symbol.

8. Using a large whip stitch (which will result in the fabric bunching around the edge to create the “crimped edge” of the top crust), sew the top crust to the rest of the pie. When the crust is about 3/4 of the way attached, stuff the pie with polyester stuffing and, if you so choose, a little bit of dried catnip. Then finish stitching the pie closed.

Your strawberry pi pie cat toy should be ready to go! We didn’t use catnip for ours, but Fizzgig likes it just the same. Her favourite thing to do is bat it down the stairs and then go chase after it. I tried to get a picture of her playing with it, but this was the best that I could do — she’s basically just a motion blur at this age!

Yarn Dolls Tutorial

Yarn dolls are something that I used to make all the time as a kid; once again, I believe I learned how to make them in Girl Guides. I realized that I hadn’t made any with my own children yet when Thing 1 came home from Guides the other night with the beginnings of her own yarn doll in the works. Thing 2 hadn’t had a chance to make them yet, so I thought I’d dig out my solid-colour yarns left over from previous projects and let them get at creating.

If you’re not the kind of person who’d have yarn scraps around the house, don’t despair! There are lots of very cheap yarns available, even from the dollar store. But before you head there I might recommend hitting the local thrift shop. There you can usually find orphaned balls of yarn for a fraction of the price of buying new, and it keeps a previously-loved item from going to a landfill.

Yarn Dolls

Materials:

– yarn
– OPTIONAL: googly eyes, beads, buttons, scrap fabric, etc.

Supplies Needed:

– book, binder, folder, or piece of stiff cardboard
– scissors
– OPTIONAL: glue, needle, thread

1. Get your yarn, book, and a pair of scissors. I chose a stack of file folders for 8″x10″ pages because they were about the right size for the size of doll that I wanted to make. However, you can really use any size of book or even a piece of cardboard. Since it’s just going to hold the yarn, you don’t have to worry about damaging it.

2. Wrap the yarn around the book until you have created a thick hank. How much yarn you use depends entirely on how big you want the doll to be and what size of book you use. Feel free to experiment! There really isn’t any “right way” to do it. Then cut the yarn off of the ball.

3. Cut a piece of yarn that is a little bit more than twice as long as the book. Thread the piece of yarn under the hank and tie it tightly with a double knot.

4. Slide the hank off of the book. Pass the piece of yarn that you used in step 3 through the center of the hank again and tie another double knot for reinforcement. Turn the hank inside-out so that the knots are on the inside. Smooth the piece of yarn so that it is now part of the hank.

5. Cut another piece of yarn that is a little bit more than twice as long as the book. Wrap this yarn tightly around where you will want the neck of the doll to be, then tie it tightly with a double knot. Wrap the yarn around one more time and tie it again for reinforcement. Smooth the yarn into the hank.

6. Holding the yarn taut, snip the loops at the bottom of the hank (opposite from the head you have created). Trim the excess yarn so that it is roughly the same length.

7. Separate roughly a third of the yarn to create the arms (1/6 of the yarn per arm). For thicker arms, separate a little bit more.

8. Cut another piece of yarn that is a little bit more than twice as long as the book. Tie that yarn to create the waist, using the same technique as at the neck.

9. Braid the arms, double-tying the wrists tightly with scraps of yarn. Divide the bottom of section of yarn in half and braid it to create the legs. Double-tie the yarn tightly around the ankles.

10. Trim off the excess yarn on the hands and feet.

At this point your yarn doll is technically done, but if you feel that it is too plain, that’s where the optional decorations come in! You can:

– add googly eyes or beads or buttons for eyes,
– tie on more yarn as hair,
– sew scrap fabric for clothing,
– tie on artificial butterfly or dragonfly wings to create fairies
– twist a pipe cleaner into a halo and tie on a big lace bow as “wings” to make an angel
– make tiny yarn dolls to hang from earrings or necklaces
– make small yarn dolls in festive colours to use as Christmas ornaments

Exercise your creativity!

There are a couple of basic variations on this kind of doll that are useful to know. The first is the “dress” version, which basically omits braiding the legs to create a skirt. You may note that the arms of this doll are tied instead of braided, which is a much quicker way to do it; this is great for younger children who may have limited patience or braiding skill. It should be noted that this version requires a shorter length of yarn (i.e. a smaller book) due to the lack of braiding.

Also, for a simple snowman, use white yarn and tie it all together at the bottom to create a “snowball” instead of legs.

A great Halloween version of a yarn doll stops at Step 6, and requires only the addition of googly eyes to become a ghost. This is probably the simplest version possible, which is perfect if you want to make a bunch of them and hang them as decorations.

Have fun!

Paper Beads Tutorial

It’s that time of year again: March Break! For the Ontario school board anyway; the Québec schools had theirs last week. My kids were really looking forward to the break, not just because of the days off, but because they loved all of the crafts we did last year. This year we started with a craft that I’m pretty sure I learned in Brownies as a child: paper beads.

Paper Beads

Materials:
– paper (I prefer recycled magazines with glossy photos)
– water-based, non-toxic liquid glue such as Mod Podge or plain white glue
– narrow-width ribbon or cord
– OPTIONAL: coordinating beads

Supplies Needed:
– paper scissors
– bamboo skewers
– ruler
– pencil
– paint brush
– old newspapers (to protect work surface)
– clean, recycled container (to use as glue pot)

1. Spread out your old newspapers to protect your work surface. Remove the piece of paper of your choice from the magazine. (Since we’ve gone paperless for the most part, we bought an old National Geographic magazine for a quarter at a thrift store.)

2. Flip your magazine clipping over so that the back side is showing. Using a ruler and a pencil, draw a long, thin triangle from the base of the paper to the top. The base of our triangles varied from 1cm to 2cm or so; under 1cm they can be a bit too small for little hands, and over 2cm they become very chunky beads.

3. Using the scissors, cut out the triangle.

4. Squirt a small amount of glue into the clean, recycled container. Dab the paint brush lightly in the glue, then spread a thin layer of glue onto the back of the paper, starting about 3cm away from the base. (If you start directly at the base, it will stick to the bamboo skewer.)

5. Starting at the non-glued end of the triangle and working toward the thinnest point, roll the paper tightly around the bamboo skewer. Once the paper is stuck down, apply a thin coat of glue to the outside of the bead, being careful not to get it on the skewer.

6. Allow the glue to dry, then slide the bead off of the skewer.

7. String the paper beads onto the cord, adding commercially-made beads if desired.

My kids really loved making these beads, especially since they can say that they made them from scratch! As a bonus, it introduced them to National Geographic magazines. Thing 1 insisted that we return to the thrift store and buy a whole bunch more, and at a quarter each I couldn’t exactly object. I have very happy memories of paging through these same magazines as a child and I’m glad that my children are getting as much enjoyment out of them as I did.

Tie Dyed Pillow Cases

Tie dyeing with the kids is really something that I prefer to do in the summer when I can throw the kids outside in their bathing suits (which are synthetic and don’t absorb dye) to minimize the mess indoors. This time of year, with temperatures hovering around freezing and snow still covering the ground, that’s not exactly an option. Instead, the girls worked in their bathing suits and socks (warm feet are important) in the kitchen, over the metal sink, and we hoped for the best.

In the spirit of keeping things as cheap as possible, we used fabric we already had — four old, plain cotton pillow cases. We also bought the dye at the dollar store. So far, this are the cheapest kits I’ve found locally, with even Walmart’s selection starting at about $11.00 for a two-colour Tulip-brand kit that only makes three items. For six colours, you’re looking at upwards of $25.00. At Dollarama, they sell their own Crafts brand three-colour kits for $4.00 apiece, and we bought two in different colours. But would these kits work as well as the more expensive ones we’d tried?

When it comes to the supplies included in the kit, I found that they were more or less the same as other brands. They contained everything we needed except the water and the plastic to wrap the fabric as it sat, which is standard. Slightly higher quality gloves would have been appreciated, since they did leak and now the kids have splotches on their hands in places, but that seems to be standard too (just like the ones that come with hair dye). The instructions were clear and concise, and even had a brief photo tutorial for how to make different kinds of designs. We used the spiral (left) and bullseye (center and right) techniques on the kids’ pillowcases. (If you need more information about how to tie dye there are a million sites out there, but the Tulip site has some great tutorials that will work with any brand of dye.)

The kit did contain soda ash, which is necessary to pre-treat the fabric to retain vibrant colours. However, the directions did say that the dyes could be used without pre-treatment, but they would come out more pastel. I let the kids choose between waiting a bit longer to dye so they could have bright colours, or to do it right away and have lighter colours, and not surprisingly they chose to go with the route that required the least amount of patience. Despite the dire warnings of the packaging and articles online, after the first rinse the colours remained vibrant (above).

After a run through the washer and dryer, the colours did fade a bit, and I expect that they will continue to do so throughout their lifetime, but I remain happy with the final product. The kids are thrilled (according to Thing 1, the pillow cases are “Awesome!”), and since the project was for them, I say it was a success. (Bottom left and top right were done in the spiral techniques, top left and bottom right were done using bullseye — more techniques here.)

I will say one thing, though: each package of three colours claims that it contains enough dye for up to eight T-shirts. I guess that could technically be true, if you were to use very small shirts, and if you didn’t want a lot of colour saturation or variation in your design. Two packs, for us, did four very saturated single-bed-sized pillow cases (which I would say are about the same size as a small adult T-shirt), with enough left over to do maybe one more. That’s five items out of two packs of dye, when it claims we could make sixteen items. So keep that in mind when you decide how many items to prep. Even so, that’s five items in six colours for $8.00, compared to Walmart’s three items in two colours for $11.00, so Dollarama remains the cheapest place in town to buy supplies for tie dye crafts.

Fairy Light Lamp Tutorial

It’s March Break, so I’m trying to keep the kids entertained without plopping them in front of screens the entire time. We’re going to try to do a craft a day, and I thought I’d share what we did and how we did it so that others can use these same techniques this week (or any time, really).

The first craft we did was a fairy light lamp. There’s no wiring required, and for safety’s sake all of the lights are LED and the power source is battery-powered. We’ve all seen a string of lights in a jar, but I thought we needed to do something to take it up a notch. If you’re working with younger children, some of these steps will need adult supervision. The end result should be an ornamental lamp or night light that the kids can be proud of! As a bonus, all of the materials can be obtained at the local dollar store, or can be made of recycled materials for free.

Since there are a few ways to do this craft, be sure to read all of the instructions first, to keep from having to re-do steps!

Fairy Light Lamp

Materials:
– small sturdy cardboard box with lid
– Mason jar or recycled jar with lid
– paint
– string of 20 battery-powered LED lights (or two strings of 10)
– batteries to power the LED lights
– diffusing fabric
– small piece of card or paper (optional)
– stickers

Supplies Needed:
– pencil
– craft knife
– duct tape
– paint brush(es)
– heavy-duty scissors
– drill (if using a jar with a one-piece lid)

1. Unscrew the lid from the jar. I used a 1L Mason jar because that’s what fit best with my box, but it’s a very subjective judgement. I also liked the look of a round box, but square or rectangular is fine too. Just make sure it’s the kind of box that has a lid. Don’t worry about a colour or pattern on the box, since it will be covered later. If you want to use a wooden box, that can work too, but you’ll need heavier-duty tools to proceed with the next steps.

2. Trace the opening of the jar onto the lid of your box.

3. Using a craft knife, cut a hole along the line that you have traced. Make sure not to use the knife on a surface that you don’t want damaged, since it will make marks on whatever’s underneath the lid!

4. Make sure that the jar fits into the hole as shown. If the fit is too tight, trim off edges of the hole with the craft knife.

5. Use a few pieces of duct tape (any colour) to reinforce the cardboard around the hole on the inside of the box.

6. Paint the outside of the box. My kids chose a base coat of their favourite colour, then two coats of glitter paint in different colours. We used acrylic paint, since it is more permanent and covers better than kids’ craft paint. Because of this, we covered our table in craft paper first to protect it — and if you look at the paper under the box, you can see why.

Other options to painting include decoupage, stickers, and wrapping the box in pretty paper. No matter what method you choose, make sure that the top and bottom are done separately, since you’ll need to be able to get into the box.

7. Put the batteries into the battery pack of the light string(s). Stuff the diffusing fabric and strings of light into the jar, leaving the battery packs and some cord outside of the jar. I used a cheap tulle (a lightweight, very fine, stiff netting as my diffusing fabric, which is available at most craft stores, fabric stores, and dollar stores in the craft section. A good place to look for this kind of thing is in the Christmas clearance section. You can use a plain colour or one with a glitter pattern. Whatever you choose, the point of the fabric is to make the light from the LEDs softer, hide the cords, and keep it all in place. Arrange the fabric and lights until they are in a position that you find satisfactory. I found that it helped to do so in low lighting so I could see how the light would shine through.

8. Using the heavy-duty scissors, cut a wide slot into the flat part of the Mason jar lid. If you are using a recycled jar with a one-piece lid, using a drill make hole large enough to easily pass the light string through.

9. Cut small strips of duct tape (any colour) and use them to cover the sharp edges of the hole in the lid. This will keep little fingers and the wires from the lights from getting cut.

10. Cover the inside of the lid with a piece of coordinating-coloured duct tape. If you don’t have any, a piece of card or colour in a coordinating colour will also work.

11. Thread the light strings through the hole. If you’re using a piece of card/paper, that should be between the lid and the jar. If you’re using a one-piece lid, you should do this step before you fill the jar with the lights and fabric.

12. Using a piece of duct tape in a coordinating colour, cover most of the hole. If you’re using the card/paper layer, this tape can be any colour. This step is unnecessary if you’re using a one-piece lid.

13. Assemble the parts in the following order:

– jar
– box lid
– card/paper (optional)
– Mason jar lid, then Mason jar band OR one-piece lid

14. Put the battery packs into the bottom of the box, then flip the jar and box lid over on top of the box bottom. To turn the lights off and on, just reach inside the box and flip the switch(es). If you like your lights simple, this can be the end of this craft. My kids wanted a bit more fun, though!

15. My girls really wanted to decorate their lanterns with 3D butterfly stickers, so that’s what we did. Honestly, any kind of sticker would work, although shiny ones (especially the faux-jewel kind) would reflect the light better.

My girls made a lantern each in their favourite colours. You may notice that the jars are slightly different because they’re from different manufacturers. The kids didn’t notice, though.

The lanterns look especially nice in the dark, and they throw interestingly-patterned shadows on the wall.

I promised Thing 2 that I would post a picture of her orange and gold lantern all by itself, since I’d done so many of Thing 1’s blue and silver one already.

So there you go! I hope that your kids enjoy making these fairy light lanterns as much as mine did!