
I had a billion and one things to accomplish yesterday evening, most of which I can’t even write about because they had to do with Christmas gifts for people that I know read this blog. One thing I can mention is that I did get the chance to put the last finishing touches on the Frankensteined gaming PC (made with excess parts graciously donated by our friends) that my husband and I are giving Thing 1 for Christmas. She doesn’t have Internet access yet, so here I can sigh with relief here about having at least one major gift out of the way.
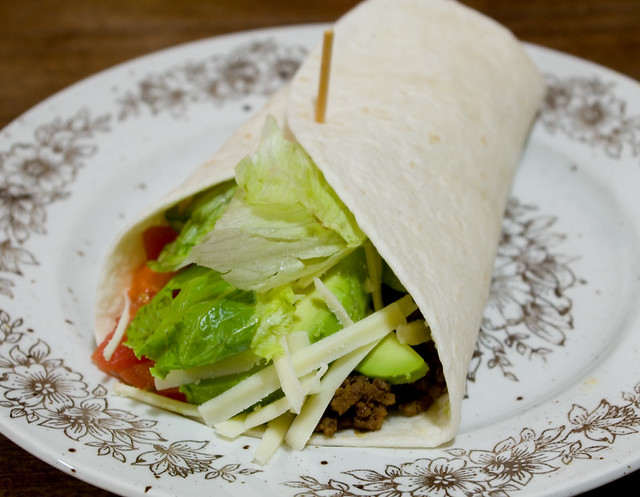
Dinner was a quick one, since I can only do so many things at once, and for a change the kitchen was not calling me. I wanted to eat at least somewhat healthily, so I made up some soft tacos with a pre-packaged spice mix. Well, I say “made up”, but mostly I just prepped all of the ingredients and set them out on the table so that everyone could fill their own tacos. I fixed mine up with spiced ground beef, avocado, lettuce, tomato, mayonnaise, and lactose-free cheddar. Also available on the table were sour cream (which I prefer over mayo, but can’t eat), homemade blender salsa canned earlier this year, and shredded cheddar cheese.
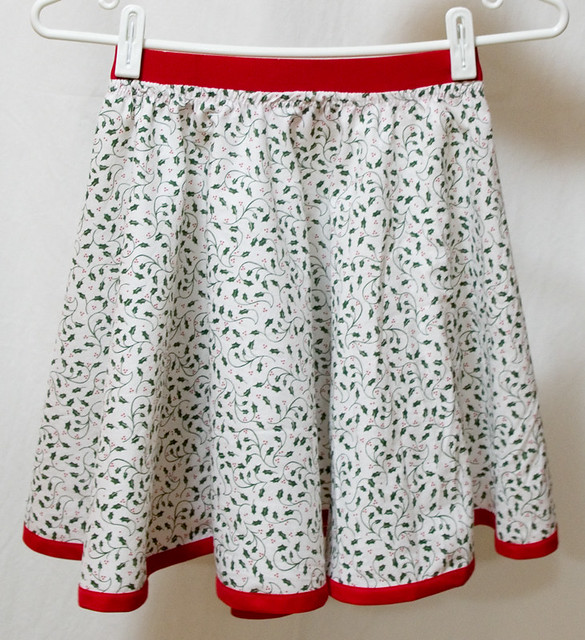
Dinner out of the way, I went on to work on some Christmas crafts. I whipped up my first-ever circle skirt for Thing 1 — which is even easier for a kid than for an adult since there aren’t any seams! A friend of mine recommended the following resources to me, which were invaluable:
– Make a circle skirt without a pattern by Costuming Diary
– Circle Skirt (and a follow-up instructional video by Made Everyday
– The Best Way to Sew Bias Tape by Positively Splendid
I combined the techniques because I wasn’t working with a serger, and because I wanted a finished waistband edge but I also wanted the cute red elastic to show. This skirt will be worn later in the week when the girls go get their pictures taken with Santa. I still have to make a second, smaller one for Thing 2. Hopefully I can make the time tomorrow.
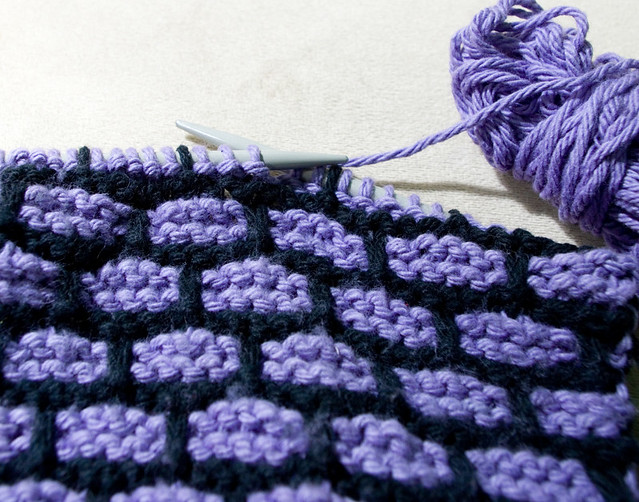
In every spare minute, I’m knitting away on cloths to be given as gifts. I think of this colourway as “Evil Minion“. This is either the last or second-last one, depending on how much yarn I am left with. After that, it’s time to start on knitted owls for my girls’ Guiding leaders.
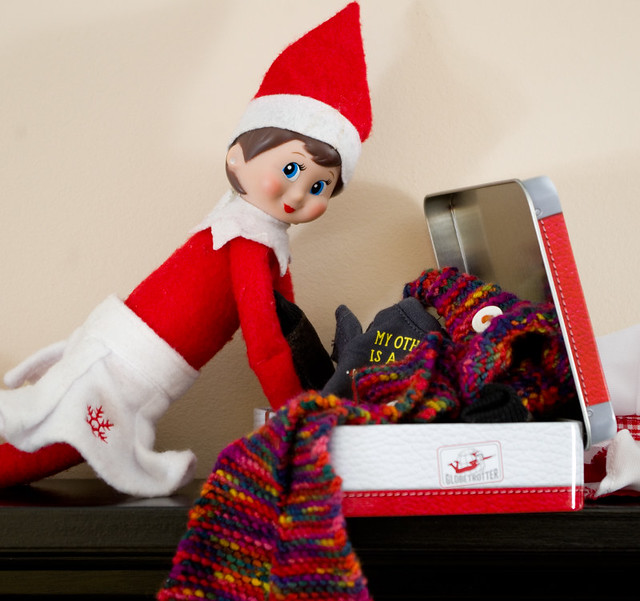
As we do every year, we have had a guest in our house starting December 1st. Candy Cane will stay until December 25th, at which point she will be whisked back to the North Pole where she will stay until next holiday season. Here she is unpacking all of her copious outfits. I know some people find The Elf on the Shelf kind of creepy, but my kids really love her and look forward to her annual arrival. We’ve never made a big deal of the “reporting back to Santa” aspect of the Elves at our house, so my kids just see her as another piece of Christmas magic.


