Not Charcoal Briquettes

Last night for dinner I wanted something quick and easy, as well as something that could preferably be cooked on the barbecue. I just wanted to spend time on that lovely new deck! There are lots of options along those lines, but unfortunately not a lot of them could be made without having to make a run to the grocery store this time. Honestly, I have run out of rice, potatoes, and carrots, which are three of my main staples. I really must go do a large grocery run. But I still needed to cook a family dinner with what I had at hand.

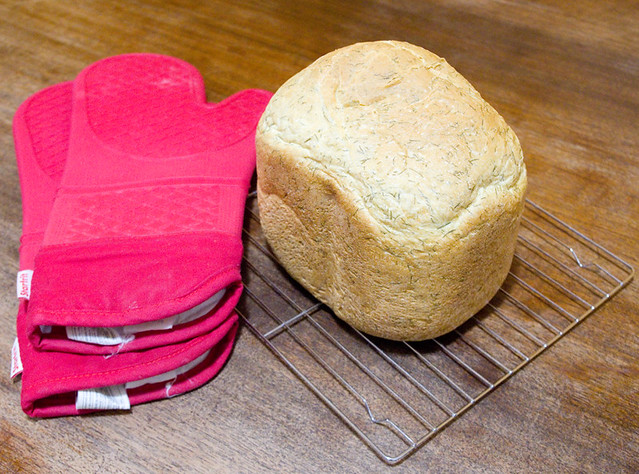
So I went with what I’ve been resorting to all too often of late: eggs and toast. The toast was day-old Fluffy Dill Bread. (I’d run the bread machine in the garage since it was so hot and humid the day before, and I didn’t want to heat up the house.) Eggs are always quick and simple, so I made both over-easy and scrambled, to peoples’ preferences. But then there was the sausages to go with the dinner, which are not, as one might think, charcoal briquettes.

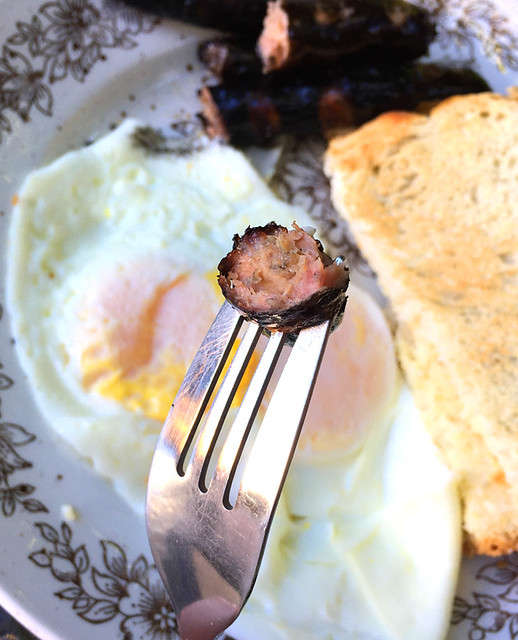
Something about the kind of wood pellet we’re using at the moment in the smoker grill turns everything cooked in there black on the outside. I think it’s just a high-ash mixture. You can see it to a certain degree on the burgers, but the buns hide the worst of it. But with the sausages, it just looks horrible. It’s funny, though, because the meat tastes absolutely fabulous. It’s juicy and tender and not at all overdone. And, of course, there’s a lovely smokey flavour and scent that comes through with anything on a wood pellet grill. We’re just going to have to invest in some nicer pellets next time we run out. The ones we’re using came with the grill when we got it last fall second-hand from my in-laws, and I have no idea what kind they are. After all, not every dish needs to look as if it’s been blackened.

Useful Weeds

Last year my mom planted dill in her garden (mammoth dill, I believe). She’d hoped for a reasonable yield, but the plants grew up tall and spindly and woody, and they dried out rather early in the season, much to her disappointment. This was especially surprising because last year was a really wet year, so it’s nigh on impossible that they weren’t watered enough. At the end of autumn, she ripped the desiccated stalks out of her garden and thought nothing more of it until this spring.

It appears that the dill self-seeded. Apparently, although it didn’t like the nicely fertilized and weeded soil of her garden, it really likes the cracks between her paving stone and between said stones and her garden border. Go figure. Dill is growing there, well, like a weed.

This seems to be a trend at Mom and Dad’s house. Ten years ago or so, a clump of chives started growing between the paving stones near the back yard — but never in the actual garden. This was especially surprising because Mom never planted any chives at all. Who knows where the seeds came from; dropped by a bird, perhaps? At first, Mom pulled the chives out like she would any other weed, but they always came back. She mowed them regularly when she did her lawn, but that didn’t cause much of a dent in their growth. Yet the chives didn’t spread to her garden or her lawn. They have self-propagated a bit along the paving stones closer to the fence, though, as you can see in the above photo. Eventually, Mom just gave up and started harvesting the chives for her own cooking; it’s a free crop that she doesn’t have to plant every year. Thing 1 and Thing 2 love those chives and grab a handful whenever we visit in the summer, leading to many car rides where the whole car reeks of onions.

I have a feeling this is what’s going to happen with the dill. This weed is a bit more aggressive than the chives, so Mom will weed it out of the garden so it doesn’t choke out her tomatoes (which she plans to plant next week). But the dill growing in the cracks can stay and supply her — and me — with all the dill we could possibly use over the summer. I actually harvested a few handfuls yesterday to make into bread machine dill bread. I needed to test out my new-to-me bread machine at any rate. The machine is smaller than my previous one, making 2lb loaves instead of 3lb, but it works a treat so I can’t exactly complain, seeing as it was free.

I think I need to make some kind of salmon dish with a creamy dill sauce, to take advantage of the herb being so nice and young and tender. Maybe next week.

Dill Pickles

By now I am well into seasonal canning mode. Two weeks ago I started with my first batch of strawberry rhubarb butter, and last week I found a great sale on mini cucumbers in bulk, so I had to make dill pickles. We were on the last jar from the batch that I made right before Christmas anyway, and fresh pack dill pickles must rest for at least a month in a cool, dark place before eating to develop flavour. I mean, they’re safe to eat right away, but they taste better after some time.

This is what my canning setup looks like, with some adaptations depending on what food I’m preparing. For large batches or large cans, I tend to have two hot water baths boiling at the same time. The largest pot on the right is actually my pressure canner, but it works quite well as a large hot water canner if I don’t clip the lid closed. The smaller pot near the front is where I brought my pickling liquid to the boil. I’ll admit it, I take the quick and easy route when I make dill pickles and I use Bernardin Dill Pickle Mix. It means that I can completely skip the typical fermentation stage; I just have to wash and cut up the cucumbers, pack them into hot sterilized jars, pour over the pickling liquid, seal, and then process the jars in a hot water bath. This means that I can make up a huge batch of pickles in a matter of a few hours (as opposed to about five days with the fermented method).

This year I tried out a type of jar I’d never used before, ones that have a vintage-look green tint. Normally these jars are about twice the price of the standard clear glass jars of the same size, but I was lucky enough to find a whole bunch of them at $4.00 for a six pack ($0.66/jar) at, of all places, Dollarama. I bought out that location’s entire stock. I mean, a twelve pack of the same size regular jar at Canadian Tire currently goes for about $12.99 ($1.08/jar), so it was definitely a bargain.

One of the reasons that coloured jars used to be considered better for canning purposes is that they allow less light to pass through the glass, and hence the food stayed good longer. Exposure to sunlight can cause canned goods to decompose faster and/or to discolour, which is why historically most food storage is in a cool, dry, dark place. The coloured glass is just one more way to help. These days, though, it’s mostly a fashion thing, a hearkening back to the old-fashioned canning jar look. I personally think that the green-tinted jars are great for pickles (or any other green preserve), but that they’d sadly make different-coloured foods look like they’d gone off in the jar. Even if the food was fine, it might not be eaten just because of its looks. I mean, have you ever tried to eat green eggs and ham? I know that even when I make the eggs myself and am sure that they are safe, I can have a difficult time choking them down because my brain is telling me that they’ve gone off because of the colour. So I think that I will stick to using the green jars for cucumber pickles, or for crafts or storage where the colour doesn’t matter.