A Taste of Summer

Over the weekend two of my friends celebrated their birthdays together — the same two friends that I baked birthday pies for around this time last year. I asked them if they would like pies as gifts again this year, and they seemed to think that this was a marvelous idea! One of my friends even requested the same type of lemon meringue pie as last year, since it went over so well.

I don’t think the meringue was as fluffy this time, but I was much happier with the level of browning on the top — which I think can be accounted for by the oven, which we replaced in the meantime. I find that while it does have its own challenges (it runs pretty consistently 50 degrees F hot), it provides a much more even heat overall.


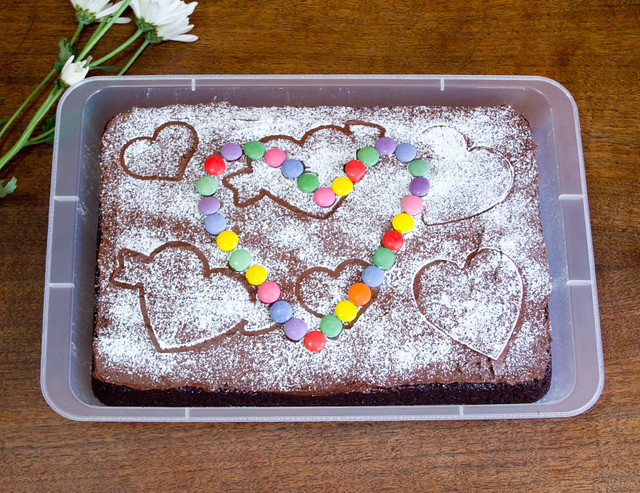
Photo by Karen Turnbull.

Sadly, the meringue topping got a little bit mangled in transit, but I’m assured that it still tasted fine! Once again, I used half of a crust recipe from page 73 of The All-New Purity Cook Book (Elizabeth Driver, 2001), the lemon meringue filling from page 687 of the Joy of Cooking (Rombauer & Becker, 2006 edition), and Soft Meringue Topping #1 on page 798 of the Joy of Cooking.

My other friend requested a change-up from last year with a fruit crumble instead of a pie. He really wanted rhubarb, and he was lucky that I still had some left over in the freezer from last summer’s harvest, because it’s well out of season around here. I mixed the rhubarb with some strawberries and green apples for added flavour and texture, and I did add a cup of sugar to the fruit because rhubarb is so very tart. To make this dish I used the Apple or Fruit Crisp recipe on page 392 of the Joy of Cooking. The final product kind of looked a mess, but I find that most crumbles do! I got to taste a bit of this one and I was quite happy with how it turned out as well. It was like a little bit of summer stuck smack dab in the cold and snow of February.

Valentine’s Day Baking

Yesterday was Valentine’s Day, and while we’re not terribly into big romantic gestures in our household, the kids really do love celebrating this holiday at school. Everyone ends up with a little mailbox full of Valentines, and some sweets to bring home, and often parents send in some nice snacks for the kids to munch on throughout the day. So of course I had to get the girls to help me with some baking to bring along to class.

At Thing 1’s insistence, I made a chocolate sheet cake with chocolate icing for her class. Since she loved her Triforce Cake so much, I used the same recipe: Amelia Bedelia’s Sheet Cake, found at the back of the story book Amelia Bedelia Bakes Off (Herman Parish, 2010), or online via Desktop Cookbook. This time, though, I actually made buttercream icing from scratch — my very first time trying it! I used the Joy of Cooking (Rombauer & Becker, 2006 edition) recipe for Chocolate Buttercream found on page 793. Honestly, the icing was more difficult to make than the cake, but it turned out so well! I used really dark chocolate and my munchkin appreciated it. She isn’t actually a big fan of the thick layers of super-sweet icing that are commonly found on commercial cakes, and to be honest, neither am I. I decorated the icing with a dusting of icing sugar over some heart-shaped cookie cutters, and then I removed the cutters to lay down a heart made of Smarties. I know it wasn’t symmetrical, but the kiddos didn’t seem to care.

Thing 2, however, really wanted to make mini banana muffins for her class. I went back to the trusty recipe in the Joy of Cooking and we together we made the Banana Bread Cockaigne on page 628. There’s a lot of teaching that goes along with baking with a child of that age, especially since they haven’t started learning fractions yet! Even so, this recipe is very forgiving (if you read my blog regularly, you’ve probably noticed that it’s a favourite), and it turned out really well. There were only three left over after she shared them with her friends, and those were promptly snatched up by her grandparents. Not that I begrudge them, because if they didn’t eat them, I would.

I hope you all had a lovely Valentine’s Day and were spoiled with some of your own favourite treats!

Holiday Tea

This past Saturday was the annual Girl Guides’ Holiday Tea, which was held at Epiphany Anglican Church just like last year. This year the funds from the tickets, bake sale, and calendar sales were being raised to finance a trip to Europe for the local Pathfinder troupes. Parents of girls in the Guiding movement were asked to contribute baked goods to the tea, so this year I used up some of the bananas in my freezer and made mini banana muffins.

(Bananas for scale.)

I used the recipe that I almost always use, the one for Banana Bread Cockaigne on page 628 of the Joy of Cooking (75th Anniversary Edition, Rombauer & Becker, 2006). Of course, I omitted the chopped nuts and/or dried apricots (which usually have come into contact with peanuts or tree nuts), since anything baked had to be school-safe. I also omitted the grated lemon zest, as I usually do, since I don’t often have lemons in the house unless I’ve bought them for a specific purpose.

As usual, the tea was lots of fun, with the tiniest of Sparks and Brownies bringing out cold drinks and trays of treats, while the Guides were in charge of serving hot drinks, and the Pathfinders and Rangers ran things from the kitchen.

Of course, I never got any of the fancy-looking shortbread or thick brownies because the children snatched them up right quick. And I didn’t see any of my tiny muffins come by, so I guess they went out earlier in the day, since my container came back empty. I was rather impressed with the surprise flavours of lemon in some of the shortbread, and maple syrup in the Rice Krispie squares. I think I’ll have to try those additions myself in the future.

Halloween Food

One of the things I try to do every year is to send some treats to school with my kids for Halloween. Some years those treats aren’t food, and instead come in the form of seasonal trinkets such as erasers and pencils (especially the stacking point kind because it brings back so many happy memories from my childhood). If I choose to send along food, I prefer for it not to be straight-up candy, since I know that the kids will be getting enough of that when it comes time for trick-or-treating. This year, Thing 2 requested that I whip up another batch of her favourite Graveyard Five-Layer Dip, which was an easy enough wish to grant. But since Thing 1’s favourite thing is, in her words, “chocolate with chocolate in it and chocolate on top,” I had to make something else for her.

I was inspired by Delish’s Pumpkin Patch Brownies for Thing 2’s dish, enough so that I even baked a second batch for her to take to her Girl Guides Halloween party as well. However, I wanted to make the brownies themselves from scratch instead of from a boxed mix. (I generally find that if a boxed mix requires additional eggs, water, and oil, you’re really just paying a lot extra per pound to have someone pre-mix your dried ingredients for you.) I used the Book Club Brownies recipe on page 762 of the Joy of Cooking (75th Anniversary Edition, Rombauer & Becker, 2006). It’s a solid recipe that is based on the Brownies Cockaigne that has appeared in Joy since the original 1931 edition. Since I knew that these brownies would be eaten in a classroom, I opted for making them slightly less messy by not adding the frosting and Oreo “dirt”. Instead, I just traced the “vines” on with green icing and made sure that every square got a pumpkin — since every kid argues about which piece is “better” based on number of toppings.

As can be surmised from my Happy Halloween! post, we also carved our pumpkins this year. In an attempt to waste as little food as possible, I had the girls separate the guts from the seeds while I cleaned out the pumpkins. Then I roasted the seeds with a drizzle of olive oil and a sprinkle of salt, on a sheet pan in the oven for about 30 minutes at 300°F (150°C), checking every ten minutes or so. They turned out lovely and will make a wonderfully crunchy, salty snack while they last. It always surprises me how few seeds you get from a single pumpkin! This is the result of five quite large gourds, and it probably won’t last us a week.

Bread Machine Malt Bread Recipe

A while ago, when I first started baking bread, I ran across a recipe that called for malt. It’s not a common ingredient around here, and in my search I learned a lot. The first thing you have to know is that “malt” can mean a number of different things:

Barley Malt Syrup: a thick syrup that greatly resembles molasses in appearance, which is extracted from sprouted (malted) barley. (Pictured above.) In Canada, this can be found in specialty or high end food stores like Whole Foods. In England, I’m told that it’s as common as molasses is here, and that children will often sneak spoonfuls of the stuff from the pantry.

Malt Extract Powder: An ingredient often used in home brewing, malt extract powder can be derived from sprouted (malted) barley or wheat. (Light dried wheat malt extract pictured.) This can be procured quite cheaply from home brewery supply stores and brew-your-own small breweries.

Malted Milk: A combination of malted barley, wheat flour, and evaporated whole milk, this is the main ingredient that differentiates a “malted” from a “milkshake”. (Not pictured.)

While all of these are all derived, at least in part, from the same process, they are all distinct ingredients in their own right and it will greatly change the outcome of a recipe if you use the wrong one. The problem is that a number of recipes I’ve come across (and ingredient lists on packaging, for that matter) sometimes use the blanket term “malt” for any of the three. This becomes increasingly concerning in the case of allergies/food intolerances or trying to eat strictly vegetarian/vegan.

So I learned all of this but still wasn’t able to find a local source for barley malt syrup. Not long later (but after I’d pretty much given up), a friend of mine came across some at a specialty grocery store and picked it up for me. Sadly, I had moved on to non-malt-based recipes by then, and the malt sat in my fridge for quite some time. Skip ahead to last week, when I cleaned out my fridge and realized that my malt was still there — and still good! (I believe it’s like maple syrup in that it’ll last years under ideal conditions.) I put together a bread machine recipe and tested it out a few times, to my family’s happiness. The malt creates a slightly darker loaf and adds a hint of sweetness (but not so much so it’d be called a truly sweet bread).

Side note: This bread can be made vegan, if you use a vegan margarine instead of butter, and use the correct style of malt, which is the barley malt syrup kind, in this case.

Bread Machine Malt Bread
Yields one 2lb loaf

A note about bread machines:
Every bread machine comes with an instruction booklet (most of which are also generally available online) that will specify the order that ingredients should be added. Mine says that liquids should be added first, then flour, then yeast. When preparing this recipe, the instructions for your specific bread machine should take first priority, so if your manual says to add the ingredients in a different order, do so.

Into the bread machine pan, pour:
1 ½ cups water
2 Tbsp barley malt syrup
Over the liquids, pour evenly:
4 cups flour
Into one corner of the pan spoon:
2 Tbsp butter or margarine
Into the other corner of the pan, spoon:
2 tsp salt
Make a divot at the center of the flour. Into the divot, put:
2 tsp yeast

Set the bread machine to the basic/normal/white setting, with a light or medium crust to your preference. Press start. Running this cycle should take about three to four hours, depending on your machine.

Enjoy!

Glazed Lemon Loaf

I don’t know why, but I’ve been craving glazed lemon loaf lately. I think it may be because one of my favourite coffee shops has it in the pastry case every once and a while, and I do sometimes succumb to temptation. When I was grocery shopping with the family the other day, I thought that I might pick one up, but they were nowhere to be found! So I Googled a recipe, bought a lemon, and baked a loaf myself — despite the fact that I usually try not to turn on the oven in this heat.

I’m happy to report that it turned out exactly as I had hoped! Moist (but not doughy) in the center, with just a little tang of lemon in the glaze… Perfect. I found the Glazed Lemon Pound Cake Loaf recipe on Seasons & Suppers: The Summer Edition. The writeup for the recipe stresses that it must be made just so, with butter and eggs at room temperature, sour cream removed from the fridge fifteen minutes before adding, and a very specific order of operations. Given that I’ve never made lemon loaf before (lemon poppyseed yes, straight up lemon no), I figured that I should follow the directions as written — at least the first time. Okay, well, I did have to make one small modification to adjust for my dairy issues, and used lactose-free sour cream instead of regular. But it still turned out great!

I think that the only beef I have with this absolutely delicious recipe is that it’s called a pound cake. What I’ve always been taught is that a pound cake calls for a pound each of flour, butter, and sugar. A quick Googling tells me that this translates to approximately 3 1/3 cups all-purpose flour, 2 cups butter, and 2 cups granulated sugar… Which isn’t even close to the proportions in this recipe. I mean, it gets a little bit closer if you halve it so that it’s simply equal weights, but even so, to me, that’s not really a pound cake. Not that this has anything to do with the quality of the recipe itself, mind you. The methodology was correct, and the end results were delicious! And I will definitely make this recipe again. I guess I’m being just a bit pedantic.

Bread Machine Beer Bread Recipe

I think I’ve finally gotten the beer bread recipe to the point that I feel it’s good enough to share! This bread is customizable based on what kind of beer you choose to use. For this bread I chose to use Lost Craft’s India Pale Ale, which is a nice, light beer with only a 4% alcohol content. But feel free to choose the beer that you like best! A stout will make a much darker, richer bread, while a crisp, light beer will have a much less pronounced taste. You could even use a non-alcoholic beer. Additionally, you can choose to omit the caraway seeds, which do have a strong flavour of their own, so that the beer shines through.

The beer that you choose to use changes what it goes well with. It’s a light fluffy bread no matter the beer, so if you’re going to spread something on top, it’s best to toast it first. With a light ale and caraway seeds, I like it paired with a sharp cheese, deli meats, and/or a touch of mustard. Without the caraway, I have served it with eggs and toast for breakfast, and received quite a few compliments.

Bread Machine Beer Bread
Yields one 2lb loaf

A note about bread machines:
Every bread machine comes with an instruction booklet (most of which are also generally available online) that will specify the order that ingredients should be added. Mine says that liquids should be added first, then flour, then yeast. When preparing this recipe, the instructions for your specific bread machine should take first priority, so if your manual says to add the ingredients in a different order, do so.

Into the bread machine pan, pour:
1 ½ cups India pale ale
2 Tbsp olive oil
Over the liquids, pour evenly:
4 cups flour
Into one corner of the pan spoon:
1 Tbsp sugar
Into the other corner of the pan, spoon:
2 tsp salt
Make a divot at the center of the flour. Into the divot, put:
2 tsp yeast
Over the top of all of the ingredients, sprinkle:
3 tsp caraway seeds

Set the bread machine to the basic/normal/white setting, with a light or medium crust to your preference. Press start. Running this cycle should take about three to four hours, depending on your machine.

It’s as simple as that!

Double Chocolate Triforce Cake

Thing 1’s birthday was over the weekend, which of course meant that we had to bake a cake. Since, in my experience, kids love baking cakes, Thing 1 and Thing 2 helped. I also believe that even if it doesn’t turn out perfectly, kids really do benefit from cooking with their parents.

Thing 1 requested a “chocolate Zelda cake with chocolate icing”. Since I am not known for my beautiful cakes (my 16th birthday cake being a great example of my skills), I decided to keep it as simple as possible. We used the tried-and-true Amelia Bedelia’s Sheet Cake recipe, which is found at the back of the story book Amelia Bedelia Bakes Off (Herman Parish, 2010). (You can also find the recipe via Desktop Cookbook.) This makes a very rich, moist, dark chocolate cake — which, as a bonus, is tree-nut and peanut free, and can be made vegan (which is great when you have to make cupcakes for school, FYI).


It’s dangerous to go alone! Take this.

The kids had gone to bed by the time the cake was cool enough to ice, so it was my turn. I used the Chocolate Satin Frosting recipe from page 796 of the Joy of Cooking (Rombauer & Becker, 2006 edition). This recipe is ridiculously easy — since it’s mostly made in a blender or food processor, it’s only slightly more difficult than cracking open a can of pre-made frosting from the grocery store. It’s also a very dark chocolate icing, almost bitter, which is perfect for my little chocolate lover.

I made the Triforce design using a stencil. I went low-tech and drew the pattern with a pencil and ruler on a piece of card stock, then cut it out with scissors. Then I simply held the stencil very closely over the icing and sprinkled on the sugar. The result wasn’t completely perfect, but Thing 1 knew what it was supposed to be. As an added bonus, the coloured sugar added a lovely crunchy topping.

So happy birthday to my fabulous firstborn! I love you so much.

Useful Weeds

Last year my mom planted dill in her garden (mammoth dill, I believe). She’d hoped for a reasonable yield, but the plants grew up tall and spindly and woody, and they dried out rather early in the season, much to her disappointment. This was especially surprising because last year was a really wet year, so it’s nigh on impossible that they weren’t watered enough. At the end of autumn, she ripped the desiccated stalks out of her garden and thought nothing more of it until this spring.

It appears that the dill self-seeded. Apparently, although it didn’t like the nicely fertilized and weeded soil of her garden, it really likes the cracks between her paving stone and between said stones and her garden border. Go figure. Dill is growing there, well, like a weed.

This seems to be a trend at Mom and Dad’s house. Ten years ago or so, a clump of chives started growing between the paving stones near the back yard — but never in the actual garden. This was especially surprising because Mom never planted any chives at all. Who knows where the seeds came from; dropped by a bird, perhaps? At first, Mom pulled the chives out like she would any other weed, but they always came back. She mowed them regularly when she did her lawn, but that didn’t cause much of a dent in their growth. Yet the chives didn’t spread to her garden or her lawn. They have self-propagated a bit along the paving stones closer to the fence, though, as you can see in the above photo. Eventually, Mom just gave up and started harvesting the chives for her own cooking; it’s a free crop that she doesn’t have to plant every year. Thing 1 and Thing 2 love those chives and grab a handful whenever we visit in the summer, leading to many car rides where the whole car reeks of onions.

I have a feeling this is what’s going to happen with the dill. This weed is a bit more aggressive than the chives, so Mom will weed it out of the garden so it doesn’t choke out her tomatoes (which she plans to plant next week). But the dill growing in the cracks can stay and supply her — and me — with all the dill we could possibly use over the summer. I actually harvested a few handfuls yesterday to make into bread machine dill bread. I needed to test out my new-to-me bread machine at any rate. The machine is smaller than my previous one, making 2lb loaves instead of 3lb, but it works a treat so I can’t exactly complain, seeing as it was free.

I think I need to make some kind of salmon dish with a creamy dill sauce, to take advantage of the herb being so nice and young and tender. Maybe next week.

Maple Walnut Pouding Chômeur

Last night I had an urge to make pouding chômeur (“poor man’s pudding”), which is a kind of upside-down maple syrup cake that is baked with its own sauce. I wanted to use some of the lovely dark maple syrup that I picked up from McCannell Craftwork at Russell Flea over the weekend. Sadly, a copy of Anita Stewart’s Canada (2008) wasn’t immediately available at the library, and I haven’t yet bought a copy (although it’s down to $15.00 online so I really should), so I didn’t have access to the first recipe that I used and liked so much. Instead, I grabbed a few cookbooks with their own versions of a pouding chômeur recipe from the library, and then I went home to pick my favourite.

I thought that I had all of the ingredients at home, but it turns out that some of them had spoiled, so I had to improvise a little bit. I ended up combining the recipes from two different books. The final cake ended up being a little bit drier and with a sauce that wasn’t quite as runny as I’d been hoping. It was pretty darned good anyway.

Unfortunately, I found that the walnuts really overpowered the maple flavour, much to my dismay. Although it was a tasty dish all in all, I was really looking forward to that creamy maple syrup sauce dominating. I think I’ll stick to a more simple pouding chômeur recipe next time, whether it be from Anita Stewart’s Canada or another source.