The Beginning of the Autumn Harvest

We’re starting to get a few cool days, and more than a few cool nights, which, in conjunction with the shortening daylight, signals to the garden that it’s time for fruits and veggies to ripen. I’ve had some meager results so far, if you don’t count the tomatoes.

For all of my efforts with gourds, a powdery fungus attacked the leaves of my plants and killed most of them off. I ended up with only one yellow zucchini, no green zucchini, no pumpkin, and only this teeny tiny butternut squash. It’s so cute that I’m seriously considering not eating it at all and carving it up or decorating it as a Hallowe’en decoration.

I did have about ten good-sized pears on my baby pear tree this year, but I didn’t get to them in time and the local squirrels and chipmunks made serious inroads. This is all that was left for me to bring in. The one on the far right developed kind of small and deformed, but it was still healthy inside. These fruits will be (and actually, all except one have already been) eaten raw, generally in packed lunches.

Despite fighting for my potatoes for sunlight, my few beet plants did okay. The roots weren’t much to talk about; I ended up with just enough to fill a single 500mL mason jar if I planned on preserves. However, the greens — which were actually red in this case due to the variety I planted, but at any rate the leaves — are also edible, and actually quite tasty! They’re good in salad, pesto, or stir-fry; basically, they’re tasty in any dish where you’d use lettuce or a similar leafy green. So I’m tolerably satisfied with my yield of beets, especially since I put in so few plants in the first place.

Signs of Life

The “on this day” features on my phone and Facebook and whatnot keep reminding me that last year at this time the city was really greening up. Leaves were unfurling, plants were sprouting, and spring had definitely sprung. This year, not so much. I mean, that’s probably a good thing, because it’s only been two weeks since we had an ice storm. For those who don’t live in northern climes, ice or snow on leaves instead of bare branches puts a whole lot of weight on trees, meaning a lot more breakage and overall damage. Not to mention the frost damage that would have affected lower-growing plants. So in the long run it’s probably good that spring is springing slowly this year, even if it does mean that things like Ontario parks have had to have a delayed opening.

But if you look closely, you can see some signs of life, like buds on a lilac bush:

Or on a pear tree:

And hardy rhubarb sprouting up despite being thoroughly trampled by the fence installation guys in the fall:

With any luck, my harvest will be better than last year’s.

Of course, the tiger lilies are one of the first plants to shoot up after the snow recedes — they generally survive the last few freezes of the season just fine:

And the first dandelions have started to bloom:

I have to admit that I’m not a huge fan of digging dandelions out of my lawn and my gardens, but they are one of the earliest foods for bees in the spring before the rest of the plants flower. So, yay!

I don’t generally plant my gardens until after the May 2-4 weekend, as late frosts can kill tender young plants. Given the weather we’ve had this year, I may be extra-cautious and not plant for another week after that, at the start of June. I mean, it hit 28°C (82.4°F) yesterday out of the blue, but average temperatures for May are generally much lower than that. However, I still enjoy seeing the native and perennial plants coming back in force after the temperatures rise.

Pear & Honey Jam Recipe

As I wrote about before, I had a lot of cooking pears that needed to be used up recently. All of this excess meant that I had a chance to experiment with making a jam of my own devising. Pears are a naturally acidic fruit, which makes them perfect for hot-water-bath canning with a bit of sugar. It took me a couple of tries to get this recipe right, since since I didn’t want to use like ten cups of sugar (with would generally produce and easily firm set), since I wanted to taste the fruit and the spices more than the sweetness. In the end, I had something that I am quite proud of. Next year, when pears come into season, I think that I will make this the main pear jam (although I did really like the Spiced Pear Jam with Pineapple found on page 935 of the Joy of Cooking (2006 edition, Rombauer & Becker), or on the app). Maybe next year I’ll have a yield of more than four pears off of my baby pear tree, and I’ll be able to make more things from fruit I’ve grown myself!

Pear & Honey Jam
Yields six 250mL (1 cup) jars

Prepare and sterilize six 250mL (1 cup) jars (or twelve 125mL (1/2 cup) jars) and matching lids as per manufacturer instructions. Keep jars and lids warm until it is time to fill them.
In a Maslin pan or other non-reactive, heavy-bottomed pot, combine:
1.5 Kg (3.3 lbs) ripe/slightly overripe pears, peeled, cored, and roughly chopped
350 mL (1.5 cups) honey*
700 mL (3 cups) sugar
60 mL (1/4 cup) lemon juice
2.5mL (1/2 tsp) ground allspice
5 mL (1 tsp) ground cinnamon
2.5mL (1/2 tsp) ground cloves
2.5mL (1/2 tsp) ground nutmeg
2.5mL (1/2 tsp) ground ginger
Bring to a boil over medium-high heat, stirring constantly to prevent burning. Boil for 10 minutes. Remove from the heat. Run the mixture through a blender or food processor until it reaches a smooth consistency, being extremely careful as the ingredients will be very, very hot. Return the mixture to the pot and bring it back to a boil.
Add:
one 85 mL (2.9 oz) package of liquid pectin
Bring mixture back to a boil. Stir constantly as mixture boil hard for an additional minute.
Ladle the jam into the prepared jars, leaving a 5mm head space. Wipe jar rims with a clean, damp cloth or paper towel. Top jars with lids and screw metal rings into place until fingertip tight. Place jars on top of a canning rack inside a boiling water canner, being sure that none of them touch the sides of the pot or each other. Jars should be covered by at least 2.5cm (1″) of water, so add hot water if necessary. Bring to a rolling boil and process for 15 minutes, starting your timer once the water is boiling.
Remove jars from canner and place them on a cooling rack, not touching each other. Let them rest for 24 hours before touching. Label if desired. Jams may take up to 48 hours to set, so do not open them until this time has passed.
This jam may be kept in a cool, dark area for up to one year.

*It’s really not worth it to use unpasteurized honey here, since all the additional benefits are lost when the honey is cooked.

Canning Pears

A while back, a friend of mine brought me a box of cooking pears from his neighbour’s tree, which was producing an overabundance. Not too long after that, he brought me a second box full. I’m told that these boxes of fruit kept appearing in front of his house under not-so-mysterious circumstances; apparently that neighbour was getting really tired of being beaned in the head by falling fruit. This week I finally had the chance to tackle this mass of pears. I’ve been cooking with them for over a month, but my rate of attrition was much too slow, and some of the fruit was starting to turn.

First I made a double batch of Cinnamon-Scented Parsnip Pear Jam, from page 407 of Preserving: The Canning and Freezing Guide for All Seasons by Pat Crocker (2011). As interesting as this combination appeared at first glance, I found the final result much too sweet; it uses twice as much sugar as fruit by volume, which is a very high ratio even by jam standards. It would still be nice on Dad’s Biscuits, fresh bread, or toast, but I guess I was hoping for more of a flavour punch given my success with this book’s carrot jam. However, I do agree with the book’s assessment that this jam, when mixed with a bit of orange juice, would probably make a lovely glaze in which roasted root veggies could be tossed.

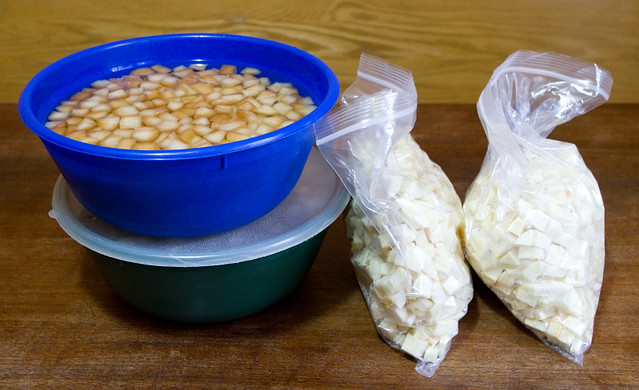
I well and truly overestimated how much fruit & veg to prepare to make this recipe, even doubled; I honestly thought I’d be able to get at least a quadruple batch in, but with all of that sugar, my pots just weren’t big enough. So I had a whole bunch of peeled, cut up pears (left) and parsnips (right) after this attempt.

The parsnips became part of our dinner last night, roasted in the oven with a sprinkle of salt, pepper, rosemary, and olive oil. I served them with baked pork chops coated in dried onion soup mix, which is a dish from my childhood that I’ve been making a lot lately once I was reminded of it. It’s just so easy! I probably have enough parsnips left for another three dinners like this one, but I think that would get old fast. I’ll need to research another recipe.

For my next recipe, I took a chance and tried peeling my ginger with a spoon, which is a kitchen hack I’ve seen floating around the Web for a while. I was quite satisfied with how this worked, actually. Not all cooking hacks are worth your time, but I found that this was honestly easier than a veggie peeler or a knife, and it wasted much less of the root.

The next step was to break out the candy/deep fry thermometer and bring the next jam up to the jelling point. (As an aside, am I the only one who feels like they need a shield as their jam/jelly gets thicker and it starts spitting huge globs of boiling-hot sugar and juice out of the pot?) This time I made Spiced Pear Jam with Pineapple found on page 935 of the Joy of Cooking (2006 edition, Rombauer & Becker), or on the app.

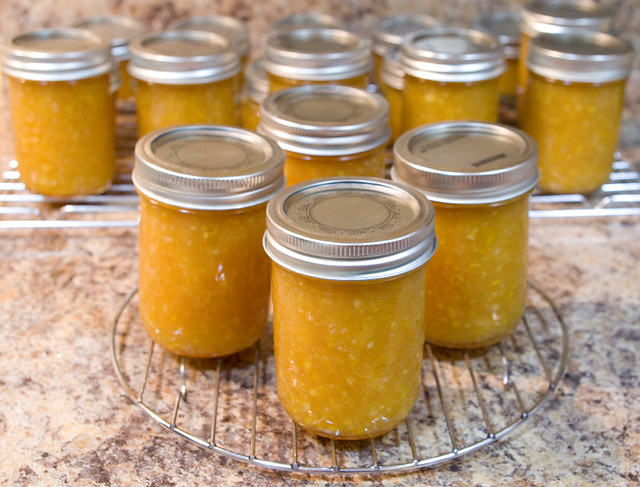
I was much happier with this jam than the previous one. I could definitely taste the fruit, and it wasn’t too sweet (it has a much lower sugar-to-fruit ratio). I have to admit that I couldn’t really taste the pineapple; the citrus note is definitely the strongest part of this jam, which isn’t necessarily a bad thing, although it does end up tasting more like a marmalade.

I probably still have enough chopped pears to make one more batch of jam. What kind should I make? I still haven’t decided. I have a lovely old recipe for pears poached in red wine and then canned, but that’s really intended for whole pears. These cooking pears needed to be chopped up to remove imperfections, so they’re sadly not really suitable to such a dish.