Hearty Hamburger Soup

The plague, aka the nasty cold with a sore throat and a cough that has been going around, hit our house hard this week. While I am desperately trying to fend it off, Thing 2 and my husband have succumbed, and Thing 1 is starting to show symptoms. It’s also been ridiculously (if seasonally) cold the last few days, averaging about -35°C (-31°F) at night with the wind chill. All of this together means that the best thing for everyone to eat is a nice, hearty soup.

So last night I made Hearty Hamburger Soup in my Instant Pot. It’s actually a stove top recipe, but it’s easy enough to adapt; I just did all the sautéing in the cooker, drained off the fat, added the rest of the ingredients and then pressure cooked for 30min. This is a dish that I’ve been meaning to make for years, and the ingredients are generally the kind of thing I have stocked in my pantry and freezer. I’m told that my aunt makes a killer version of this dish, but I haven’t been able to wheedle her recipe away from her. The Allrecipes version was quite nice, though. I made the accompanying bread earlier that day in the bread machine; it was Egg-Enriched White Loaf on page 67 of Bread Machine: How to Prepare and Bake the Perfect Loaf by Jennie Shapter (2002).

Thing 1’s Stir-Fried Ginger Chicken

Thing 1 is learning how to cook, by which I don’t mean just helping me in the kitchen, but actually planning and preparing entire meals. She’s been able to successfully manage pre-packaged food for a while now, so she wanted to step up her game. I gave her free run of my cookbooks last week, but I suggested that for now she stick with some of the ones meant for beginners that I’d picked up over the years. She really likes Essential Cooking Basics: The New Cook by Mary Berry & Marlena Spieler (1997), I think at least in part because it’s full of detailed step-by-step photos, but isn’t only targeted at children. She prepared this dish almost entirely by herself, although I remained nearby to field (many, many) questions and to introduce her to some new techniques.

She chose to make Stir-Fried Ginger Chicken (page 88), which is the kind of meal that takes a lot more time to peel and chop than to actually cook. She was only just starting to prepare when she cut open a sweet pepper to find another tiny pepper growing inside! I’d read about this phenomenon before, but hadn’t chanced upon it myself; it’s called parthenocarpy, which is a kind of internal proliferation of a fruit without fertilization. Basically, it’s a tiny natural clone of the larger pepper — and it’s perfectly edible.


Yes, I know the knife in the background shouldn’t have been left blade-up; Thing 1 put it in the dishwasher moments after this photo was taken.

Knife skills are, I think, one of the most essential parts of learning to cook efficiently. I’m no speed demon myself, but I’m reasonably quick I manage not to cut myself most of the time. I find that even a lot of adults are awkward and slow with a knife in the kitchen, so I hope that starting Thing 1 early acquiring this skill will mean it’s easier for her as she grows up.

Another part of learning how to cook is learning how to adapt a recipe to what you have. I, for example, don’t have a good wok any more, so the dish had to be cooked in a large non-stick frying pan, which meant that the instructions had to change a little bit. Also, I couldn’t find the specific kind of noodle that the recipe called for, so a few adaptations had to be made for that.

Thing 1’s final dish was perfectly prepared: the veggies were still a little crunchy, the chicken was moist, and the noodles were al dente. Everyone went back for seconds, and there was still enough for Thing 1 to take as leftovers for lunch the next day — and show off to her friends.

A Taste of Lebanon

When I was a kid, my mother liked to tell me the story of how she and my father met some of their friends back in the day. You see, Mom and Dad didn’t go to university directly after finishing high school; Dad earned a college diploma first, and Mom worked for a while. This meant that they were a few years older (and hopefully more mature) than most of their classmates. Not only that, but they had gotten married before they started university as well, which was (and I think still is) extremely unusual. This combination of factors meant that they didn’t really fit in with a lot of their peers. However, there was an extremely small community of international students attending the university at the time, and a lot of them were also older, and few were even married couples. My parents naturally fell in with this group of students and they became great friends. This meant that my parents (who are both white and from not only small towns, but military small towns) learned a lot about a number of international cultures and foods when otherwise they probably wouldn’t have done so.

A number of their friends were from Lebanon, and one of them (or possible a few of them, I may be misremembering) wanted to help publish a Lebanese cookbook to be sold in Canada. It was to include a lot of dishes that were common knowledge in Lebanon, but were considered “unusual” and “exotic” at the time throughout most of Canada. My parents got to be the testers for a lot of these dishes, since the authors were trying to tailor the recipes to a wider audience. Always enthusiastic about trying new foods, my parents were very happy guinea pigs.

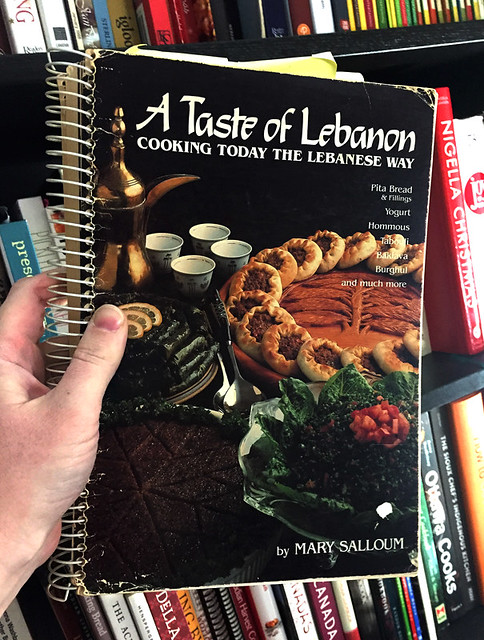
Now, I think that A Taste of Lebanon: Cooking Today the Lebanese Way (Mary Salloum, 1983) is the book that this eventually became. My father bought my mother a copy for Christmas the year it first came out. My parents used that book regularly until it was passed down to me a few years ago when I started to show a greater interest in cooking.

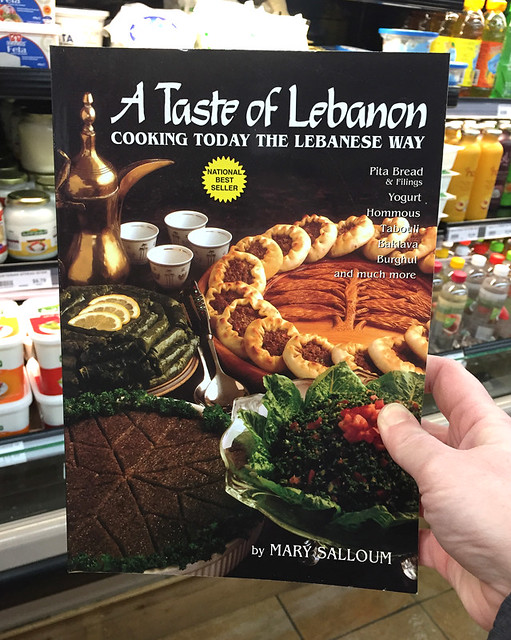
Imagine my surprise, then, to stumble upon a brand new copy of this book at the Mid-East Food Centre; I didn’t realize that it was still in print! Not bad, considering it’s been more than 35 years. A quick search online revealed that it’s also available online as well. I would definitely highly recommend getting a copy of this book if you’re interested in Lebanese cooking even a little bit. As a bonus, it is a Canadian publication, so it focuses on ingredients that are actually available here.

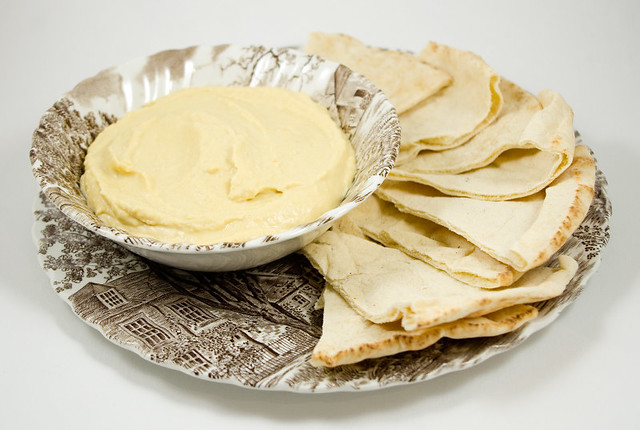
Finding this book still for sale prompted me to go back to my own copy and make one of the easiest of the recipes therein: hommous bi tahini, i.e. chick pea dip with sesame seed paste. You can buy a large variety of types of hummus in just about every chain grocery store these days, since it’s considered healthy and trendy now. But when I was a kid my parents had to make it for us. Actually, since it’s a no-cook recipe (all you need is a blender), it makes a lot of sense to make your own hummus if you can.

I based the prices here on the everyday listings found on the Superstore website; you could probably find a lot of these ingredients even cheaper if you shop the sales.

Suraj chick peas @ $0.88 for a 540mL can = $0.88
Alkanater tahina @ $8.58 for 907ml, 60ml used = $0.57
Rooster Garlic @ $0.58 for 3 bulbs with 10 cloves each, 1 clove used = $0.02
Windsor iodized table salt @ $1.28 for 1kg, 2.84g used = $0.004
No Name lemon juice @ $2.48 for 946ml, 60ml used = $0.16

Total cost for 1 batch = $1.634

Now compare that to the pre-made prices, which start at $3.47 for a comparable amount, and go up to about $5.00 for the fancier stuff. That’s a pretty big saving if you make it yourself, and it’ll add up if you’re the kind of person who eats it regularly!

Now, my favourite way to eat hummus is on fresh pita bread — and one of the next recipes on my list is pita bread itself, which is also in this cookbook. But I know a lot of health-conscious people prefer it as a veggie dip, as it’s great with sliced sweet peppers, carrots, or celery. (Of course, it’s vegetarian, vegan, and gluten-free too — not that these dietary trends were even on the radar of this classic food.) A Taste of Lebanon recommends that hummus and pita be served with any fish recipe, baked kibbi, tabouli, barbequed chicken, or shish kabob. It is truly one of the most versatile dishes I have ever made.

Yuan-Style Salmon & Spinach with Bonito Flakes

After all of the work (and many hours of ingredient hunting) over the weekend for Sunday’s dinner, I thought I’d keep things a bit more simple on Monday night. I’d been meaning to try out some of the recipes from Ten-Minute Bento (Megumi Fuji, 2007), since they all looked delicious and relatively simple. I went through my cupboards to determine what I already had, prepped my shopping list, and then went out for the day. Easy peasy, right? Except that halfway through the day my eldest called from school to tell me she was feeling sick, and could I come and pick her up. So much for picking up the missing ingredients with the girls after school, then. Instead of the leisurely dinner prep I had been hoping for, I chucked the rice in the Instant Pot right before my husband came home, made a mad dash for the grocery store once he arrived, and returned home as quickly as possible. I know, I could have changed my dinner plans entirely, but at this point it would probably have taken longer to find another recipe, scrounge the house for ingredients, and likely defrost something from the freezer.

Luckily the recipes in this book are as simple as described, if not necessarily as quick. (It’s not a ten-minute bento if you have to cook the rice, marinade the fish for ten minutes, and then grill each side of the fish for 4 minutes per side. Just saying.) I upped the portions to make the bento on page 21 for four people, and we all greatly enjoyed our yuan-style salmon & spinach with bonito flakes. I would definitely make this recipe again. Honestly, if it hadn’t been for circumstances delaying me from getting the ingredients earlier, it would have been a snap! As a bonus, making the sticky rice in the Instant Pot was super easy and came out perfectly.

Chestnut Roasting Fail

This morning we found Candy Cane hiding in with the Christmas stuffies:

While I’m still spending most of my time trying to finish up the Christmas knitting, we still have to eat! On a recent grocery store expedition, Thing 1 insisted that we purchase some chestnuts to roast at home — then promptly forgot about them. So I figured I should do something about that.

Now, around here we tend to think of roasted chestnuts as kind of quaint and old-timey, mostly because of the Christmas carol. But when I was in Istanbul some years ago, fresh-roasted chestnuts were sold on every second corner in the old city, alongside roasted corn on the cob and stacks of chewy pretzels. One of my big regrets is that I never tried any while I was there, despite their tantalizing aroma!

So I Googled how to roast chestnuts in the oven, and while everyone seemed to have a slightly different take, all of the methods seemed pretty simple. I more or less used the Howcast method. Basically, I preheated the oven to 375°F, rinsed and dried the chestnuts, and tried to make an X incision on the skin of the nut. It was here that I started to realize that things may not be going to according to plan, since if I’d used anything smaller than a butcher’s knife I would have snapped the blade.

Then I baked the chestnuts in the oven on a cookie sheet, and followed that by taking them out of the oven and putting them in a casserole dish, which I covered with a towel and let rest for ten minutes. At this point I was pretty sure that there was something not working, since the BBC says the skins should open and the insides should be tender — and the skins remained defiantly closed.

When I tried to peel them, my suspicions were confirmed. The shells were hard and the nutmeat was even harder; an experimental taste test threatened to chip a tooth. They were hard as a rock.

So either I got the wrong kind of chestnut for roasting (and in my inexperience I don’t know the difference), or the ones I bought were ridiculously old and dried out. I’d like to try this again, because I still regret not eating the ones in Istanbul, but where can I be sure to buy the right kind and age of chestnuts around here?

Family Sushi Night

One thing we share as a family is that every single one of us loves sushi. However, we do differ as to which one is our favourite — the best bribe ever to use on Thing 1 is salmon nigiri, while Thing 2 is a big fan of a California roll or any maki with shrimp tempura in it, my husband prefers hand rolls (temaki), while I actually like sashimi (just the fish/seafood), possibly with a bowl of rice on the side to fill me up.

That being said, I don’t know why it didn’t occur to me before now to make sushi at home. I used to do it all the time in high school and as a young adult; I actually hosted a few dinner parties where we all rolled our own sushi. However, it is very time consuming for one person to make a family’s worth, and I guess I just set it aside until I thought the kids were old enough to help me out. But the kids are both old enough now to assemble their own soft tacos or burritos, and sushi uses many of roughly the same techniques, so I thought it was time to give it a go.

Last night I made up a big pot of sushi rice and cut up all kinds of toppings: smoked salmon, cooked shrimp, scrambled egg with a bit of mirin mixed in, cucumber, carrots, and avocado. Then I dug out one rolling mat per person and let everyone assemble their own sushi.

The nice thing about making sushi this way is that everyone can have it just how they like it, although probably not as pretty as they’d like it, that comes with a heck of a lot of practice. I find it surprising that a lot of people around here still assume that sushi automatically equals raw fish, when it’s really all about the vinegared rice. You can top it or roll it with just about anything you’d like. You can even avoid fish or even all animal products altogether, although the purists may take objection to that. But let’s be honest, purists aren’t going to be rolling sushi at home with their six-year-old, they’re going to be paying a very skilled professional chef to create the perfect mouthfuls.

I really liked the combination of the saltiness of the smoked salmon with the sweet egg and the crunch of cucumber.

The egg-and-shrimp roll I made could have used a little more punch; perhaps I should pick up some spicy Japanese mayo for next time?

My husband’s rolls generally turned out nicer-looking than mine, except, of course, when I went to take a picture. His egg, cucumber, and shrimp roll tasted pretty good, though.

After a couple of messy (if tasty) attempts at maki sushi rolls, the girls tried their hands at hand rolls, which are the closest in assembly to a taco, which is where there experience lies.

We had a really good time making and eating this dinner, and I’m starting to think I should have introduced homemade sushi long before now. I loved watching the kids’ faces light up when I told them that we could actually make sushi at home. Not only that, but it’s a pretty healthy meal that’s infinitely customizable. We are definitely going to do this again, and soon. It needs to become a regular thing in my house again.

Grilled Salmon & Trout Teriyaki Rice Bowls

It’s been unseasonably warm this fall, so I thought that another light, refreshing meal was in order. The girls requested rice bowls, so that’s what we ended up doing! I found a few pieces of both salmon and trout on special at the local grocery store, but neither one had quite enough to feed the entire family. In the end, I served each person a slice of each kind of fish.

I marinated the fish in Kikkoman Teriyaki Marinade & Sauce, and then my husband put it on the smoker grill. I always cook this kind of fish on a baking sheet even on a grill, and even if it’s skin-on like ours normally is, because once done it tends to fall apart into the machinery beneath. While the meat was cooking, I put on the rice, steamed some bok choy, thinly sliced some carrots, cut up one of my many home-grown cucumbers, chopped the onion tops from my garden (they’re a great substitute for chives), and cut up some enoki mushrooms. By the time all that was done, the fish was ready. Then all that was left was to assemble the bowls, and to eat!

Garlicky Pasta Primavera

Last night I was inspired by Delish to make their Bowtie Primavera recipe. It was originally posted back in 2016, but the video popped up again on my Facebook feed, and, well, I had lots of cherry tomatoes that needed eating, so I figured it was timely.

This dish features a lovely rainbow of vegetables: asparagus, zucchini, cherry tomatoes, and mushrooms. I find it funny that it’s advertised as a “spring pasta” because really the only spring part is the asparagus; the zucchini, cherry tomatoes, and most mushrooms are late summer/early fall produce. I actually couldn’t find fresh asparagus at the grocery store right now and so had to use frozen, but that works just fine cooked in a sauce anyway.

My cherry tomatoes were really juicy and released a lot of that juice when cooking, so I found that 1 cup of reserved pasta water was excessive. I ended up having to boil down the sauce in order for it not to be, well, soup. Additionally, I used lactose-free sour cream, which I don’t think make a huge difference to the consistency but it did mean that I could actually eat it. (I would assume that, to make this dish vegan, a cream cheese substitute could be used effectively.) I also didn’t garnish with chopped basil because, to be completely honest, I forgot to buy any.

All that being said, I was really happy with the end result. This dish was creamy but not cloying, came together quickly (although not as quickly as the recipe indicated), and was both healthy and tasty. I will definitely be making it again.

Slow Cooker Caribbean Lobster Bisque Recipe

About four years ago I had the opportunity to try PC Jammin’ Jamaican Lobster Bisque, which is a frozen entree that was created by Winslow Taylor of Mississauga, Ontario for the PC Recipe to Riches contest. I loved it! It was creamy and filling with just the right amount of bite. Sadly, this frozen dinner didn’t stay on the shelves long, and it has been years since it’s been in production, I think. So a I did some research and some testing, and I came up with what I consider to be a really nice non-dairy Caribbean-style lobster bisque that you can make in a slow cooker. I originally posted this recipe in my old blog a few years back, but I’ve had the chance to refine it somewhat since then. Enjoy!

Slow Cooker Caribbean Lobster Bisque

In a frying pan, gently heat:
1 Tbsp olive oil
To the oil, add:
1 white onion, chopped
2 cloves of garlic, finely minced
Saute until the onions are clear. Stir often so that they do not brown. Put sauteed items in slow cooker.
Add to slow cooker:
4 cups reduced-sodium chicken broth
3 cups pumpkin* puree**
6 Roma tomatoes, peeled, de-seeded & chopped
1 tsp black pepper
1 tsp salt***
1 tsp paprika****
4 sprigs fresh thyme
1/2 tsp Scotch Bonnet hot pepper sauce*****
With a large sharp knife, cut off the fan part at the bottom of:
4 lobster tails****** (totaling 400g or more)
Reserve the remaining meaty parts of the lobster tails for later.
Add the fan part of the lobster tails to the crock pot. Stir. Cover and cook in the slow cooker for 6 hours on low.
Remove and discard lobster tail ends & thyme. Using a blender or food processor, puree the soup until it has an even, creamy consistency. Put the soup back in the slow cooker, and add the reserved meaty parts of the lobster tail. Stir, cover, and cook for about 45min to 1hr, or until lobster shells are pink and meat is cooked through. Remove remaining lobster from the slow cooker and let it cool until it is comfortable to handle.
While the lobster is cooling, stir into the slow cooker:
1 can (400mL) coconut milk
Remove lobster flesh from the shells. Discard shells. Chop lobster flesh into small bite-sized pieces and add to the slow cooker. Stir.
Optionally, garnish each serving with:
a sprinkle of fresh cilantro or parsley, chopped

This bisque is delicious as an appetizer or as a lunch. It freezes well; I like to freeze it in single-sized portions so that I can take it along with me for work lunches. It goes well with crusty bread and strong cheese.

Notes:
* Equal quantities of winter squash puree such as butternut, calabaza, or Hubbard squash may be substituted.
** When I can my own squash, it comes out much more watery than the commercial canned versions. If you are using a thicker canned squash, add enough water to the mixture in the slow cooker so that it has the consistency of a thinner cream soup. This amount will vary depending on the consistency of the puree.
*** If you use regular chicken broth instead of the reduced-sodium version called for in this recipe, omit the salt. If you use homemade chicken broth with no salt at all, add an extra 1 tsp salt.
**** If you can get it, smoked paprika adds an extra layer of flavour to this recipe. Otherwise, regular paprika will do.
***** I used the Scotch Bonnet hot pepper sauce made by Grace (which is available at most grocery stores around here), but you can use the one of your choice. My original recipe called for 4 tsp of this sauce, but it ended up too hot for anyone in my family except me. If you like your food spicy, add a little more than 2 tsp. If you aren’t that fond of spice, cut it down to 1 tsp for a tiny bit of a bite. If you don’t like spice at all, you can omit the sauce altogether for a mild bisque redolent with coconut – although if you do this, I’d recommend adding more thyme.
****** I have used lobster tails to make this soup, I have also done it with satisfactory results with other (cheaper) parts of the crustacean, like the claws. Just set aside the bigger, meatier parts for the last step of cooking, and use the smaller, mostly-shell parts for the slow-cooking stage to add flavour. Remember to take any parts with shell out before you blend!

Healthy Summer BBQ

We are almost done having a deck installed in our back yard, covering the mud pit that used to be there where the old, rotten deck used to be that we hadn’t had the funds to replace. The new deck was supposed to be done last week, but some of the deck boards in the package that was bought were warped or otherwise damaged, and we’ve been waiting since last Wednesday for Home Depot to deliver the replacements. Two delivery dates have come and gone, and the delivery never showed up… Needless to say, we are not amused.

But most of the deck is done, which means the barbecues are back in place and it’s time to cook outside!

Dinner started with a lovely fruit smoothie: banana, peach, strawberry, mango, and orange juice, with all the fruit other than the banana coming out of a package in the freezer that I really needed to use up. The kids loved it.

Dinner for me was quite filling, although you’d never believe it from the look of it! It was salmon in a honey dijon marinade, which I bought grill-ready from the grocery store, and zucchini cooked with a bit of olive oil and salt. I made it all up on the wood pellet barbecue, which added a lovely smokey overtone to the whole dish.

Of course, the kids wanted — and received — hot dogs made in the microwave. You can’t win them all.