Spice Cupboard

I finally organized my spice cupboard! I’ve been putting it off forever, but I finally got fed up when I yet again bought more of something I could have sworn I was out of, only to find an old jar of it stuffed in behind containers I could swear I had moved.

I mean, it wasn’t a horror show, really. But when I cleaned it out I realized that I’d had some of the contents of those containers for at least six or seven years. One, a jar of Italian spice, had to be at least ten years old. Not that any of it would have hurt any of us to eat it, but what kind of flavour was I getting out of stuff that ancient?

I’d been collecting these little Tupperware spice containers (Modular Mates small spice shaker 1843 bottoms and 1844 lids) for a while now, picking them up second-hand whenever I got the chance. They don’t make the small ones any more, and I figured that the larger ones would just prompt me to buy too much of a single spice again. While I can see that being useful for something like cinnamon that I use in large quantities, it’s not something that I need for all of my spices. And while I love those magnetic spice tins that look so great on a kitchen wall and mean that you can see what you have left at a glance, to keep herbs and spices fresh they’re supposed to be stored in a dark place — like a cupboard. (I’ve seen some designs where those magnetic spice racks are placed on the wall directly above the back of a stove, which looks lovely, but not only are the contents getting damaged by light but also by the heat of the cooking below. I wouldn’t recommend this setup unless it’s 100% for show.)

And now my spice cupboard looks like this! I find it immensely satisfying. To my dismay, I thought I had more than enough containers for my spices, but even after green binning a bunch of ancient ones, I still had more than I thought. A number of the herbs and spices that I don’t use often are now in my freezer, although I plan on transitioning them at least in part to the little containers when I get some more. For now, the freezer will keep them fresher longer anyway.

I think I’ll need to put in a couple of shelves so that the containers aren’t stacked, though. I know they won’t stay orderly otherwise. Or maybe I can find some kind of racks that slide out for easy access? I’ll have to look into it. But for right now I can find what I need when I need it, my choice of containers encourages me to buy in bulk (to reduce single-use plastic), and I’m loving it!

Cleaning Coloured Pyrex

At my last flea market, one of the other vendors (a lovely lady selling the most fabulous knitwear) asked me how I get my Pyrex so clean and shiny. She’d had some issues keeping hers looking its best, and was wondering if I had any tips or tricks. I kind of brushed it off with an, “Oh, I just wash it!” But later I thought about it and realized that I really do have a process that I use. I thought I would share it here so that I can help other collectors.

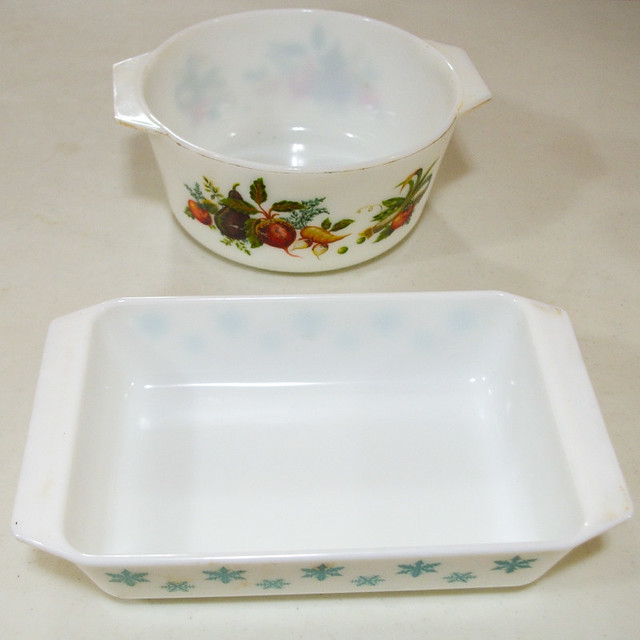
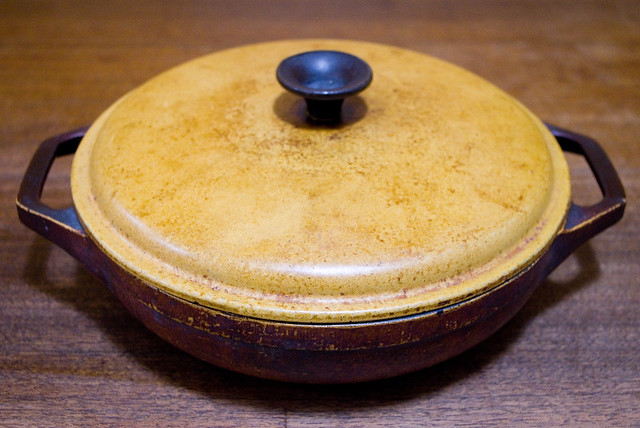
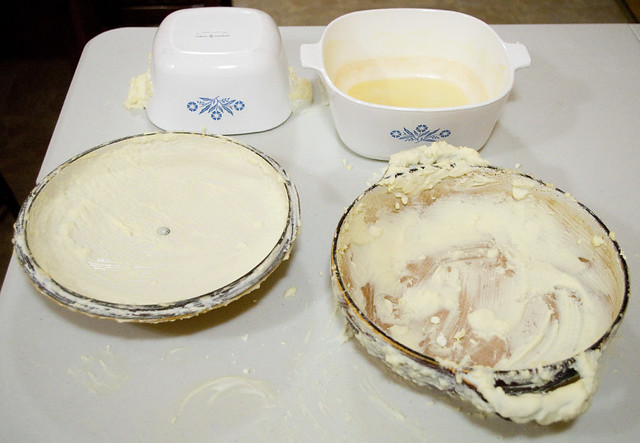
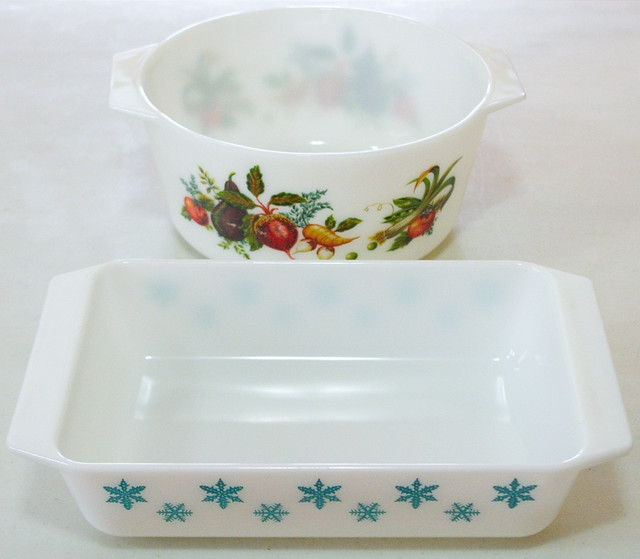
For the purpose of demonstration, I’ll use the two pieces that came into my possession recently. The top one is a JAJ Pyrex casserole in the Market Garden pattern from 1971. (James A. Jobling’s company produced Pyrex in England from 1921 through 1973, when the patent rights reverted to Corning; after this point, the “Pyrex England” backstamp was used.) The bottom is a rectangular casserole from 1956 by the American Pyrex division in the Snowflake pattern, which is the very first pattern that was ever screen printed onto Pyrex. Given the age and condition of these pieces, I really want to keep the designs intact. Most importantly, when I got them there were no chips or nicks, which is something even the best cleaning can’t fix!

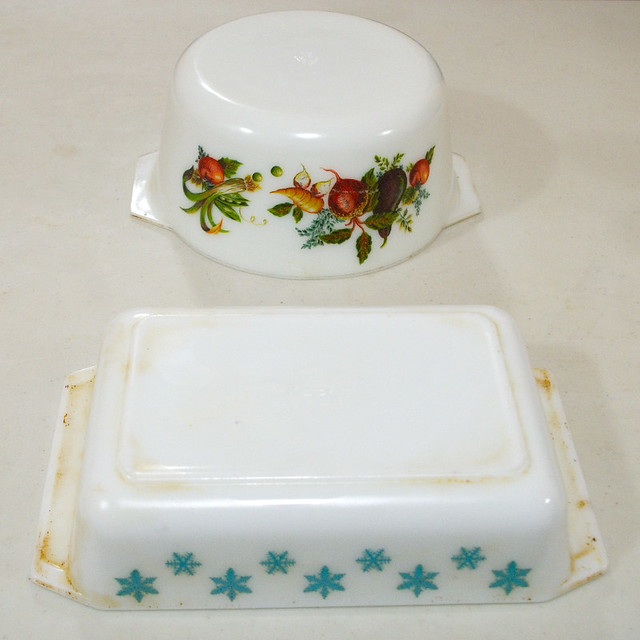
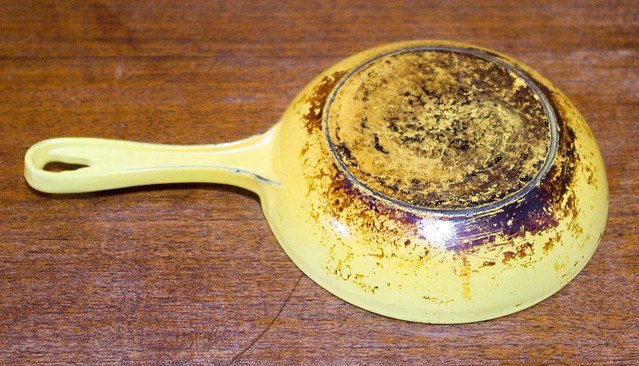
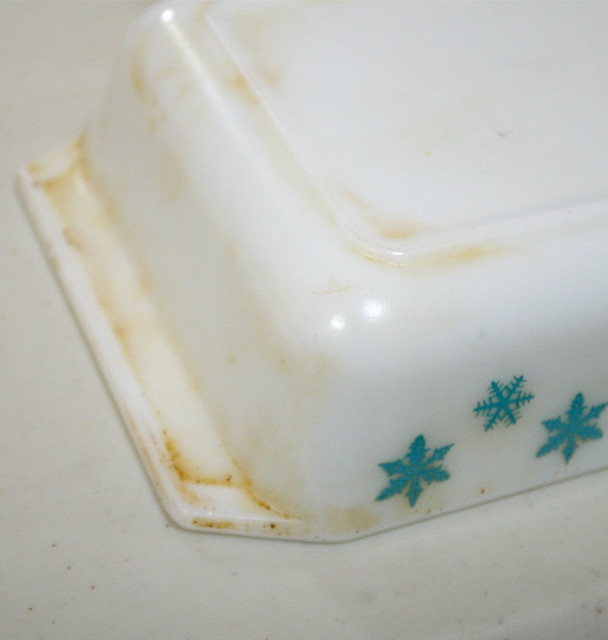
To be honest, these dishes aren’t in the worst condition of the ones that have come into my collection; some good examples of how bad it can get are in my old Cleaning Glass post. As is quite common, the inside of the casseroles were in pretty good shape, since people are most picky about keeping the parts that touch their food in the best shape, but the bottoms were worse off. But do not despair if you see this brown residue on a dish that you want, since it will totally come off with a bit of work!

One of the most important things I can say about cleaning old coloured Pyrex, whether it be solid-colour or screen-printed, is not to put it in the dishwasher. They won’t warp or chip in there — after all, they’re meant for the oven and even the oldest are safe for the microwave if there’s no metallic trim. However, the harsh chemicals and high heat of the dishwasher can fade or even completely erase the beautiful colours over time, so I really would recommend avoiding it! Of course, modern Pyrex and Corningware are dishwasher-safe, so if you’re not sure of the age of a piece, look for the stamp on the bottom that labels it as such.

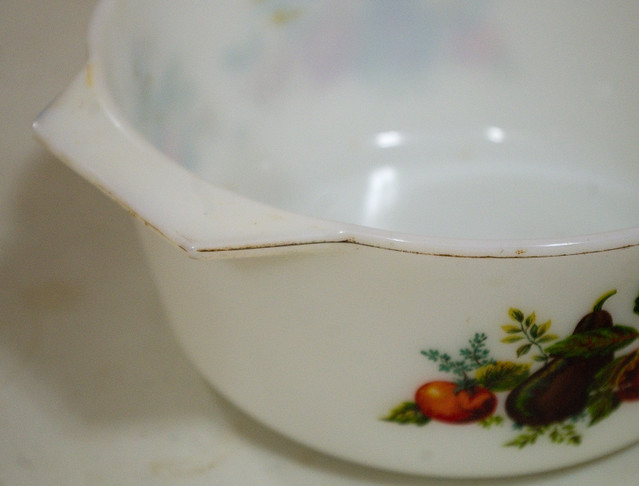
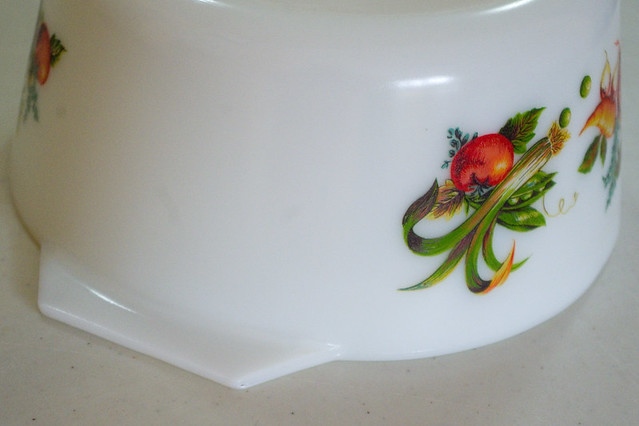
On the Market Garden piece, the worse part was where food debris had collected in the edge around the rim. This is usually really hard to get out, but I have a technique for that which works for most dishes.

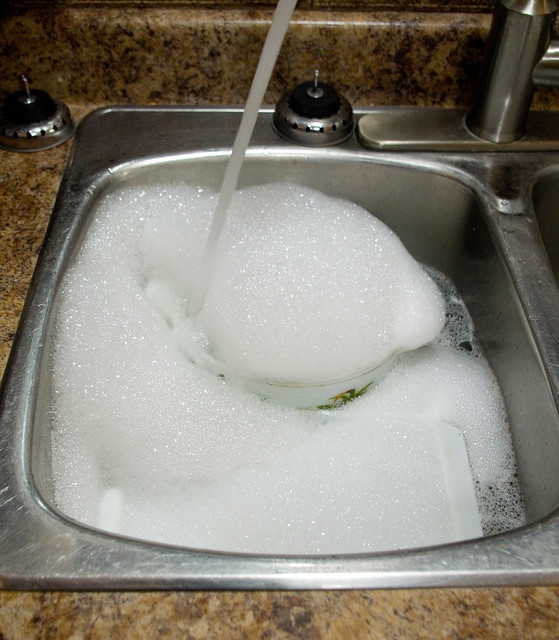
When cleaning coloured Pyrex, one of the things you want to avoid the most is heavy-duty scrubbing. So, no highly abrasive cleaning powders or scouring pads! (Although I’m quite enamoured of Lee Valley’s stainless-steel chain mail scrubber, which is great for cast iron, it would utterly ruin a Pyrex dish.) So your best bet is to fill up a sink with hot water and a generous helping of dish soap, and then let that sit overnight. Yes, the same technique for tackling the roasting pan from the Christmas turkey works with Pyrex, but why wouldn’t it?

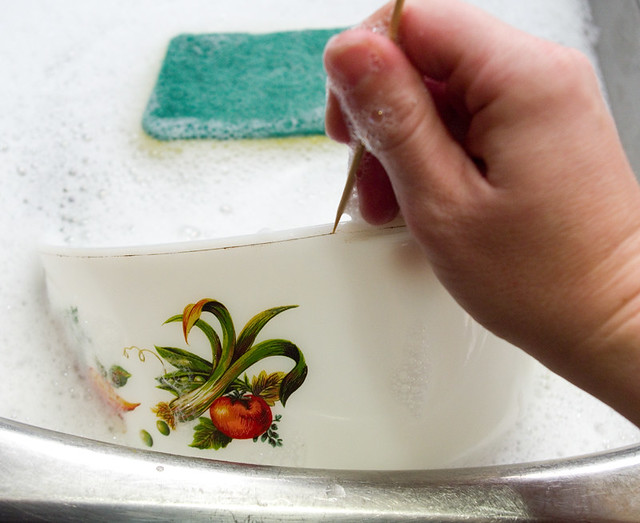
When it comes time to scrub the dishes in the soapy water, I like to use the double-sided cleaning sponges with the green scrubber. I find that they’re generally abrasive enough to get rid of stains, yet not abrasive enough to remove designs (unless you scrub for a really long time — always be careful!).

And here you can see my secret weapon: bamboo skewers. They’re perfect for getting into tiny little areas that accumulate grime, but because they’re so breakable it’s really difficult to scratch the finish with them. The wide end of the skewer can even be used to concentrate your effort on areas with a thick layer of baked-on grease; I used them to great effect on my enameled cast-iron pan. As a bonus, they’re not strong enough to go through the enamel on cast-iron either (on which you also don’t want to use anything too abrasive lest you damage the finish).

I was lucky this time in that the Snowflake dish came completely clean with this treatment, even though it looked like it was in the worst shape. So I only had to do the next step on the Market Garden piece: a paste of baking soda and lemon or lime juice. The juice is acidic and the baking soda is slightly abrasive, which makes for a perfect cleaning combination. I left the past on overnight to dry, then added more lemon juice to scrub off the stains the next morning. Then, for a super-shiny finish, I gave it one more good wash in dish soap and water.

Sometimes, with dishes in really rough shape, you have to repeat these steps a few times. One other thing you can try, although only as a last resort, is a sink full of hot water and a single dishwasher detergent packet, left to sit overnight. I only do this when the dishes have resisted every other cleaning method, because the detergent is really harsh and concentrated. But I much prefer using one of the packets instead of giving up altogether! However, this time I didn’t have to resort to such drastic measures.

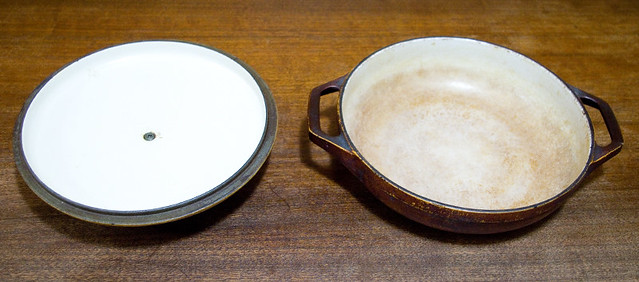
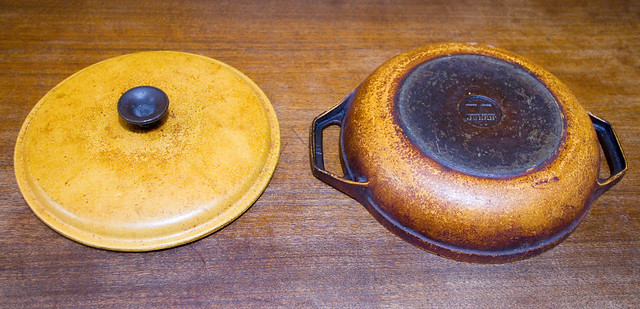
So here are my cleaning results:

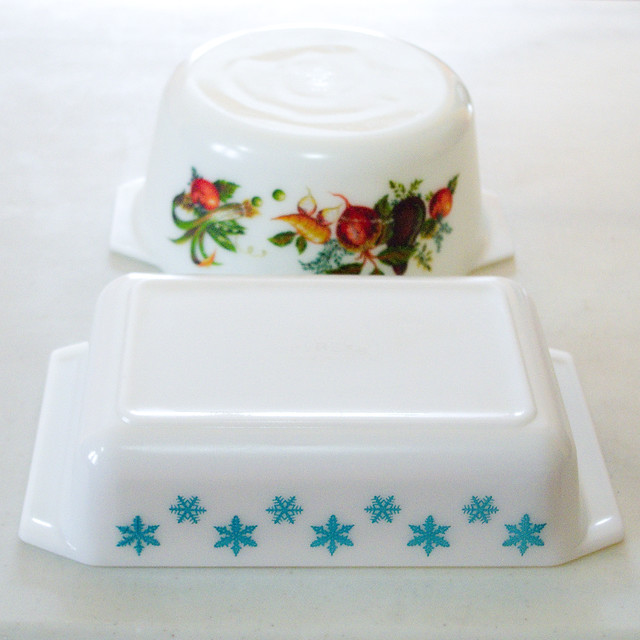
Pristine bottom surfaces.
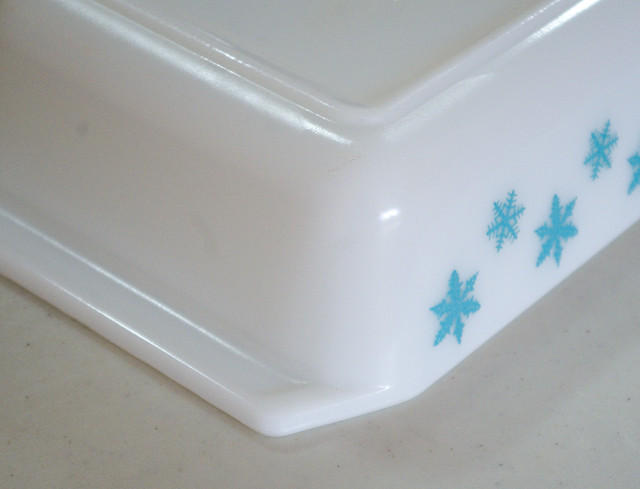
Edges like new.

And interiors from which you’d be happy to serve any guest.

So next time you see an old Pyrex piece that’s a bit worse for wear, don’t automatically discard it because of the amount of work that’d be involved bringing it up to snuff. It may take a couple of rounds of soaking, but it can look like new again without all that much elbow grease!

Cleaning Up a Tiny Cast Iron Pan

Not too long after I got the cast iron Nomar braiser, I found over the course of my thrifting a lovely little cast iron enameled pan. It’s only about 6.5″ (16.5cm) across, so I guess it’s individual-sized for frying. But a very popular baking trend at the moment is to bake and serve cakes and breads in cast iron pans, and this little pan would make a lovely serving for two for that kind of dish.

The inside doesn’t look half bad! There’s only a few scratches on the shiny enamel. And a bit of a squint at the handle reveals that it’s actually a Le Creuset, which means top-of-the-line workmanship. They don’t currently sell a pan this small, but one that’s about twice the size is $210.00, which does give an idea of how much it would have cost when new.

The bottom of the pan, however, needed some TLC. Luckily it’s not as bad as last time.

I used the baking-powder-and-lemon-juice paste technique again, and it worked a treat. It didn’t make too much of a difference to the inside…

But now the outside looks lovely too! There are a few scratches that can’t be removed, but all of the gunk is gone. And this time, it only took one application of the paste and a good scrub, instead of a couple days of soaking and scrubbing. Works for me!

Cleaning Enameled Cast Iron

I picked up a box of old, used kitchenware a while back, and buried down deep at the bottom was what looked like an enameled cast iron casserole dish. It was in pretty rough shape.

The inside wasn’t too badly off; there seemed to be some staining, but no chips or pits in the coating. The outside, however, was a mess:

My best guess is that the previous owner(s) had regularly cleaned the inside where food would actually touch, but were lackadaisical at best about cleaning the exterior. There was a brand name on the bottom, but it was so covered in gunk that I couldn’t quite make it out. But it seemed like a solid piece, so I decided to give cleaning it up a shot.

(I was also going to write about two vintage Pyrex dishes from the same box that had cleaned up really nicely with a lot of elbow grease, but yesterday I managed to bump into them and send them crashing to the floor. They hit each other on the way down and shattered into teeny tiny little pieces. They were only Cornflower Blue dishes, probably about 30 to 40 years old and not terribly rare, but after all that work I was — and still am — rather pissed off that I made such a stupid mistake. Anyway, that’s why there are Pyrex casseroles in that photo as well.)

One of the suggestions that I found online was to coat the piece in a paste of baking soda and lemon or lime juice, so I tried that first. If nothing else, it smelled nicer than any other cleaner I tried!

It actually made a pretty good dent in polishing up the interior.

However, it didn’t have the penetrating power to get a the worst of the exterior’s years of caked-on grease. I’m going to keep this technique in my arsenal for future reference, though, since it did do wonders for the areas where the damage wasn’t so bad, like on the outside of the lid.

The next tip I tried was to soak the pot overnight in a solution of two parts water to one part vinegar. This made so little difference that I didn’t even bother taking a picture. It was just a waste of time.

My friend suggested that I fill the sink with water and add two dishwasher pods, which did end up being the technique I was looking for. Even so, I had to soak for 12 hours, give it a scrub, change the water, and then return it to soak. This technique took three days, but just look how it turned out!

While it was soaking, I was finally able to get a good look at the logo. It’s a Nomar braiser, and my research dates it from the late 1960’s to early 1970’s:

At some point Nomar was bought out by Staub, which is a competitor of Le Creuset. Apparently, back when they went by the Nomar name, the brand was an even stronger competitor. And Le Creuset is the be-all and end-all of cast iron ware these days!

My roaster holds about 2.5L, which puts it between Le Creuset’s 1.5L and 3.5L braisers… Which retail for $200 and $340 CAD, respectively. So my piece old Nomar was definitely worth the work I put into it!

And I have to say, it’s awfully pretty.

Cleaning Glass

Because I am passionate about thrifting, a lot of second-hand items come my way from friends and family, garage sales, thrift shops, charity stores, estate sales and moving sales. I’d like to say that everything that I get comes in tip-top shape, but unfortunately that’s not the case. A certain amount of wear-and-tear is expected, especially when it comes to vintage or antique pieces that have seen everyday use. That doesn’t bother me at all. What I will not condone the level of filth of some of these items.

That isn’t to say that I won’t work with something that is scuzzy. On the contrary — but I won’t keep an item that I can’t get clean. Luckily, a lot of kitchen items are metal, glass, or plastic, which can all be recycled in this area if I can’t bring them up to an acceptable level. But I much prefer to put some elbow grease into it to get things spic and span again if I can. Reuse before recycling, if possible, as it were. If you factor in the time it takes me to clean pieces like this, it’s probably not cost-effective, but to me it’s still worth it to keep something perfectly serviceable out of a landfill or recycling center. Those teachers who repeated, “Reduce, reuse, recycle!” to me as a child should be happy that something stuck.


Before and after cleaning of some glass cookware that I came by recently.

Clear glass, especially Pyrex and Anchor ware, are some of my favourites when it comes to bringing things back up to snuff. The heavy, clear glass is impermeable, so even long-standing coatings of dirt and grease don’t sink under the surface. This glassware is dishwasher-safe, so often I can get the machine to do a lot of the work for me. I mean, there are all kinds of tricks online to help remove different kinds of gunge, but in my experience a lot of soap, hot water, soaking, and scrubbing usually does the trick. I’ve discovered that one of the best things to use to scrape off stubborn, caked-on food is bamboo skewers. You can put a fair amount of pressure behind the wood, but it’s still fragile enough that it will break before scratching or etching the glass.

There’s just something terribly satisfying about seeing what was once a shamefully dirty dish become something you wouldn’t hesitate to use to serve your grandmother.

First Bake of the Christmas Season

I wanted to spend today working on my last-minute costume, but the weather has started to change for the colder, and that meant that I had to make some changes to my house. The Weather Network is calling for rain, freezing rain, and snow over the weekend, so I had to be prepared. First, I had to put up the Christmas lights, since climbing on a ladder in the ice and snow is not a good idea.

Second, I had to clean the garage. I know it may not look like much, but it took me the rest of the day to get my garage this tidy. I really prefer to park under a roof in the winter; the car starts easier, it takes less time to get out the door because I don’t have brush/scrape off snow/ice, and it’s just generally better for the longevity of the vehicle. In warmer weather, however, my garage becomes my workshop-slash-storage-space, and it becomes cluttered and messy, and there’s no way you can get a car in there for about six months. So every fall I have to give it a good clean, and this year I’d let it get bad enough that it took me most of the day.

We still had to eat, of course, so I kept in the same mind-set as yesterday’s Clean Out Your Refrigerator Day — this having nothing to do with the fact that I still hadn’t gone to the grocery store, of course. I made grilled cheese for the family using yesterday’s Light Rye and Caraway Bread (page 75, Bread Machine: How to Prepare and Bake the Perfect Loaf (Jennie Shapter (2002)) and leftover cheese from the cheese-and-crackers tray from the Halloween party, which I think was mostly cheddar and Havarti, possibly Gouda. Sadly, there was just toast for me, since I have yet to find a non-dairy cheese that I actually like. Alongside the sandwiches I served cream of carrot soup that I had made up around Easter and frozen.

This weekend there is an annual fundraiser to send the area Pathfinders on an excursion, for which the younger girls (Sparks, Brownies and Guides) help out. The fundraiser is a holiday tea held at a local church. Parents supply beverages and baked goods, the Pathfinders organize and run the kitchen, the Guides serve the hot drinks, the Brownies serve cold drinks and treats, and the little Sparks just serve treats. The younger girls only work in one-hour shifts and are always given the chance to sit down and have tea and treats afterwards, so they love participating in this fundraiser. Plus, it makes them feel really grown up.

Thing 1 helped me choose and bake the treats we’ll be providing, which after a perusal of my cookbooks Thing 1 proclaimed had to be brownies-without-the-capital-B. She picked the recipe from Cookies: Recipes for Gifting & Sharing (Publications International Ltd., 2016), the classic brownies on page 35. Other than taking longer to bake than the directions specified, they went off without a hitch! Of course, I had to try one of the brownies before I packaged them to drop off tonight, and they’re rich and chocolatey soft, firm on the outside with a soft, moist (but not under-cooked) center. I am definitely pleased with this recipe, and not only because it’s so easy! My only qualm is that it has a bit of dairy inside, so maybe in the future I’ll be able to come up with a non-dairy version.