English Muffins Take 2

My husband has been bugging me to make homemade English muffins again since I last made them about a year ago. But my new stove meant that I didn’t have the griddle attachment anymore, and I hadn’t bought a stand-alone version in the meantime. I also hadn’t found a local source for proper silicone English muffin rings, which is what I thought would have really helped create a better muffin than last time.

However, I had found a Flippin’ Fantastic pancake maker at a thrift store, so after a good wash I thought I’d give it a try instead. I discovered that if you want perfectly-round English muffins, this really isn’t the right tool. It’s great when they’re first starting out, but the rings need to be deeper, so once they started to rise they ended up being irregularly-shaped anyway. Not only that, but despite a good coating of non-stick spray, the batter stuck really badly to the silicone, making for a messy clean-up.

I also tried to use the flipper for the eggs that were going to go in the muffin sandwiches, and that was an unmitigated disaster. Eggs are a lot more liquid than English muffin batter, and they just leaked out the bottom of the flipper to create a single, solid mass of egg that I then had to break up with a spatula. Online reviews point out that this exactly the same thing that happens with pancake batter, so I don’t think that this product works as advertised. What a shame.

All that being said, the flavour and texture of the English muffins themselves was great despite the flipper not working out. I used Alton Brown’s English Muffin Recipe, which turned out lighter than my other attempt. I discovered that while this mixture is too liquid to mold like a bun, it can just be spooned out onto a pan without rings at all. The resulting muffins will be lopsided, but they will taste just as good! This time I served the muffins as sandwiches with bacon, egg, and cheddar cheese (lactose-free for me), with slices of navel oranges on the side. It was a hit!

Valentine’s Day Baking

Yesterday was Valentine’s Day, and while we’re not terribly into big romantic gestures in our household, the kids really do love celebrating this holiday at school. Everyone ends up with a little mailbox full of Valentines, and some sweets to bring home, and often parents send in some nice snacks for the kids to munch on throughout the day. So of course I had to get the girls to help me with some baking to bring along to class.

At Thing 1’s insistence, I made a chocolate sheet cake with chocolate icing for her class. Since she loved her Triforce Cake so much, I used the same recipe: Amelia Bedelia’s Sheet Cake, found at the back of the story book Amelia Bedelia Bakes Off (Herman Parish, 2010), or online via Desktop Cookbook. This time, though, I actually made buttercream icing from scratch — my very first time trying it! I used the Joy of Cooking (Rombauer & Becker, 2006 edition) recipe for Chocolate Buttercream found on page 793. Honestly, the icing was more difficult to make than the cake, but it turned out so well! I used really dark chocolate and my munchkin appreciated it. She isn’t actually a big fan of the thick layers of super-sweet icing that are commonly found on commercial cakes, and to be honest, neither am I. I decorated the icing with a dusting of icing sugar over some heart-shaped cookie cutters, and then I removed the cutters to lay down a heart made of Smarties. I know it wasn’t symmetrical, but the kiddos didn’t seem to care.

Thing 2, however, really wanted to make mini banana muffins for her class. I went back to the trusty recipe in the Joy of Cooking and we together we made the Banana Bread Cockaigne on page 628. There’s a lot of teaching that goes along with baking with a child of that age, especially since they haven’t started learning fractions yet! Even so, this recipe is very forgiving (if you read my blog regularly, you’ve probably noticed that it’s a favourite), and it turned out really well. There were only three left over after she shared them with her friends, and those were promptly snatched up by her grandparents. Not that I begrudge them, because if they didn’t eat them, I would.

I hope you all had a lovely Valentine’s Day and were spoiled with some of your own favourite treats!

Pumpkin Spice Muffins & Cheerios

It’s no secret that I love pumpkin spice. A lot of people joke that it’s a flavouring made specifically for white women, and there may be some substance to that. After all, it does smell distinctly like the pumpkin pie that was a treat in my family around Thanksgiving and Christmas, so I’m guessing that other people of a similar background have similar nostalgia. They say that smell has a great deal of power when it comes to memory, at any rate.

When I was growing up, though, pumpkin spice wasn’t in everything come fall. Pumpkin pie and pumpkin bread, if you were lucky, and that was about it. The popularity of Starbucks’ pumpkin spice latte is what really got the ball rolling, at least around here. I’m not a coffee drinker, so I was later than many about hopping on the bandwagon. I really rather liked the Oreos and the Kahlua. That being said, I firmly believe that some things really don’t need to be pumpkin spice flavoured, or have been poorly done, so I like to try out a few new dishes every autumn as a kind of experiment.

The first dish that I tried this week was pumpkin spice muffins baked from Krusteaz Pumpkin Spice Quick Bread Mix, which I bought from Costco on a recent trip. The box says that you can make loaves, pancakes, cookies, and muffins, but I was feeling lazy so I just made the muffins. They rose nicely and looked great in the pan, but they fell and became rather overly moist once they left the oven, despite being cooked through. Even so, they were fairly tasty; the kids especially liked them.

For my part, I think I will stick to the Joy of Cooking‘s Pumpkin Bread recipe for this kind of muffin. I’ve had better luck with this recipe in the past. However, I do wonder, in the case of the mix, if it’s trying to do too many things — or if a different preparation might suit the mix better? At any rate, I have three more packages of mix to cook, so I should be able to try them all out.

I also tried some Pumpkin Spice Cheerios. These are definitely a sweet cereal, which to me isn’t suited to breakfast at all. Actually, I found them quite cloying in (unsweetened almond) milk. However, they’re not half bad dry, and make quite a nice snack. However, if I’m going for a sweet Cheerio, I much prefer Apple Cinnamon Cheerios. They came out in 1988, so they have a place in my heart as being a special treat from my childhood (we weren’t allowed sugary cereal except on special occasions). Also, I just find that they taste less sweet and cloying, which is funny because according to the nutrition info, pumpkin spice has 8g of sugar per serving, and apple cinnamon has 9g. Maybe it’s how it’s cooked, or just the spice mixture? It’s even stranger when you realize that one of the major components in pumpkin spice is actually cinnamon. At any rate, I still like Apple Cinnamon Cheerios better.

When Hunger and Exhaustion Collide

So I had kind of a mini food crisis the other night. I was home alone with my sleeping children; my husband was out visiting some friends. Since I hadn’t been home much lately, the fridge had become very empty, and the pantry wasn’t faring much better. I’d been up since 5:30am that day doing all kinds of lifting and lugging out in the heat, and I was exhausted. However, I couldn’t go to sleep yet because I had time-sensitive tasks that had to be completed. But I was just so exhausted that I couldn’t even think of cooking. I’d left it too late to order delivery, unless I wanted pizza, which my gut just can’t handle. (My friends told me afterwards that there is a local place that makes vegan pizza, i.e. it’s dairy free, and I may try that next time. Or order chicken wings from a pizza place, which didn’t even occur to me.)

In the end, starving but too tired to cook much from scratch, I tried making a microwaved baked potato, but even then I was thwarted: upon cutting it open, I discovered that it was rotten inside. I only got to eat a potato on my second try. I was so tired and frustrated that I was brought to tears over this stupid potato.

And all that time, all I could think about was how good Two Bite Brownies would taste.

So! I finally am able to go to bed, tummy actually full, but when I woke up the next morning I was absolutely determined that the same kind of thing wouldn’t happen the following night. Hubby home and children awake, I popped out to the grocery store and purchased the ingredients for one of my favourite easily-baked items: banana nut bread (or muffins, in this case). They’re filling and more or less healthy and very difficult to mess up. No was was I going to be exhausted and hungry and frustrated to that degree if I could help it.

I did buy a bag of Two Bite Brownies as well, though.

Dollar Store Challenge: Pancake Mix & Peach Muffins Recipe

When I was doing the Dollar Store Challenge last week, I had the chance to get a good look at the non-junk-food ingredients that the store had to offer. I was inspired to try to make another meal from the ingredients, this time a to-go, prep-ahead breakfast or lunch. I was inspired by some of the pancake mix muffins I’d seen on the Internet, but of course I had to make some serious adaptations to adjust for what’s available at the Dollar Store. As a bonus, it’s also vegetarian (although not vegan), and can be made nut-free.

What I bought was:

1 x Aunt Jemima Original Pancake Mix @ $2.50/ea
1 x Fruitropic Peach Halves 398mL @ $1.00/ea
1 x Fruitropic Coconut Milk 398mL @ $1.25/ea
1 x Unsweetened Apple Snack Fruit Combo Applesauce 452g @ $1.25/ea

Subtotal: $6.00 + tax
Total with tax: $6.00

(None of these food items were taxable.)

When budgeting for this meal, keep in mind that there will be leftover pancake mix, coconut milk, and applesauce that can be used in additional recipes.

After having made the muffins, next time I would probably add a spices for inexpensive added flavour and some chopped walnuts for crunch and weight. I didn’t see either of these ingredients at my local Dollar Store, so it wouldn’t strictly conform to the challenge, but you could easily stay under the $10-to-serve-four-people mandate by buying small quantities of both at the grocery store or Bulk Barn. Of course, if you’re allergic to nuts or you want to send the muffins to a nut-free environment like an elementary school, just skip them!

Here’s the recipe:


I didn’t use spices in this batch, so if you follow the recipe, the colour of your final product will be slightly darker.

Pancake Mix & Peach Muffins
Makes 14-16 muffins

Preheat the oven to 400°F (205°C).
In a large mixing bowl, combine:
2 1/2 cups pancake mix
1/2 tsp salt
1/2 tsp ground cinnamon
1/8 tsp ground cloves
1/4 tsp ground nutmeg
1/2 cup canned coconut milk*
113g single-serve cup of applesauce
Open a:
398mL can of peach halves**
Drain the syrup from the peaches into a measuring cup. Top up the syrup with water until the combined liquid measures 1 cup. Add the liquid to the mixing bowl. Mix until batter is smooth.

Chop the peaches roughly and fold them into the batter. Also fold in:
2/3 cup chopped walnuts***

Grease a muffin pan or spray with baking spray. Ladle batter into cups about 2/3 full.

Bake for 14 to 16 minutes, or until a cake tester inserted into one of the muffins comes out clean. Turn them out of the pan immediately and place them right-side-up to cool on a wire rack. Muffins may be eaten right away or cooled completely and then stored in a sealed container at room temperature.

*Canned coconut milk tends to separate, so stir it well before measuring.
**Other types of canned fruit or fruit mixes may be substituted, so long as they are in a light syrup.
***Walnuts are optional.

Blueberry Bran Muffins Recipe

Recently I came across a copy of The United Churches in Canada: Let’s Break Bread Together — the September 1988 version, though, not the current one. I love cookbooks that are comprised of favourite recipes contributed by members of the organization. I mean, where else can you find quality recipes like this one:

Jokes aside, I have learned how to make some really great dishes from books like these. I have also contributed to a few; off the top of my head I know some of my recipes have ended up in books published by my high school, the local chapter of the Girl Guides of Canada, and my kids’ preschool. Not only are these cookbooks great fundraisers, they’re also a nice way to bring the community together by introducing neighbours to the flavours and dishes that are important to them.

All that being said, these cookbooks are not written — and as importantly, are not edited by — professionals. These days it’s not as bad, what with spell check and the ability to digitally track changes when a document is being sent around for review. But you have to be very, very careful to fully read a recipe from start to finish with pre-2000 cookbooks. Well, I mean, you should probably do that anyway with any recipe, but at least in professional cookbooks they’ll generally include all of the ingredients in the ingredient list, and a general expectation of yield, and have fairly clear instructions.

I’ll use the blueberry bran muffins recipe on page 86 of Let’s Break Bread Together as an example. It specified All-Bran Cereal — but what kind? Right now, in Canada, there’s All-Bran Flakes, All-Bran Buds, All-Bran Multigrain Crunch, and All-Bran Granola. Now, I understand that in some cases with older recipes, there was only one variety of an ingredient even though now the company may have branched out. In this case, though, a quick search of the Internet reveals that in the mid-’80’s there was the equivalent of Flakes and Buds, so it should have been specified.

Also, the blueberries in the muffins, which were so clearly stated in the title, were not in the ingredient list. Instead, the kind and quantity of berry were buried in the baking instructions. As you can see from the recipe above, the formatting of this books is such that the ingredients are supposed to be in bold and indented from the rest of the text; they are most often found at the start of the recipe as well. It can be really confusing when ingredients are not where you expect them to be.

Now, please don’t think I’m angry about all this. I’m really not. This book was put together by volunteers (in this case, the United Church in Meadowood, Winnipeg, Manitoba) in their free time before the general use of the home computer. However, what it does for me is it makes me aware of how important precise instructions are to the ease of success of a recipe. It definitely makes me want to give another go-over of the recipes I’ve written, that’s for sure. And if anyone else uses one of my recipes and notices something that should be changed, please let me know so I can fix it!

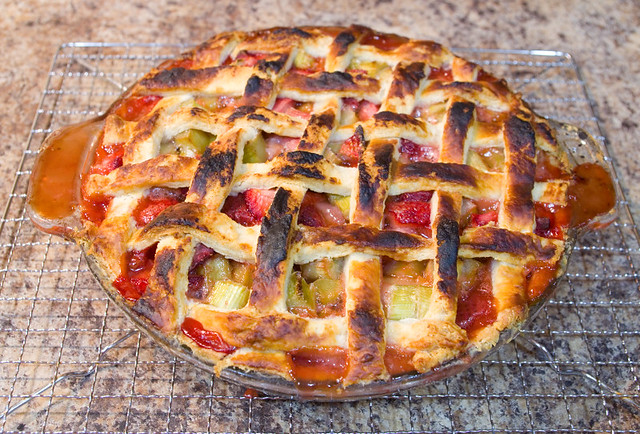
Here is my version of the blueberry bran muffins recipe, updated for accuracy and to make it a little bit healthier. I have tried out the changes and it resulted in the delectable muffins seen pictured above.

Blueberry Bran Muffins
Makes 16 muffins

In a large mixing bowl, beat:
2 large eggs
Mix in:
1 cup 2% milk*
1/2 cup unsweetened applesauce
1 cup All-Bran Buds
Let stand 15 minutes for Buds to hydrate.
Preheat oven to 400°F (175°C).
In a separate mixing bowl, combine:
2 cups all-purpose white flour
1 cup white sugar
4 tsp baking powder
1 tsp salt
Add dry ingredients to wet ingredients, stirring until blended.
Fold into batter:
2 cups fresh blueberries**
Spoon batter into greased muffin tins 3/4 full. Bake 15-18 minutes, until done. You will be able to tell that the muffins are done when the tops turn golden-brown and a toothpick or wooden skewer inserted at the center point comes out clean.
Cool the muffins for 5 minutes in the pan, until the tops are just cool enough to touch. Gently, with your fingertips, spin each muffin a quarter turn in the pan. This will dislodge the muffin from the pan and help keep it from sticking. Remove the muffins from the pan and finish cooling them on a wire rack. Once cool, they may be stored in a container for about five days. However, they are best eaten as fresh as possible.

*Alternately, a milk substitute such as almond milk or soy milk may be used. If you do so, reduce the volume of milk substitute by 1 Tbsp, and add 1 Tbsp light vegetable oil such as sunflower or canola.
**Alternately, you may use frozen blueberries. However, before using they should be thawed and the excess liquid drained.

Clean-Out-the-Fridge Food

A coworker of a friend had a rhubarb plant that was trying to take over the world, so my friend was nice enough to claim the excess stalks for me and then meet up with me so I could get them. Since I knew I wasn’t going to have the chance to use up all of the rhubarb before it went bad, I washed it, chopped it, and divvied it up into portions for the freezer. However, I did set a bit of it aside so that I could make up another batch of rhubarb muffins (125 Best Quick Bread Recipes by Donna Washburn & Heather Butt (2002), page 22).

These muffins are a real hit around my house, and most of the batch of twelve was gone before the end of the day. I didn’t have any oranges or orange juice around the house (and I didn’t want to go out), so I omitted the orange zest and juice from the recipe. Instead I put 3 Tbsp lemon juice and 3 Tbsp sugar into a measuring cup, then added enough water to bring the level up to 2/3 cup. This gave me the proper amount of liquid, but with a bit of acidity and sweetness. The recipe is also for a loaf instead of muffins, but I just greased my muffin tin and filled the twelve sections with the batter, and baked it at the recommended temperature for about 25 minutes. Despite all of the changes, this recipe turned out really well!

Then it was time to make dinner. Once again, I didn’t want to hit the grocery store, so it ended up being a “use up the food in the fridge” kind of day. I thawed some chicken broth that I had made previously, chopped up some leftover chicken and peeled some carrots, then brought that all together to become chicken noodle soup. I even had a chance to use up some of my excess Canadian Eh? Shapes Pasta. I served the soup alongside tabbouleh (the Joy of Cooking (2006 edition), page 362), which was made with parsley and mint from my garden. The bread was day-old improvised white bread which has a whole story of its own behind it, but that tale will have to be told another day. All in all, I was very satisfied with this clean-out-the-fridge meal!

Rhubarb

It’s rhubarb season, and I only just discovered that rhubarb is one of my husband’s favourite “fruits” (I know it’s a petiole (stalk) and not a fruit, but it is cooked like one, so I think of it as being in the same category). We’ve only been married for ten years at this point, and have known each other for more than twenty, you’d think it would have come up in conversation before now. In any case, I do have a rhubarb plant in my old garden, which is an area of the yard where I used to grow things but have had to stop because the fence there desperately needs repair. We’re supposed to get a new fence this summer, so hopefully I’ll be able to plant a secondary garden against the fence next spring. All that being said, my rhubarb plant is under-performing, to say the least.

This plant is three years old and honestly looks like I just planted it this year. The stalks are losing a size competition to the grass. The plant has never been big, so I doubt that it needs to be split. I think it’s probably due to poor soil quality; I mean, I have never fertilized that garden, I just used the soil that was there when we moved in. Next year I’ll be sure to add compost and extra soil and see if that helps at all. With the new fence going in, there’s no point in trying anything before then… My plant may not survive the ordeal anyway.

So that was my total rhubarb harvest: one handful of spindly little stems. Luckily, some friends of mine out in Russell have a plant that is trying its hardest to take over part of their back yard, and they let me harvest more than half of it in exchange for some homemade pickles. I could not have been more thrilled (or thankful)! So I got to cooking.

The first thing I tried, at my husband’s request, was strawberry rhubarb pie. I used the pie recipe from page 680 of the Joy of Cooking (2006 edition), but I used the Purity Pastry crust from page 73 of the Purity Cookbook (2001 edition), which is my preferred basic pie crust recipe. This was my very first attempt at a rhubarb pie of any kind, and also my first shot at a lattice crust, which I discovered isn’t terribly difficult, although it’s time-consuming.

The top of the pie came out a little bit darker than I’d have liked, although it didn’t taste burnt. I kept my eye on the baking process, constantly monitoring the oven temperature, and it happened anyway. I am really starting to need a new oven. I can’t keep a bulb lit in there because it burns out within days, the temperature control isn’t accurate (which is why I have a secondary thermometer in there), and it’s so small that I can only cook one thing at once. Ah well, it’ll happen eventually.


Thing 1 holding the pie over my head so I could lay on the floor and get a shot at the bottom.

What surprises me the most is that the pie wasn’t overcooked anywhere else. I would think that the bottom would be the most likely spot, given that I was using a baking setting where only the bottom burner was used. I know that the pie plate protected the bottom of the pie somewhat, but even so… Well, at least it tasted good.

As an aside, you might notice that the rhubarb in my dishes doesn’t look particularly red; that’s because the cultivar that my friends grow is ripe when the stalks are green, although sometimes they do have a slightly red tinge. It tastes just as good, even if the colour of the dishes isn’t nearly as spectacular.

I’ve also been baking up loads of Rhubarb Orange Bread from page 22 of 125 Best Quick Bread Recipes by Donna Washburn & Heather Butt (2002). This book was a thrift store find that I definitely don’t regret! I made a few loaves of the rhubarb orange bread that were devoured by my family before I had a chance to photograph them, then a pile of mini-loaves for the freezer, and then a couple dozen nut-free muffins for the kids to take to school (the original recipe has walnuts). I prefer the taste and texture of the version with nuts, but I understand why it’s something that can’t be brought to school.

As I write this, I am in the middle of making up some slow-cooker strawberry-rhubarb butter. If it turns out, I hope to share the recipe. The one thing that I meant to make that I forgot about was a rhubarb crisp, for which there is a recipe on page 692 of my Joy of Cooking. If none of my other friends have excess rhubarb for which they’re willing to trade, I may have to buy a bundle at a farmers’ market this weekend just so I can make this dish. It’s been many years since I had one, but I remember it being delicious!

Morning Glory Pumpkin Muffins

It’s ComicCon costume crunch-time, so I haven’t been spending as much time cooking as I’d like to. Nevertheless, over the weekend I was inspired by the copy of Purely Pumpkin: More Than 100 Seasonal Recipes to Share, Savor, and Warm Your Kitchen by Allison Day (2016) that I have taken out of the library again. I managed to whip up some Morning Glory Pumpkin Muffins (page 81), which were very simple and absolutely delicious. Healthy, too!

For the health-conscious, these muffins are made with spelt flour, bananas, pumpkin puree, apples, pumpkin seeds, raisins, sesame seeds, and poppy seeds. A combination like that is a great way to satisfy hunger cravings and keep you full for a while — perfect to grab when running out the door in the morning. The recipe called for vegetable oil, for which I substituted an equal amount of applesauce, which made the muffins even healthier. These muffins are also very moist and tasty, with just a bit of crunch from the seeds, which is probably why my kids have been noshing on them whenever they get the chance. Would I make this recipe again? Most definitely. Now I’m more eager than ever to try the rest of the recipes in this book!

English Muffins

I love English muffins, and not because I am of British ancestry. English muffins aren’t English at all, really; the dish as we know it today was developed by Samuel Bath Thomas in New York City in the late 1800’s. However Thomas, who came from England, did base his recipe on the yeast-leavened muffins sold door-to-door in his home country, back before most people had ovens in their homes. Those were the kind of muffins that they were talking about in the song “Do You Know the Muffin Man”. In England they are just called “muffins”, and are differentiated from quick bread muffins by context.

Thomas English muffins are still sold in the United States today, but so far as I can tell aren’t distributed in Canada. So the English muffins we have here are imitations of an American product, which is in itself an imitation of a British product. I’m sure we’re not getting the most authentic muffin experience here.

So a couple of weekends ago I decided to take a stab at making my own English muffins. The first thing I had to do was make sure I had the correct equipment. Until I tried to make them, I didn’t know that English muffins weren’t baked; I discovered that I would needed a griddle (which is why they’re sometimes called “griddle muffins”).

My stove is a bit atypical. It it a hand-me-down from family who were upgrading, but it was a very fancy model (Jenn-Air F121-C) thirty years ago when it was new. Each side of the stove-top can be removed and switched out; there are simple electric burner panels, a ceramic cook-top panel, a grill panel, and a griddle panel. Although all of these extras came with the stove, I had only ever used the electric burners, so switching for the griddle was an interesting experience, seeing as the stove’s user manual disappeared ages ago.

Another piece of equipment I needed was English muffin rings… Which I didn’t have, and would have been hard to find on a Sunday morning when most stores were closed. So I chose a recipe that made a more cohesive muffin and didn’t need the rings: How To Make English Muffins from TheKitchn.com

The muffins were tasty, but I wasn’t a hundred percent satisfied with the internal texture. My muffins rose nicely, but solidly, and as such were missing the large nooks and crannies that are, to me, the signature characteristic of a proper English muffin. I’m not sure if that was a problem with the recipe or with my technique. I did the quick version of the recipe and started it that morning. TheKitchen.com says that the starter can ferment overnight and the dough can be left to rise for up to three days in the fridge, so perhaps I will try it that way next time. If I still don’t get the texture I’m looking for, I’ll invest in the English muffin rings and try a different recipe.

That being said, the muffins that I made were definitely edible, and I don’t think the batch even lasted the day. I served them with bacon, cheese, and a fried egg for lunch, and they were eaten spread with elderberry jam as snacks in the evening. My family obviously isn’t nearly as critical of my end results as I am, since they have asked me to make them again soon.