Rogan Ghosh & Rotis

Last night I wanted to do something a little different for Sunday dinner, but I still wanted it to be warm and hearty. The temperatures on the weekend had dipped below -30°C (-22°F), which calls for solid comfort food in my opinion. On Saturday afternoon I delved into my new Christmas-gift-card acquisition, The Complete Indian Instant Pot Cookbook: 130 Traditional & Modern Recipes (Chandra Ram, 2018) and picked rogan ghosh, aka lamb stew (page 2019) and rotis from the plethora of recipes that I wanted to try. It was the first time I ever attempted to cook an Indian dish from scratch, although I’ve used pre-packaged sauces and curry pastes many times.

It’s a good thing that I started prepping on Saturday, because I had a really hard time finding some of the ingredients! I discovered quickly that most chain supermarkets around here don’t carry lamb shoulder, and as it turns out some of the more specialty stores like the Mid-East Food Centre, where I’ve had great luck in the past, had been shorted on their order that week. I hit at least six stores before I ended up at George’s Meat Shop, which luckily had the lamb in stock. Neither they nor any of the other places I visited carried serrano chilies, nor did the next three, at which point I admit that I just gave up and asked Google for a good substitution. Apparently jalapeno peppers are similar in taste but not nearly as hot, so I went with those and simply doubled the amount of peppers. Luckily that worked out okay. But if anyone has any suggestions as to where in the Ottawa area carries serrano chilies, please let me know!

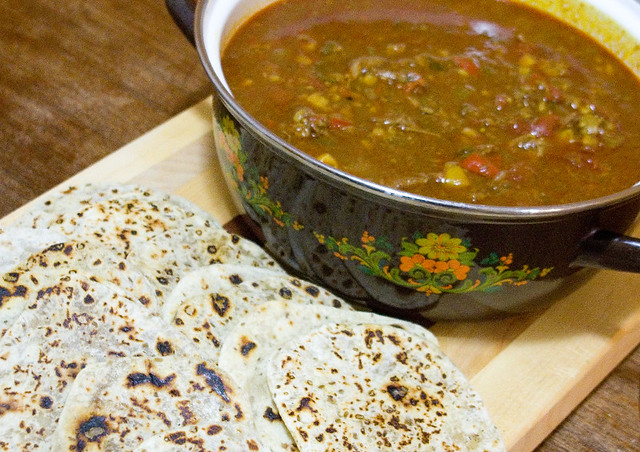
I chopped up my meat and slathered it with marinade on Saturday night, leaving the prepping of the spices and the vegetables until Sunday. What with the speed of the Instant Pot, all of that chopping took significantly longer than the actual cook time of the dish. The finished product was definitely worth it, though. My whole family loved it, and it wasn’t too spicy for anyone (always something I have to take into account with our rather over-sensitive tongues). I was pretty sure it wouldn’t be too spicy, though, given that we all eat lots of jalapenos my homemade salsa. I think that the only mediocre part of this meal (although not at all horrible) was my rotis, which in retrospect I didn’t roll nearly thin enough. I loved their flavour, but I need a lot more practice to make rotis I’m actually proud of.

After some Googling, I’ve learned that apparently you can make the stew using mutton, goat, or even beef. I really liked the rich flavour of the lamb, so I can’t see using beef instead unless it’s out of budgetary consideration, but I like the gaminess of mutton and goat, so I might eventually give them a go. I assume that these would have a longer cook time because the meat is tougher, though.

Maple Syrup Gone Bad

I threw a couple of waffles in the toaster the other day (they’re a special treat around here), at which point I realized that the kids had finished the last of the jar of maple syrup that had been in the fridge. So I went into the cupboard to refill the smaller fridge container, and I found this:

It looks a little dodgy, with that ring of residue around the side, doesn’t it? But I shrugged it off, thinking that some of the top level had crystallized, since it has happened before. But when I opened the jug there was a puff of released gas and a distinct smell of alcohol. It had started to ferment.

I have never in my life had this happen before. I have kept open maple syrup both in the fridge and in the cupboard for years, and the worst thing that has ever happened is that it has crystallized. I honestly thought that it was like honey. I think that this is the combination of having left it in the cupboard and buying it from a farmer’s market*. Don’t get me wrong, I love farmer’s market food! But most of the time there isn’t the same quality control from batch to batch, and this batch could have been bottled too soon. If the temperature didn’t get high enough and/or the ratio of water to syrup was too high, bacteria could survive and the syrup would spoil faster. In a commercial setting, such factors are much more highly regulated.

After discovering this I did some reading and realized that maple syrup can intentionally be fermented to create maple mead, but this is usually done by introducing a specific kind of bacteria (yeast). Since I had no idea what kind of bacteria were in this bottle — and were now creating slow-moving bubbles, once the cap was open — I had to rinse it all down the drain.

I’m kicking myself especially hard about this one because there was so much left in the jug (well over a liter), and because it is Canada. In winter. I could have just left the stupid thing in our uninsulated garage and it would probably have been fine. But I ran out of space in the fridge over the Christmas holidays and left the biggest bottle in the cupboard instead.

Ah, well. I’ll just have to buy some more come spring.

*This was bought from an out-of-town market, and I won’t name the source because heck, this could have been entirely the fault of my food safety practices. But I would like to note for the record that I have never, ever, had any of our local producers’ syrup go bad. Actually, no syrup of any kind has ever gone bad on me before this — which is why it surprised me so much!

Leveling Up the Mac and Cheese

Believe it or not, I’m still trying to use up the Christmas leftovers, although at this point I’m left with the stuff that keeps well like cold cuts and hard cheeses. Last night I decided to continue using up some of those leftovers by making a batch of Mom’s Homemade Macaroni & Cheese.

Now, it may look a bit anemic because I didn’t use a cheddar that was dyed orange, but taste-wise it was anything but! The cheese was one of my personal favourites, Balderson Royal Canadian (2 Year) Cheddar. This brand has the added bonus of being relatively local; their original factory was in Lanark County, although they’re now owned by Parmalat. Although this mac and cheese can be made with just about any cheddar or other sharp, hard cheese (and I think I’ve used them all over the years), including cheap store brands, it really shines with something with a bit more flavour. Despite making an entire batch, after last night’s meal there were no survivors leftovers, which is the ultimate compliment to the cook.

As an addendum, I’ve discovered that there is lactose-free milk and lactose-free cheddar, so if you’re like me and are lactose-intolerant, you can still make this dish. Unfortunately, so far as I know Balderson doesn’t make an official lactose-free cheese yet. However, according to Life Hacker, grocery chain Wegman’s says:

An easy way to check for lactose in cheese is to look at the Nutrition Facts under “Sugar”. Since the sugar in cheese is lactose, you can easily see how much lactose the cheese contains. If the sugar is listed as zero, then the cheese contains no more than half a gram of lactose per ounce. Compare to 12 grams of lactose in an 8 ounce glass of milk.

According to the Balderson Royal Canadian (2 Year) Cheddar official nutritional information, the sugar content is 0g, so if a lactose-intolerant person is going to treat themselves to cheese, this would be a good choice. So, like me, you could combine lactose-free milk and this delicious sharp cheddar (although you may be a bit paranoid and want to take some Lactaid in advance just in case).

Nori Cheese Tamagoyaki & Rice

Since the stew the night before took a while to prepare — not so much the cooking, but all of the chopping and cutting — I thought that last night I would make something a bit more simple. I wanted to continue testing out (okay, playing with) my new Instant Pot, so I used it to make a batch of basmati rice. I used the instructions for rice that I found on page 51 of The Ultimate Instant Pot Cookbook (Coco Morante, 2018). I’ve made basmati rice about a million times on the stove and I’ve got it pretty much down to a science, but I wanted to see how the new cooker would compare. I don’t think it takes any less time once you take into account the preheating and the recommended-for-best-results ten minutes on Keep Warm after cooking, but it is pretty darned easy. Unlike the stove top version, I can more or less just set it and forget it, so I can see why a lot of people like this feature. I think I need to test it with some of the trickier varieties, like wild rice or sticky rice, before I am 100% convinced.

The topping for the rice was another attempt at Nori Cheese Tamagoyaki (video here). While this dish invariably comes out tasting excellent, I’m still working on the technique. I find that rolling the nori and egg are fine, but the cheese makes it tricky and it wants so badly to fall apart. Ah well, practice makes perfect. This time I topped it with Japanese mayo and masago (seasoned capelin caviar), as per the recipe, and I think that this transforms the omelette flavour-wise from a breakfast to a supper dish. Given the family’s rave reviews, this is definitely going to be a regular part of our diet, so I think that I’ll get all the practice I need!

Instant Pot Beef and Guinness® Stew Recipe

After my success with the Instant Pot Beef Bourguignon, I really wanted to use my new toy to make some Guinness® beef stew for my husband, since it’s one of his favourites. Unfortunately none of the Instant Pot cookbooks that I bought after Christmas (because of course that was one of the first things I bought) contained this recipe. I’ve had fantastic luck with the Chef John’s Beef and Guinness® Stew, which creates a delicious stove-top version of this dish. To try and keep the flavour the same as the version we love, I adapted the preparation method for the Instant Pot. Here’s what I did:

Instant Pot Beef and Guinness® Stew
Serves 6

Cut* into small pieces:
4 slices low-sodium bacon
Peel and dice:
2 medium-sized yellow onions
Turn on the Instant Pot and select the Sauté program. If necessary, press the Sauté key repeatedly to toggle to the Normal setting. Wait until the LED displays “Hot”.
To the inner pot, add:
1 Tbsp olive oil
Stir the bacon and onions into the oil and cook for about 5 minutes, stirring often, until the bacon is cooked and the onions have begun to turn clear.
Add to the pot:
2 1/2 lbs (1.1Kg) boneless beef chuck**, cut into bite-sized pieces
Sprinkle the mixture with:
1 tsp salt
1/4 tsp black pepper
Press the Sauté key repeatedly to toggle to the More setting. Being careful not to burn the onions, cook until meat has browned, about 5 minutes. Stir often.
Press the Sauté key repeatedly to toggle to the Less setting.
To the pot, add:
1 can (440mL) Guinness® or other dark beer
1 cup low-sodium beef stock
5 cloves garlic, minced
1/4 cup tomato paste
4 sprigs fresh thyme OR 1/2 tsp dried thyme
3 carrots, cut into bite-sized pieces
3 stalks celery, cut into bite-sized pieces
1 tsp white sugar
Stir all ingredients together until evenly mixed.
Press Cancel on the cooker.
Place the lid and turn to lock. Turn the steam release handle to the Sealing position.
Select Pressure Cook, High Pressure, and set for 30 minutes. 10 seconds after settings are set, the cooker will beep three times and display “On” to indicate that it has started the preheat cycle.

While the Instant Pot program is running, you may wish to make:
4 cups mashed potatoes (OPTIONAL***)

When the cooking cycle has finished, the cooker will beep and enter the Auto Keep Warm mode. (If the Auto Keep Warm function has been turned off, it can be turned back on at any time.) Once the cooking is complete, allow the pressure to release naturally for 10 minutes, and then turn the steam release handle to the Venting position to let the steam out for a Quick Release. Once the steam is safely released, remove the lid.
Turn the cooker back on to Sauté > Normal and simmer stew until it has thickened somewhat, about 15 minutes. While thickening, stir regularly, and remove the sprigs of thyme, if using fresh.

Serve stew in soup bowls, either as-is or atop a mound of mashed potatoes with a divot in the middle to hold the toppings.

*I find that bacon is easiest to cut up using kitchen shears.
**Most kinds of beef are good in stew, so use whatever is in your budget. The pressure cooking (or slow cooking, in traditional stews) will transform even the toughest cuts into something you can cut with a fork. Whatever the cut, make sure to cut off the worst of the fat, since the texture can become off-putting.
***I prefer this stew served over mashed potatoes to soak up all of the lovely broth, but many people like it plain.

Socks of Many Colours

In an effort to get an early start on the first of my New Year’s resolutions, I spent a good chunk of this weekend knitting socks. Not just any socks, but socks (well, one sock so far) of many colours. I have a bag of yarn odds and sods of sock yarn that I inherited from a crafty friend when she passed away, as well as many years worth of my own leftovers. I thought that it would be nice to use up this bag, but to do so means that I’m going to have to make some very interestingly-coloured socks.

So far this sock has used six different leftover yarns, and I hope to use one or two more before it’s done. I divided the balls in half by weight and pattern, so the second sock should mostly match — although the colour repeat on some of the yarns is so long that it won’t be perfect. In the end, the pair of socks will be completely unique and hopefully a lot of fun!

I still haven’t decided what I’m going to do with the other leftover sock yarn, of which there is quite a bit. I don’t have the patience to turn it into a blanket, but a shawl is not out of the question. Or maybe a scarf; an infinity scarf might be nice. I haven’t knit a scarf in years. I’ve already made a couple dozen mini sweaters as Christmas ornaments over the last few years, and I’ve run out of people to gift them to. Given how cold my hands get at night when I’m on the computer, I may have to knit a new pair of wrist warmers, though. Hmmmmmm…

Instant Pot Beef Bourguignon

Yesterday I decided I wanted to try to make something a bit more complicated with my new Instant Pot (or, as my husband puts it, I wanted to play with my new toys). Since I had some red wine left over from Christmas that needed to be used up, and nobody in our household drinks wine, I Googled and found a nice recipe for Instant Pot Beef Bourguignon from Instant Pot Eats. I dug a couple of large chunks of beef out of the freezer the night before to thaw, and I had most of the other ingredients already at home. I did have to send the hubby out for tinned tomatoes and fresh carrots, and somehow we had run out of tomatoes.

I’d never made this dish before, but for all that I’ve heard that beef bourguignon is a complicated dish, I discovered that it’s really just a fancy kind of stew — and I’ve made many stews over the years. Making it in the Instant Pot really sped things up, but I could have done something very similar in the slow cooker, so long as I planned ahead. I really appreciated that I could saute the ingredients and pressure cook them all in the same device, though, since that saved me quite a bit of effort and clean-up time. Actually, I overestimated how long it would all take me, so I took advantage of the “keep warm” function as well.

I don’t exactly have a base for comparison, but I would deem it a definite success! The recipe’s serving suggestions are either with mashed potatoes, fresh bread, pasta, parsley dumplings, steamed vegetables, cauliflower rice, or cabbage with butter and pepper. I took advantage of my bread machine and served it with slices of freshly-baked white bread (page 66, Bread Machine: How to Prepare and Bake the Perfect Loaf by Jennie Shapter, 2002). While this combination was lovely, I think I’d like to try it over mashed potatoes next time, in the same style Beef and Guinness Stew. And yes, there will be a next time, judging by the family appreciation of this dish! The meat was tender, the sauce flavourful, and it was nice and filling on a cold winter’s day. My husband ate so much that he was groaning afterwards about how full his stomach was, and yet he regretted nothing.

Eggs

I thought that yesterday would be a good time to start trying out Christmas presents, and I used up almost a dozen eggs doing so.

First I had to try out my tamagoyaki pan. I used the fillings from Tasty’s Nori Cheese Tamagoyaki recipe (video here), but I wanted to see how it would taste without the mayonnaise and tobiko toppings. I only ended up using one sheet each of nori and dairy-free havarti cheese because I was having a hard enough time rolling it as it was. I think I made each layer too thick, so I’ll try it with less egg per layer next time. Despite the loose, messy look of the omelet, my husband and children thought it was delicious! I rather liked it as well. As you can see in the picture, the cheese inside was nice and gooey, which I think was a big selling point. I think I’ll have to make it as a proper meal in the near future. I’ll need to practice with a basic, filling-free tamagoyaki for sushi as well.

Next I broke out the Instant Pot, first to read the instruction manual, and then to give it an initial test run as per the instructions. I was a little nervous to use it at first, since it is indeed a pressure cooker, and as I’ve stated before I find them a bit intimidating. It’s that evil sound of steam hissing out of them at velocity, I think, and photos like this one of what happens when a pressure cooker doesn’t vent properly. I found that the Instant Pot is much quieter and less scary than my traditional pressure cooker, which is enormous and I generally only use for canning things anyway.

I did take a tip from BuzzFeed and popped a half dozen eggs into the pot while I was doing the initial test run. With a two minute cook time (plus preheat) and a quick pressure release once the timer was done, the eggs turned out perfectly cooked! So this tip is definitely confirmed. Now, my usual method is directly from the Joy of Cooking: put large eggs in a pot, cover with cold water, bring to a boil, then remove the pot from the heat and let it sit covered for 17 minutes. While this has unfailingly yielded perfect hard-boiled eggs, the Instant Pot is definitely faster, even with preheating time. I am pretty darned impressed.

I guess I need to make a proper meal using my Instant Pot soon then, don’t I?

Resolutions

1. Crafting

This is a two-part resolution. Firstly, I’d like to use up the materials I have purchased over the years, and/or use recycled or thrifted materials whenever possible.

Secondly, I’d like to participate in more group or community projects, like Mochimochi Land’s Let’s Knit a Ball Pit — ideally using materials previously specified. The ball pit will be a part of Vogue Knitting LIVE in New York City, and once the event is over they will be donated to the American Foundation for Children with AIDS. I contributed the two knitted balls in the photo above to this project, and I really enjoyed it! I hope that they arrive in time. I’d like to keep the ball rolling, as it were, and donate my time and skills to other events, even if it’s something as simple as hats for the newborn babies at the local children’s hospital.

2. Environmental

I would like to try to decrease our household’s reliance on single-use plastic, and to continue to reuse, repurpose, and recycle. To me, that doesn’t mean being rid of plastics entirely; actually, I think it would be rather wasteful to completely be rid of the plastics we do have, just to buy all new replacements in another material. Rather, I’d like to commit to using recycled plastics, either post-consumer recycled commercial products, or finding a new home for second-hand plastic products, like the lunch boxes above that I bought at a thrift store.

3. In the Kitchen

I want to expand my cooking knowledge, skills, and style — while at the same time trying to keep it reasonably healthy. I think I’ve been stuck in a bit of a rut lately, and I want to do better! To that end, I have purchased even more second-hand cookbooks that I’m not only going to try out, but that I’m going to read through for ideas. At Thing 1’s request, I am looking into more Japanese food:

Sushi by Ryuichi Yoshii (1998)
The Japanese Kitchen by Kimiko Barber (2004)
Ten-Minute Bento by Megumi Fujii (2007)

Of all of the books that I have thrifted lately, I think I am most excited about The Japanese Kitchen, which helps break down and de-mystify each ingredient, and Ten Minute Bento, which is all about quick and easy (and I think will become a favourite cookbook to pull out to prep dinner on busy weeknights). There is a lot about Japanese cooking that I don’t know, but these books look like they’ll really help me get a better grasp on it.

In a more general vein, I have also picked up:

Gordon Ramsay’s Passion for Flavour by Gordon Ramsay (1996)
Deliciously Dairy Free: Fresh and Simple Lactose-Free Recipes for Healthy Eating Every Day by Lesley Waters (2015)
Gourmet Meals in Crappy Little Kitchens by Jennifer Schaertl (2010)
More Bread Machine Magic by Linda Rehberg and Lois Conway (1997)
Jamie Oliver’s FoodTube Presents: The Cake Book by Cupcake Jemma (2014)
Cocktails for Book Lovers by Tessa Smith McGovern (2014)

Now, some of these, like the cupcake book and the cocktail book, are just for fun — but shouldn’t cooking be fun? The dairy-free one and the one about cooking in small kitchens (and I have to say, that title grabbed my attention) are probably the ones I’d use the most, though. Yet every cookbook is a kind of inspiration for me, even if I don’t try a single dish.

4. Business

I think that it’s time for my business to expand from flea markets to online. I think I will start with local sales, since a lot of my products are both heavy and quite breakable. I just don’t know that it would be cost-effective to try to ship vintage Pyrex or, heaven forbid, cast iron cookware. But vintage Tupperware is both hardy and light enough to make the trip! I think that this expansion will challenge my photography skills (since product photography is quite different than casual snaps) and my organization skills. I’m also looking at how to make it all as environmentally-sound as possible; I especially don’t want to package items in styrofoam, bubble wrap, or air-filled bags, since they’re all single-use plastic. I’m looking into wool and straw and other biodegradable options. People shipped things without breaking them long before plastic was invented, so there have to be options. The question is, can I keep it cost-effective? Challenges, challenges!

So what are your resolutions for the New Year?