Weekend Recap

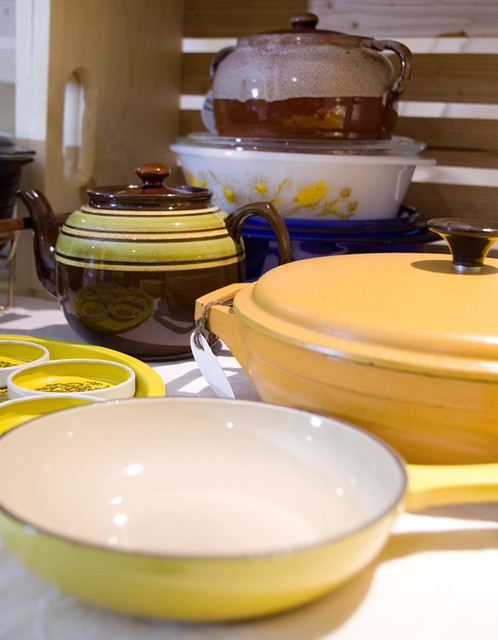
Manning my first stall at Russell Flea was a lot of fun, and it was definitely a learning experience! I learned that the lights that I bought (from Dollarama, since a lot of people have asked) don’t fit through the bottom slats of all of the display crates, so I’ll have to widen a spot for them. I learned that it takes a really long time to pack and unpack a table’s worth of glass and stoneware when you have to unwrap and wrap every single item to prevent damage in transit. I learned that paper is great for wrapping delicate items if you only need to do so once or twice, but it disintegrates really fast (you’re better off using old fabric — blankets and towels are best — if you’re going to do it repeatedly). I learned that an apron with a lot of change in the pockets which ties around your neck can make your neck really sore if you wear it all day. I learned that people have really fond memories of old Tupperware and Pyrex.

Oh yeah, and I learned that I should be careful not to cram all of my tablecloths as tightly as possible into one bag, so that they effectively have the wrinkles pressed into them by the time I arrive at the venue. Whoops.

But I did have a good time. I got to chat with some friends who stopped by, and meet the vendors around me with a great deal more experience than I. I may even have met someone who can teach me how to spin if I ever manage to get my spinning wheel repaired.

One of the nice things about working for myself is that I can knit and mind a stall at the same time, once it’s all set up. That’s not something you’re generally allowed to do in a traditional retail setup. I find that it’s a great conversation starter. I managed to get about a third of a sock done that day.

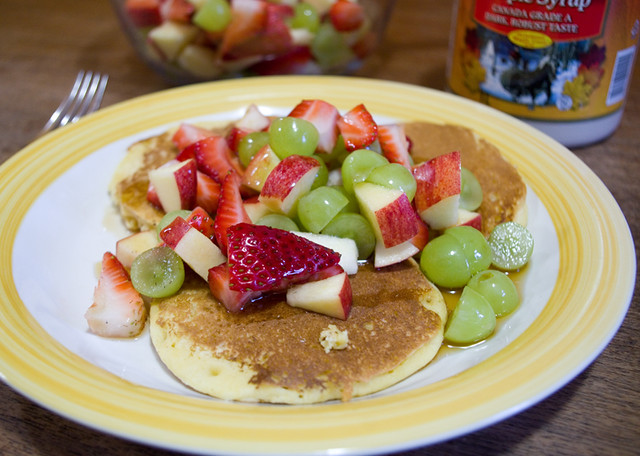
Since I was away all day working, my husband did have to make dinner which was, at the request of the kiddos, pancakes! Hubby had never actually made pancakes before, although I was sure that that was a basic thing that everyone around here knows how to make if they cook at all. My husband is an unenthusiastic cook at best, but he has learned the necessary skills. His pancakes turned out really lovely! Fluffy and delicious, and smothered with fruit and maple syrup.

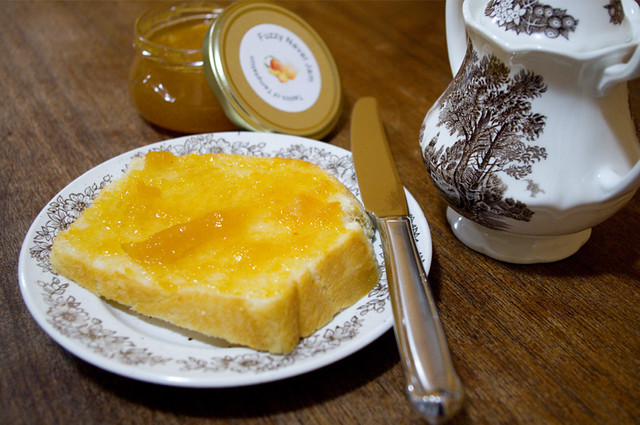
Speaking of syrup, apparently the sap has been running since that weird warm spell back in February, so the local tree farms should be getting a great harvest this year. Note to self: I need to pick up some more local maple syrup when I’m at Russell Flea again two weeks from now. I’m pretty sure it’s McCannell Craftwork was the farm that brought the syrup on Saturday, and I hope they’ll be back again.

My First Market!

Tomorrow will be my first ever flea market as a vendor, and I am so excited! It doesn’t matter that I’ve worked retail off and on since I was old enough to get a job, or that I’ve worked in a second-hand shop, or that I’ve put together what seems like dozens of successful garage sales. This is the first time I’ve run what is essentially my own little shop. I’m both excited and nervous, as if I’m prepping for a really important job interview. I really, really hope I don’t mess it up!

I’ve set up a trial run of my booth in my half-finished basement so that I can be sure that I have everything together that I’ll need. At the same time, I have to make sure I don’t take more than I need (although I’ll need a bit of overstock to replenish the table as the day goes on), since I have to cram everything in my little hatchback. It’s really a balancing act.

My first market is at Russell Flea, which runs this Saturday, March 24th from 9:00am to 3:00pm at Russell High School (982 N Russell Rd, Russell, ON). I’ll be in the atrium this week, straight down the hall from the main entrance, on the right (in an classy spot directly across from the bathrooms).

Basically, I’ll be taking my passion for found, free, and flea, and turning it on its head to work behind the counter. I’ll even be bringing a few upcycled creations of my own to put on the floor. (No pics of those yet, since they’re small furniture and I don’t have an appropriately large area to photograph them at home free at the moment.) So please wish me luck!

Excellent Potato Bread Recipe

I finally had a chance to try out one of the recipes from the 1877 The Home Cook Book that I was so happy to find on Saint Patrick’s Day! It was a very interesting exercise to try to recreate such an old recipe. Here’s the original text:

EXCELLENT BREAD
Mrs. Geo. W. Pitkin.

Four potatoes mashed fine, four teaspoons of salt, two quarts of lukewarm milk, one-half cake compressed yeast dissolved in one-half cup of warm water, flour enough to make a pliable dough ; mould with hands well greased with lard ; place in pans, and when sufficiently light, it is ready for baking.

You’ll notice that it gives no cooking time or temperature, no approximate yield, no idea the volume of mashed potatoes, how big a cake of yeast measures (and what kind of yeast — the book gives multiple recipes for how to make your own), or how much flour to use. I’m really glad this wasn’t the first loaf of bread I’d ever made! Although I guess part of the point of these recipes is that they assume that all readers will have a certain breadth of knowledge base.

As it turns out, this recipe makes 4-5 loaves, depending on the size of your loaf pan. I honestly didn’t even have a bowl big enough to mix all of the ingredients, so I had to stir everything in shifts. It all turned out quite well, though, so I thought I’d share my interpretation of the recipe. Hopefully it’s a little more easily-repeatable than the original; I’ve also halved the quantities in my version for ease of cooking in a modern kitchen. The end result is a white bread that is still a little heavier and more filling, due to the potatoes. It also stays moist much longer than a straight white loaf.

Excellent Potato Bread
Yields 2 large loaves

In a small bowl, mix together:
2 packages (14g) quick-rise instant yeast
1/4 cup warm water
Wait for yeast to activate; if it foams up, it is good to use.
While waiting for yeast, peel and chop:
2 potatoes
Peeled, this should yield about 265g of uncooked potato.
Place potatoes in a stove-safe pot, cover with water, and bring to a boil. Reduce heat to a simmer and cook until the potatoes are easily pierced with a fork. Alternately, you can cook the potatoes in a microwave-safe casserole: place potatoes in the dish, cover with water, and cook on high until they can be easily pierced by a fork, about 12 minutes. No matter how you prepare the potatoes, drain them once cooked and mash them until they are no longer lumpy. Set aside to cool somewhat.
In a very large bowl, combine:
4 cups warm milk
2 tsp salt
Stir. Add the yeast mixture and the potatoes to the mixture, stir well.
While stirring with a sturdy wooden spoon, gradually add:
8 cups flour
As the end of adding the flour nears, the mixture may become too stiff to stir with a spoon. If it does, it can be stirred with floured hands in the bowl.

Flour a flat surface and hands generously. Turn the dough out of the bowl, scraping if necessary. Knead the bread for about 10 minutes, until it is springy. If the dough is too sticky on the hands or flat surface, add a bit more flour, but add it gradually and only add as much as absolutely necessary. The dough should be moist but not sticky.

Oil or use cooking spray on a large mixing bowl. Form the dough into a ball and place it in the bowl. Cover the bowl with a clean, damp tea towel. Place the bowl in a warm, dry area with no drafts. Allow the dough to rise until double, about 1 hour.

Grease two loaf pans. If you use smaller loaf pans (8.5″x4.5″), they will end up with a “mushroom top” loaf like the one pictured. If you use larger 9.5″x5.5″ pans, the bread will be a more uniform shape.
Divide the dough into two even portions, form each into a loaf shape and put each one into its own loaf pan. Cover with a damp towel and allow to rise again in a warm, draft-free area until double, about one hour.

Near the end of the rising time, preheat your oven to 350°F (175°F). Bake for about 30 minutes, checking often near the end of that time to make sure that they do not overcook. Verify that the bread is done by removing them from the pan and tapping them on the bottom. When cooked through, the loaf should make a hollow sound. Remove the loaves from the pans immediately and place them on a wire cooling rack.

As with all bread, this kind is best served immediately. To keep it at its freshest, slice it only when it is about to be eaten. This bread will keep for four or five days if wrapped in a clean plastic bag. Make sure it is wrapped up only after totally cool, or it will go soggy.

First Day of Spring Fail

Yesterday was the first day of spring, which despite clear skies brought with it a morning temperature of -20°C (-4°F) with the wind chill. Even though it felt like the warmer weather had started to arrive a few weeks ago and we even broke out the grill, after teasing us a bit the temperatures dropped back down again. It’s unseasonably cold here, even for this part of Canada! Usually by the end of March Break we’re looking at some bare grass, at least. Six years ago, it was -25°C (77°F) on this very same day, which I will grant you broke a bunch of records… But the average is usually somewhere in between.


Yep, this snowman is over 1 story high — and he’s still decked out for Saint Patrick’s Day.

I guess I wouldn’t be so down about the weather (freezing temperatures mean no bugs, after all) if the rest of the day had gone better. Right before supper, Thing 1 knocked my camera off of the kitchen table and busted the motor on my primary lens. I am lucky that I have a backup salvaged from an old camera of mine, but I still have to do some testing to make sure the camera body is okay. I didn’t find out that I had a replacement until after we ate, though, so please excuse the cell phone camera pictures.

Honestly, though, I don’t think that a better camera would have made this meal look yummy. I used my new-to-me air fryer machine (a T-Fal Actifry) to make sweet potato fries using this recipe that I followed to the letter. The fries turned out tough and chewy and not at all fry-like. Not only that, but as soon as the sweet potato touched air, it turned all kinds of unappetizing colours. Usually I’d use an orange sweet potato, but the white-fleshed kind was the only one that they had at the grocery store today. Maybe the orange kind would be better — or even the purple kind? Or maybe I’m using the machine wrong, or it’s busted? It will take further experimentation to find out.

At least the burgers turned out tasty, if not what I’d intended. I made up the burgers using a bit of onion soup mix, and I topped them with a fried egg, which was actually pretty good. I’d wanted to top them with thin slices of avocado as well, but every single avocado in the package I bought just today was rotten inside. So that put the kaibosh on that.

All in all, I ended up with a barely palatable meal that Gordon Ramsay would not hesitate to roast. I was so disappointed. And it all took almost two hours to make from scratch.

Hopefully tomorrow will be better.

Chicken Pot Pie Noodles

Last night I wanted to try something new for dinner, but I didn’t want something that would take forever and a day to prepare. The perfect compromise was the Chicken Pot Pie Noodles recipe from Delish that came across my Facebook feed the other day.

It was as easy as promised, although it did take me a bit longer because I had to cook the chicken beforehand — but that was just a matter of throwing some chicken legs and thighs on a roasting pan, seasoning them, and putting them on a roasting pan at 350°F (175°C) for about 45 minutes. This recipe would be much faster if I had precooked chicken, and I think it would be a great way to use up leftovers. I had to make my version dairy-free, so I substituted margarine for butter and coconut milk for heavy cream. I’ve found in the past that these are good replacements, and they worked just as well as expected. There was a slight flavour of coconut to the sauce, which isn’t strongly spiced, but that didn’t bother me. Also, I used macaroni instead of egg noodles, just because that’s what I had in the pantry, and it worked just fine.

Would I make this recipe again? Most definitely! I think it’s a great addition to my weeknight repertoire.

Saint Patrick’s Day Thrifting

This past Saturday I spent the day with a good friend of mine down in the Glebe. We started with a Saint Patrick’s Day lunch at Patty’s Pub, where we had great food and conversation while we listened to the live band playing Irish folk music. Then we headed out to 613flea (a great urban flea market) just up the road in the Aberdeen Pavilion in Lansdowne Park. When we finished there, we browsed the Ottawa Antique Market, and then we rounded out our day by perusing a second-hand charity shop. I know it’s not the kind of thing that everyone’s into (heaven knows my husband has no interest whatsoever), but my friend and I had a fabulous time!

Of course, I did return home with a few treasures. I think my favourite one of the bunch is a copy of the 1889 (seventieth edition) printing of the 1877 volume The Home Cook Book, which was compiled by the Ladies of Toronto and Chief Cities and Towns in Canada as a fundraiser for the Sick Kids Hospital. From what I understand, this is the very first Canadian cookbook that was compiled by an organization to be sold in order to raise funds. It’s such a common thing to do these days (especially as it gets easier and easier to self-publish inexpensively) that most of us who like to cook have at least one of these in our collection — and have probably contributed to a few.

I’m really looking forward to diving into this book and trying to recreate some of the recipes. It’s going to be interesting, because the instructions are sparse and often vague as so many old cookbooks often are, since they assume a great deal of previous experience on the part of the reader. The book also refers to culinary techniques, measurements, and ingredients we don’t use any more. I mean, what is a quiet oven? Or a quick oven? Do we even grow Spitzenberg or Greening apples any more in Canada? When they talk about currants, do they mean dried or fresh? How much does a wineglass hold? Or a teacup? I’m going to be doing a lot of Googling, I tell you.

Now, I love the feel and smell of old books, but this is the digital age after all and the book is well out of copyright. It was actually archived online by the University of Toronto and the Toronto Public Library; you can check it out in all its glory here. Or if you’re like me and you don’t want your old books contaminated by kitchen spatter, when you’re cooking you can always pull up the digital version on your phone or tablet.

The fantastic old cookbook wasn’t my only find, though! I picked up an 8×10″ print of Carabara Designs‘ hand-lettered print of the “Do you want ants?” quote from the TV show Archer. I am constantly amazed by my kids’ capability to utterly destroy the kitchen with two pieces of toast, so I’ve been thinking this a lot lately.

The print has pride of place on the side of the cupboard above the kitchen counter peninsula, hopefully where the kids will see it. But kids being kids, they probably won’t even notice. Ah, well. I think it’s perfect, and it even matches the paint job. Now all I need is a coordinating print to go underneath.

Last but not least, I picked up some Fuzzy Navel Jam from Tastes of Temptation. This jam tastes just like summer, which is exactly what I need right about now. Honestly, I liked everything they had on offer, but this was the one that made me smile the most. Spread on a piece of fresh homemade bread, it makes a divine snack with a cup of tea!

Teacup Pin Cushion Tutorial

My kids are learning to sew, so I thought that it was time that they had pincushions of their own. I’ve seen teacup pin cushions around at flea markets and craft fairs, so I thought we’d make a go of whipping up some of our own. They’re really easy and right up the kids’ alwy, patience-wise.

Teacup Pin Cushion

Materials:
– 1 teacup (saucer optional)
– 1 square of cotton or cotton-blend fabric, about 3X as wide as the teacup’s top
– polyester fiberfill
– thread

Supplies Needed:
– fabric scissors
– needle
– hot glue gun & glue
– pins

1. It all starts with a teacup — but none of Grandma’s fine china! We bought ours for about $2.00 at a local charity thrift shoppe. If you’re not into tea, a coffee or espresso cup works well, or an egg cup, or even a sake glass. We even made one using a miniature terracotta pot (picked up for about $0.75 at a gardening supply store). Basically, it has to be an opaque container that you like the looks of that’s about the size of an old teacup, or smaller. You will also need to pick out a piece of coordinating fabric that’s about three times as wide as the mouth of your vessel.

1.B. OPTIONAL STEP: If you’re very crafty, you can embroider a design on your fabric at this stage.

2. Using a pair of fabric scissors, cut your fabric into a circle about three times as wide as the opening of your teacup. It doesn’t have to be perfect, since this end will be hidden inside the bottom of the cup where nobody will ever see it.

3. Using a running stitch, stitch around the outside edge of the circle, about 1cm from the edge. Use a sturdy thread, but don’t worry about the colour, since this will be hidden as well. Tie a knot at each end of the thread, but do not stitch that knot into the fabric.

4. Making sure that the fabric is inside-right, pull the thread taut to gather the fabric, but do not tie a knot. This will make a little pouch.

5. Stuff the pouch firmly with fiberfill.

6. Draw the thread as taut as possible and tie it off securely. This will create a small cushion.

7. Stuff the cushion into the teacup, making sure that the end with the stitching and the gathering is at the bottom of the cup.

8. Affix the cushion inside the cup using hot glue. I found that I got the neatest results by pushing the fabric down below the edge of the cup, and then running a bead of hot glue quickly about 0.5cm lower than the edge of the cup. Then I carefully released pressure on the cushion until it sat at the height I wanted, holding it in place while the glue dried. Otherwise, the cushion kept trying to puff much too far out of the cup.

9.B. OPTIONAL STEP: Using hot glue or by sewing, decorate the pin cushion. You can add a border of ribbon or trim around the edge of the cup to conceal the glue. Buttons, lace, small pompoms, googly eyes, felt cutouts, silk flowers… If you’re so inclined, this is a great time to be creative.

And that’s really all there is to it!

As for our last March Break craft, Thing 2 went with a more contemporary look.

Whereas I made mine in a little flower pot. I created the floral element by sticking sewing pins through little fabric flowers bought in a confetti-like pack from the dollar store.

And Thing 1 used the fabric flowers slightly differently, pinning them into place with her pincushion’s pins.

String Art Tutorial

I’ve been wanting to try this craft with my girls for a while; it is a great way to learn how to use a hammer and nails! I never did this as a child, but my little brother did, and his string art masterpiece hung in his room for years. The nice thing about this craft is that you can make it simple or complicated, depending on the skill level of the people doing it. We went with really simple, perfect for a busy day’s work!

String Art

Materials:
– 1 piece of 1/2″to 3/4″ thick wood, approx 12″ by 12″ (pine preferred)
– 1 colour of acrylic paint
– 20 (or so) 1″ long common framing nails
– scraps of thin yarn or string
– sawtooth picture hanger & screws

Supplies Needed:
– fine-grain sandpaper
– paintbrush
– hammer
– wooden clothes pin
– screwdriver

1. We started with a 12″ by 12″ piece of 1/2″ pine shelving left over from an old project. Pine is inexpensive and easy to hammer nails into. Such a small piece can be often be found inexpensively (or free) off-cut from a home improvement store. If you’re not handy with a saw, most reno stores will cut wood to size if you ask.

2. Using fine-grain sandpaper, give the piece of wood a quick once-over to remove any splinters.

3. You can leave the wood unfinished (in fact, a lot of string art is done on gorgeous, rustic barn board), but my girls opted to paint theirs. Two coats of crafting acrylic turned Thing 2’s board an eye-searing pink, while Thing 1 chose a more muted lavender. Don’t forget to cover your work surfaces with paper or plastic if you care at all if it gets stained! (Graffito from the kids is optional.)

4. Nail in the nails in the pattern of your choice. My kids went for an abstract creation of their own design. However, any number of designs and shapes can be downloaded off of the Internet, printed out, and then taped onto the top of the wood. You can then nail along the edges of the design, and rip the paper away when you’re done. Alternately, you can freehand a design in pencil and then paint over the marks before you add the string.

Since the kids hadn’t done much hammering with full-sized hammers before, we used wooden clothes pins to hold the nails upright while they got them started. This keeps their fingers away from the hammer, at least until they have a little bit more precision! (It stunned Thing 1 that I could hold a nail while hammering without smashing my fingers.)

Thing 1 went with a free-form design.

Thing 2 went with a more geometric plan.

5. Tie a few knots around one of the nails, and then go to town wrapping the string around the nails!

6. If you’re planning on hanging the string art on the wall, using a screwdriver, attach a sawtooth picture hanger with screws to the top back of the piece. Alternately, it can be propped on shelf, or held up by a mini easel.

Salt Dough Creations

A friend of mine bought me a copy of the Better Homes and Gardens Treasury of Christmas Crafts & Foods for Christmas, and leafing through the project ideas therein brought back many memories of the kinds of crafts that I did when I was growing up. One of the ones that stood out the most was the salt dough Christmas ornaments. Although I never made any in the patterns suggested by this book, I did make some simple ones through Brownies and Guides, and I had a lovely little girl in a red dress as part of my ornament collection until she eventually fell apart. I thought that my kids might enjoy playing with dough that becomes a permanent creation for a change. (If your kids would basically like to do the same exercise but come away with something that they can eat, I would highly recommend Cookie Monster’s Famous Cookie Dough instead.)


Rolling out the dough and cutting it out with cookie cutters and Play Doh cutters.

I did my due Googling, and I discovered that although the style of ornament that people make has changed a bit over the years (especially when it comes to the choice of colours used), the actual technique remains the same. Multiple books and many sources on the Net stick to the basic recipe of:

– 2 cups flour
– 1 cup salt
– 1 cup water

Which you then knead together to create a stiff dough. You then cut out/shape your designs and lay them on parchment paper on a cooking tray. Advanced creations can take a long time, a lot of skill, and a great attention to detail. However, when you’re making crafts with younger children, quick and easy cookie cut-outs are the name of the game! As a bonus, since the dough is so cheap to make and is 100% biodegradable, if the kids proclaim themselves done after having made very few cutouts, it’s not too big of a deal.

Salt Dough 2//embedr.flickr.com/assets/client-code.js

After shaping, you put the salt dough creations in the oven at 200°F (93°C) for… Well, that’s where directions vary. I think it all really depends on the thickness of the final pieces. I’ve seen it anywhere from two to eight hours, so I kind of guessed at three, which worked out okay. I think that what everyone agrees on is that you don’t want to bake or brown the dough, you just want to remove all the moisture.

Then the cut-outs need to be cooled on a cooling rack, which doesn’t take all that long, really, since they weren’t terribly hot in the first place. We left them overnight to hopefully remove the last of the moisture. It’s not like you have to worry about them going stale, after all.

Then it was time for paint! I have what seems like a million colours of acrylic and many different paint brushes, all from the dollar store. If you don’t have a stash of paint and want to keep costs low, stick with red, yellow, blue, black, and white. The kids can mix any colours they want with the primary ones, and it’s a good lesson in colour theory.

To be honest, my girls ran out of patience with the fiddly details, so the painting will have to be completed another day. Since I had to make dinner, I didn’t get a chance to finish painting the ones that I made either, so we’ll have to sit down and do them all together tomorrow. I really liked how the ones with the impressions turned out, though. The girls used rubber stamps, carved rolling pins, and even leaves of plants to create textures.

Of the ones that I painted, I am particularly happy some of the simplest: the Easter bunnies, made using a cookie cutter and a little ball of dough for the tails.

The next step is to seal salt dough, which I’d prefer to do with spray-on acrylic, so that will probably have to be done out in the garage once it warms up a bit. I’m told it can also be done with Mod Podge or PVA glue, both of which I own, but I’d like to test them first to see how badly they smudge. Then the ones with holes will become ornaments, and the ones without holes will have a magnet (also from the dollar store) glued on the back to become fridge magnets.

Tie Dyed Pillow Cases

Tie dyeing with the kids is really something that I prefer to do in the summer when I can throw the kids outside in their bathing suits (which are synthetic and don’t absorb dye) to minimize the mess indoors. This time of year, with temperatures hovering around freezing and snow still covering the ground, that’s not exactly an option. Instead, the girls worked in their bathing suits and socks (warm feet are important) in the kitchen, over the metal sink, and we hoped for the best.

In the spirit of keeping things as cheap as possible, we used fabric we already had — four old, plain cotton pillow cases. We also bought the dye at the dollar store. So far, this are the cheapest kits I’ve found locally, with even Walmart’s selection starting at about $11.00 for a two-colour Tulip-brand kit that only makes three items. For six colours, you’re looking at upwards of $25.00. At Dollarama, they sell their own Crafts brand three-colour kits for $4.00 apiece, and we bought two in different colours. But would these kits work as well as the more expensive ones we’d tried?

When it comes to the supplies included in the kit, I found that they were more or less the same as other brands. They contained everything we needed except the water and the plastic to wrap the fabric as it sat, which is standard. Slightly higher quality gloves would have been appreciated, since they did leak and now the kids have splotches on their hands in places, but that seems to be standard too (just like the ones that come with hair dye). The instructions were clear and concise, and even had a brief photo tutorial for how to make different kinds of designs. We used the spiral (left) and bullseye (center and right) techniques on the kids’ pillowcases. (If you need more information about how to tie dye there are a million sites out there, but the Tulip site has some great tutorials that will work with any brand of dye.)

The kit did contain soda ash, which is necessary to pre-treat the fabric to retain vibrant colours. However, the directions did say that the dyes could be used without pre-treatment, but they would come out more pastel. I let the kids choose between waiting a bit longer to dye so they could have bright colours, or to do it right away and have lighter colours, and not surprisingly they chose to go with the route that required the least amount of patience. Despite the dire warnings of the packaging and articles online, after the first rinse the colours remained vibrant (above).

After a run through the washer and dryer, the colours did fade a bit, and I expect that they will continue to do so throughout their lifetime, but I remain happy with the final product. The kids are thrilled (according to Thing 1, the pillow cases are “Awesome!”), and since the project was for them, I say it was a success. (Bottom left and top right were done in the spiral techniques, top left and bottom right were done using bullseye — more techniques here.)

I will say one thing, though: each package of three colours claims that it contains enough dye for up to eight T-shirts. I guess that could technically be true, if you were to use very small shirts, and if you didn’t want a lot of colour saturation or variation in your design. Two packs, for us, did four very saturated single-bed-sized pillow cases (which I would say are about the same size as a small adult T-shirt), with enough left over to do maybe one more. That’s five items out of two packs of dye, when it claims we could make sixteen items. So keep that in mind when you decide how many items to prep. Even so, that’s five items in six colours for $8.00, compared to Walmart’s three items in two colours for $11.00, so Dollarama remains the cheapest place in town to buy supplies for tie dye crafts.