But What Is It? The Sequel

Over this past summer I found a tool at the cottage my parents were renting and I couldn’t for the life of me figure out what it was. After posting But What Is It? and But What Is It? Part 2, the general consensus was that it was some kind of homemade chopping tool, probably to aid someone who had limited hand strength.

Today I have a new quandary. I picked up a piece of Tupperware when I bought a big box of second-hand plastic containers, and I have no idea what it is. Here are some photos for your reference:

As you can see, it’s actual Tupperware brand (around here we often call any plastic container “Tupperware”, no matter the brand, so I had to specify). However, it doesn’t have a mold number, so it can’t easily be looked up online. Because of this, I suspect that it may be part of a larger item. Because of the colour/texture, I suspect that it’s of relatively recent manufacture, not vintage. It’s solid plastic, and one end tapers sharply, scraper-like. It measures 19.8cm (7 3/4″) at its widest point and is about 13cm (5″) tall at the highest point at the center of the arch.

I’ve asked my friend who is into collecting Tupperware in a big way, and she has no idea. My Googling has yielded nothing. Anyone? Anyone? Bueller?

EDITED TO ADD:

Karen and Peter over on my Facebook page pointed me in the right direction: it’s a food scoop! Its meant to scoop up food after you chop it so it’s easily transferred from food to pan. This makes sense, because the scoop was originally packaged with a five-slot knife block that had an attached recipe card holder. There’s a good example over on eBay. Mystery solved!

Bulgogi Beef Bowl

Yesterday Thing 2 was home from school with a cold, and Thing 1 returned from school at the end of the day complaining of a sore throat. Since my day was primarily taken up with caring for the both of them, I needed to make an easy dinner, one that didn’t take a lot of supervision. I also needed to make dinner from what I had in the house, because if taking the kids to the store can be a chore, it’s a thousand times worse when they’re sick. And let’s be honest, nobody else at the store appreciates me bringing my little disease vectors along.

I rooted through my pantry and found a bottle of Sempio Bulgogi Marinade, which to be honest I had completely forgotten about. I’d tried their Kalbi sauce a while back and really liked it, so I had high hopes for this marinade. It was a bit more liquid than I’d expected, but otherwise it was lovely. I half-thawed some beef from the freezer, sliced it thin, then marinaded it (and thawed it the rest of the way) over the course of an hour. Then I boiled up a pot of rice (basmati, which I know is more of an Indian thing than Korean, but it’s what I had on hand), steamed bok choy in the microwave, and then layered them in a bowl with the beef on top. If I’d thought about it I would have topped it with toasted sesame seeds, which I do have in my spice cupboard, but I forgot they were there! I had a little extra marinade at the bottom of the pan, which I poured over the bowl. This drizzled through the beef slices and onto the bok choy and rice, making both very tasty.

Things don’t bode much better for the kids being well tomorrow, so I’ll have to think of another pantry-friendly, healthy, hopefully-tasty meal for tomorrow…

Bread Machine Fluffy Herb Bread Recipe

I’ve been meaning to post this recipe for a while, but I like to accompany my recipes with a picture, and my family keeps cutting into the loaves before I get a chance to take a photograph! This recipe is for a fluffy, high-rising loaf that stands up well on its own, but really shines when it is speckled generously with fresh or dried herbs. As a bonus, this bread is also dairy-free, nut-free, vegetarian, and can be made vegan with the proper sourcing of ingredients. Because of the herbs, it is a very savoury bread, and pairs well with eggs and meats — especially as toast with dipping eggs, and as sandwich bread for leftover roast or cold cuts.


A 2lb loaf made with rosemary.

Bread Machine Fluffy Herb Bread
Yields one loaf

A note about loaf size:
Quantities for a 1.5lb loaf are in bold, quantities for a 2lb loaf are in bold purple. However, this loaf is very light and fluffy — so it expands a lot. Use the settings for a 1.5lb loaf if your machine goes up to 2lbs; only make a 2lb loaf if your machine has the capacity to make a loaf that is 3lbs or greater.

A note about bread machines:
Every bread machine comes with an instruction booklet (most of which are also generally available online) that will specify the order that ingredients should be added. Mine says that liquids should be added first, then flour, then yeast. When preparing this recipe, the instructions for your specific bread machine should take first priority, so if your manual says to add the ingredients in a different order, do so.

Into the bread machine pan, pour:
1 1/4 cups (1 1/2 cups +3 Tbsp) water
2 Tbsp (2 Tbsp) olive oil
Over the liquids, sprinkle:
3 cups (4 cups) all-purpose flour*
Ensure that the flour covers the liquids entirely.
Into opposite corners of the pan, add:
1 Tbsp (1.5 Tbsp) sugar
1 1/2 tsp (2 tsp) salt
Create a well in the flour at the center of the bread pan, being sure not to go all the way down to the liquid. Into the well, add:
2 tsp (2 tsp) active dry yeast
Over the entire contents of the pan, sprinkle:
2 Tbsp (2 1/2 Tbsp) dried OR 4 Tbsp (5 Tbsp) chopped fresh herb of choice**

Set the bread machine to the basic/normal/white setting, with a light or medium crust to your preference. Press start. Running this cycle should take about four hours.

Remove the bread at the end of the baking cycle. Turn it out of the pan onto a wire rack to cool, making sure that the kneading paddle(s) are removed from the bread. Serve immediately (being careful to cut gently when it is warm), or when cool. Do not wrap the loaf or put it into a container until it is entirely cool, or it will become mushy.

* For a healthier loaf, substitute half of the all-purpose flour for whole-wheat flour. A whole wheat loaf will not rise as high, however.
**Suggestions: rosemary, dill, oregano, basil, chives, thyme, or sage.

Avocado Pasta Sauce: Second Try

Yesterday was another busy day, followed by a trip to Costco as soon as the girls got home. The trip took over two hours; I can never get out of that place in a reasonable amount of time! Luckily, Thing 1 and Thing 2 were very patient, which couldn’t possibly have anything whatsoever to do with the plethora of food samples that they were able to try. By the time I finished at the store and drove home, I had eaten significantly into the time that I usually use to prepare dinner. Something quick and easy was in order.

I have to say that the Avocado Pasta Sauce that I wrote about earlier this week is definitely a quick and easy dish. In the time that it takes to boil up the pasta (assuming you’re using dried — fresh stuff only takes a couple of minutes), the sauce is done. Since the sauce only requires prepping a few veggies and running them through a blender, it’s also very simple. This time I took my own advice and added a generous handful of fresh basil and cilantro to the mix, along with a bit more pasta water to thin it all out. I was much happier with the flavour this way — it wasn’t so plain! I sliced a few cherry tomatoes and tossed them in with the pasta and sauce as well for a bit of an acid zing. I also discovered that a generous shake of Parmesan cheese tops this dish nicely. (I’d suggest using a bit more salt and pepper if you’re going to forego the dairy.)

I served the avocado sauce on penne basically because it was the only wheat-based pasta that we had in the house (I didn’t think it would go terribly well on vermicelli or soba noodles). For the meat, I just carved up a rotisserie chicken that I’d picked up at Costco while I was there. It was a tasty and satisfying meal that was whipped up in the amount of time that it takes to boil some pasta. Not bad!

New Toy

So I have a bit of thing for hunting for interesting vintage kitchen gear. Part of this is the love of the hunt, part of it is because I love the look of older pieces, and part of it is because I actually use a lot of these things and I just can’t afford to buy them new. And, let’s face it, the phrase “Reduce, Reuse, Recycle!” was beaten so thoroughly into my head as a child that I just can’t shake it free. My new toy is a case in point: a Oster Regency Kitchen Center, circa 1983.

Oster Kitchen Center Slicer Shredder Salad Maker
Kitchen Center with slicer/shredder/salad maker/French fry cutter attachment and four cutting discs (shredder, French fry cutter, thick slicer, and thin slicer).

I adore the styling of the KitchenAid and Smeg stand mixers, but heaven knows that I can’t afford one. I do have a beautiful Dormeyer Princess mixer, but so far I only have the mixer attachment for it. My new-to-me Kitchen Center has slicer/shredder/salad maker/French fry cutter, mixer/doughmaker, and blender attachments. Actually, it originally came with a grinder as well, but that part went missing sometime in the last 35 years.


Kitchen Center with blender attachment.

Also missing: the mixing bowls! Well, two bowls that looked about right came with it, but it turns out that they weren’t the correct ones. I shopped around at my local thrift stores and found a total of four that work for about $20, which is reasonable when you consider they’d be about $70 on Amazon.

I was a little worried when I took the machine apart to clean it and realized that some of the gears are plastic. I have a bad habit of putting too much strain on my machines and stripping plastic gears. I’ve ruined a couple of blenders that way. Luckily, the gears for the blender attachment are all metal. We’ll see if the other attachments’ gears are durable enough to withstand my not-so-tender ministrations.


Kitchen Center with mixer/dough maker attachment.

I have to admit that the part I am most enthused about is the stand mixer/dough maker. So many recipes and instructional videos just call for you to use one. I mean sure, it’s possible to do it all by hand, but sometimes I just don’t want to put in all that effort. Also, it can sometimes be a bit tricky to translate directions (especially timing/consistency) from machine mixing to hand mixing.

Apparently there were a whole lot of other attachments that were additional, optional purchases. The one that interests me the most was the pasta accessory, which included five processing discs for thin or thic spaghetti, lasagne, rigatoni, and fettuccine. Unfortunately, it looks like it attached to the (missing) grinder. So I’ll be keeping an eye out for these pieces during my future thrifting expeditions. There may be homemade ramen in my future yet!

Ice Day

Yesterday was what we generally call a “snow day” around here, as in the winter weather was so terrible that school buses were cancelled and the kids stayed home from school. But it was really more of an “ice day”, since it had snowed the day before and then the temperature jumped up so we could have freezing rain coating that layer of snow, and then just plain old rain creating puddles on top of it all. It was a mess. It was definitely an ice storm, if not the ice storm.

With the kids home from school and it being too dangerous to really get out of the house (that being the whole reason for the bus cancellations in the first place), I found myself trying to wrangle two active children with increasingly high levels of cabin fever. The day was taken up with playing, crafting, snacking, NERF target practice, and video games. When the weather cleared up a bit, the girls went outside with their father to clear the driveway while I cooked supper (no mean feat after the plough had been by, leaving a burm of ice and slush between our house and the road).

On days like this, you really have to cook with whatever happens to be in the house. My pantry and freezer are well-stocked, and although it would likely take us weeks to even feel hungry feeding on those items alone, I was craving something a bit fresher. I Googled to find some recipes for pasta sauce that I could make without hitting the grocery store, and I found PureWow’s Spaghetti with Avocado Pasta Sauce. I thought that it would be ideal because it is a sauce with a creamy texture (which I adore), but without any actual dairy products.

I served the sauce over cooked spaghetti squash, with baked chicken legs (sprinkled with my usual garlic powder, sage, rosemary, thyme, summer savoury, and sea salt). I only realized after I took the picture exactly how unappetizing the sauce ended up looking, especially since I couldn’t toss it in the “noodles” without them falling apart. Ignoring the other gross things it could look like, the shine on the sauce makes it look like icing or a glaze, which it did not taste like at all. Flavour-wise, it was like eating guacamole, without the heat of peppers. Honestly, it was a little bit bland. I’d like to try this recipe again, but on actual pasta, with some fresh herbs thrown in (Googling has suggested basil and cilantro), and possibly some sliced cherry tomatoes.

At least dessert was a success! I heated a frozen apple pie from Mom’s birthday dinner (I always make two pies when I bake, one for the event and another to throw in the freezer for future use). When reheated from fully frozen, it usually takes about an hour in an oven at 350°F. I served the pie with a scoop of non-dairy vanilla “ice cream” for me and whipped cream for everyone else. There were no complaints on that score!

Double-Layered Tuque Pattern

I finished up a second of my extremely-warm double-layered winter hats the other day, this time for Thing 1, and I thought I’d share the pattern. It’s a pretty easy one, as such things go. It involves the basic techniques of casting on, casting off, knitting, purling, increases (k1fb — knit one front and back), decreases (k2tog — knit two together), and knitting in the round (I prefer the magic loop technique, but whatever you are most comfortable with is fine). Don’t let the seemingly long pattern deter you! It’s mostly because the pattern contains a flat-brim and a ribbed-brim version.

A note about sizing: this hat is made to fit my 23″ head with room for a ponytail or other hairdo underneath. I’m no Brent Butt (who claims to have a 27″ head), but my head’s still large enough that it generally falls outside of the women’s hat sizing category and smack-dab into the men’s. Don’t worry, this pattern is adjustable to the size that you want it; instructions are below.


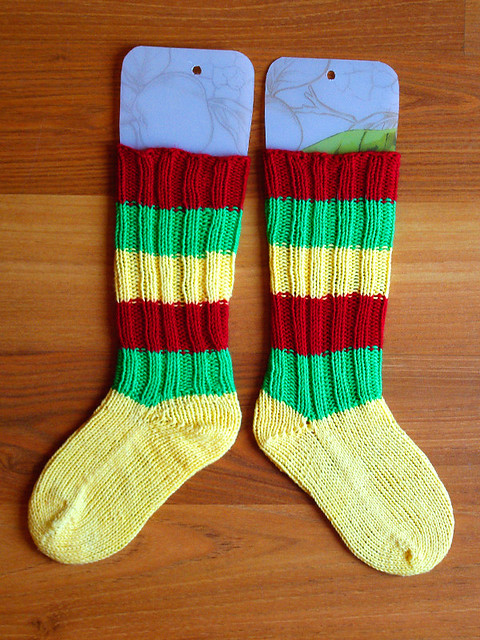
Left: plain brim hat knit in Polo Stripe colourway
Right: ribbed brim hat knit in Favorite Stripe colourway

Double-Layered Tuque
Adult male size, fits 23″ to 24″ circumference head

Materials:
– one 141g (5oz), 215m (236 yds) ball of Red Heart Super Saver Stripes yarn (100% acrylic)
– for ribbed-brim hat only: scraps of contrasting yarn for stitches & pompom
– one set of 5mm (US 8, UK 6) circular knitting needles in a length comfortable for the magic loop method (I prefer 120cm/47″ or longer)

Gauge:
– 21 stitches and 27 rows in stockinette stitch = 20cm x 20cm (4″ x 4″) square on 5mm (US 8, UK 6) needles

Instructions:

Cast on:
– Cast on 18 stitches (flat brim) OR 24 stitches (ribbed-brim).
– Place half of the stitches on each half of the circular needle so as to use the magic loop method.
– Join to work in the round, being careful not to twist.
– Knit one row, placing a stitch marker after every third (flat brim) OR fourth (ribbed brim) stitch. This will divide your work into six sections.

Increase the Crown Exterior:
– First row: *Knit until one stitch before first stitch marker. K1FB on the stitch before the stitch marker. Repeat from * until row is complete. (Every row like this will increase your work by 6 stitches.)
– Second row: Knit.
– Repeat first and second rows until you have 57 stitches per side (flat brim) OR 60 stitches per side (ribbed brim)

SIZING NOTE:

This is where you can adjust for head size. Once you have established your gauge, which you can do either with a swatch or by measuring your stitches as you go, you can calculate how many stitches you will need in total. Use one of the following formulae, depending on whether you’re measuring in metric or imperial:

(Head Circumference + 2.5cm) X Number of Stitches per CM = Desired # of Stitches

OR

(Head Circumference + 1″) X Number of Stitches per Inch = Desired # of Stitches

Then, round the stitch number up to the next multiple of six. It gets a bit more tricky for the ribbed brim version, which must also be divisible by four.

Knit the Body:
– Use a piece of differently-coloured yarn or a safety pin to mark the row where the increases end.
FLAT-BRIM:
– Knit until body measures 9cm (3.5″) from end of increases.
– Remove increase marker.
RIBBED-BRIM:
– Knit until body measures 5cm (2″) from end of increases.
– K2, P2 for and additional 3.8cm (1.5″).
– Remove increase marker.

Decrease:
FLAT-BRIM:
– Divide the number of stitches on each needle by three, and place a stitch marker after each group. Knit the next round, knitting two stitches together for the two stitches before each stitch marker. There should be 54 stitches on each needle.
RIBBED BRIM:
– Divide the number of stitches on each needle by two, and place a stitch marker after each group. Knit OR purl two stitches together, depending on what that stitch should have been in the normal order of K2, P2. There should be 58 stitches on each needle.
– Use a piece of differently-coloured yarn or a safety pin to mark the row where you made these decreases.

Knit the Body Lining:
FLAT BRIM:
– Knit until interior body measures 9cm (3.5″) from decrease marker.
– Remove decrease marker.
RIBBED BRIM:
– K2, P2 for 3.8cm (1.5″) from decrease marker.
– Knit for an additional 5cm (2″).
– Remove decrease marker.

Decrease Lining:
– Divide the number of stitches on each needle by three. For the flat-brimmed hat, unless you have adjusted for size, that means each group should be 18 stitches. For the ribbed-brim hat, the number will not be even. If you have not adjusted for size, divide the stitches 19-19-20. If you have adjusted for size, try and make the groups as even as possible.
– First row: **Knit until two stitches before first stitch marker. K2tog on the two stitches before the stitch marker. Repeat from ** until row is complete. (Every row like this will decrease your work by 6 stitches.)
– Second row: Knit.
– Repeat first and second rows until you have 12 stitches per side (flat brim) OR 18 stitches per side (ribbed brim).
– Cast off, leaving a long tail.

Finishing:
– Run the tail of yarn through the cast off stitches and draw tight, tying a secure knot.
– Run the other tail of yarn through the cast on stitches and pull tight, tying a secure knot.
– Fold the lining into the exterior of the hat so that the cast off and cast on stitches touch, back to back.
– With a few stitches of one of the yarn tails, secure the two ends of the hat together at the point. Tie one tail to the other and pull them between the two layers of fabric.
– Create a pompom out of the leftover yarn (flat brim) or out of scrap contrasting yarn (ribbed brim). Stitch it to the exterior of the peak of the hat.
– About 1cm (about 0.5″) from the bottom edge of the hat (flat brim) OR along the edge of the ribbing (ribbed brim), stitch leftover/contrasting yarn every second stitch, affixing the lining to the exterior of the hat. Then run a piece of leftover/contrasting yarn through these stitches, creating a continuous line. Make sure that these stitches are not too tight, so as not to be uncomfortable around the ears. Tie off the yarn and run it between the two layers of fabric, snipping off any extra if it protrudes.

As usual, should you note any errata in this pattern, or if any instructions need further clarification, please let me know so that I can fix it and/or make my instructions more clear!

Frozen Ramen

I love fresh noodles. I am endlessly fascinated by videos like the ones about making thread-thin suo noodles or precisely-cut Chinese spinach noodles or seemingly-effortless hand-pulled noodles (emphasis on “seemingly”). In Japan, I was lucky enough to be able to try fresh ramen and, I think, udon, but there may have been a bit lost in translation.

Sadly, it’s hard to get fresh noodles of any style around here. There are a couple of specialty restaurants that make them, but for home use the closest I can get is refrigerated ones from the grocery store — and that’s only European styles. So until someone teaches me how to hand-pull noodles, or until I can afford an automatic pasta maker (or at the very least a hand-cranked pasta machine), I’m stuck with frozen or dried noodles.


Frozen ramen that my husband prepared, topped with cooked shrimp, dried shrimp, baby bok choy, and soft-boiled eggs.

The consistency of dried noodles doesn’t seem to bother my husband. Sure, he likes freshly-made pasta on the few occasions that we do get it, but he doesn’t crave the chewiness and strength of well-made ramen or udon. When he cooks ramen for dinner (and he always uses either instant broth or my homemade broth from the freezer), the consistency of the noodles doesn’t even cross his mind.


Frozen ramen that my husband prepared, topped with cooked shrimp, sliced avocado, baby bok choy, and soft-boiled eggs.

That being said, he is willing to go along with my conviction that there are much better things out there. To that end, we’ve been trying out the other brands of ramen that are locally available, which admittedly aren’t very many. We started with dried noodles — not the ones in the instant noodle packets, but something very similar. The last two meals my husband made used Nissin Frozen Ramen Roodles in Artificial Pork Flavour. The noodles were a bit better than the dried kind, but not by much. The broth mix that went with the noodles actually had less flavour than the packets that come with instant noodles (and so far as I can tell they had just as much sodium). I think the lack of punch is funny considering that Nissin is the same company that makes our family’s preferred brand of instant noodle packet. If I have to eat a just-add-water soup, I prefer their Tonkotsu Artificial Pork Flavour with Black Garlic Oil.

So I guess this frozen ramen was overall a bit better than the dried kind, but only a bit. I have another variety in my freezer left to try, though, before I head back to T&T to see if they have any others.

As an aside, did anyone else use to eat dried ramen as a kid without cooking it first? It makes me cringe in retrospect, but we used to sprinkle the dried sauce packet over the top and eat it as is. I was reminded of this recently when I noticed that one of the local grocery stores had instant ramen on sale for 27¢ a packet, and I realized how happy this would have made me as a child, or as a broke college student for that matter. How my teeth survived unbroken I’ll never know.

Personal Pizza

I’ve been craving pizza lately, which is pretty much a no-no because of the issues that my digestive tract has with dairy. However, to my everlasting joy, I’ve discovered that I can eat lactose-free cheese so long as I don’t go overboard, since cheese is also quite greasy, especially when melted. Since none of the pizzerias around here carry lactose-free cheese as an option, I thought that a “make your own pizza” evening was in order.

It didn’t look spectacular because I put the toppings under the cheese, but it tasted great! I started with the dough from the Two-Cheese Pizza recipe on page 170 of Betty Crocker’s Best Bread Machine Cookbook (1999). This made enough for one 12″ pizza or four 4″ or so thin-crust-ish pizzas. (Next time I do this, I’m doubling the recipe.) You can’t actually cook pizzas in the bread machine, so I rolled out the dough into individual crusts and everyone topped their own. I used Healthy Veggie Tomato Sauce that I had in the freezer as the sauce, although I did simmer it a little to reduce it a little bit. I topped my pizza with ground beef and crumbled bacon, along with a few cremini mushroom slices. The rest of the family had theirs with more traditional mozzarella, but since cheddar was the only kind I could get lactose-free, I went with that.

I’ve tried Jamie Oliver’s Quick Family Pizza in the past, and although the kids liked it, one of the things I discovered about myself is that I’m not a big fan of the taste of self-rising flour. I think it’s just a little too salty for me. At any rate, I like the yeast dough a great deal more, and it’s just as easy as the quick bread version if I use the bread machine. So I think I’ll stick with this kind of dough for future pizza iterations.

Smelly Socks Pattern

Way back when Thing 1 was only three years old and not reading by herself yet, her favourite book for quite some time was Smelly Socks by Robert Munsch (2004). I must have read that book to her a thousand times. I was raised on Munsch classics like The Paper Bag Princess Love You Forever, so I didn’t really mind.

Smelly Socks tells the tale of a girl named Tina who begs her grandfather to take her across the river to a big sock store to buy some fancy socks. She finds herself the perfect pair of red, yellow and green socks, and she cries, “Socks! Socks! Wonderful socks! I am NEVER going to take them off!” Of course, the longer Tina wears the socks, the smellier they get, until her friends get fed up and drag
her down to the river to give those socks a good washing.

Thing 1 wanted Smelly Socks of her very own, so I just had to knit her some. (You can see the titular socks on the cover of the the book.) Over the years, those socks were worn by both of the girls, and they still never wore out! Since they’re much too small for either kiddo any more, they’re currently stored in a box of keepsakes. I thought I would share my old pattern for the socks so that other people can make keepsakes of their own.

Smelly Socks
Preschooler size; approximately children’s size 8 CDN/US

Materials:
– one ball Mandarin Petit in Yellow 2004 OR Goldenrod 2315
– one ball Mandarin Petit in Cardinal 4418
– one ball Mandarin Petit in Green 8017
– one set of 3.25mm (US 3, UK 10) circular knitting needles in a length comfortable for the magic loop method (I prefer 120cm/47″ or longer)

Each ball of Mandarin Petit is by Sandnes Garn of Norway is 100 % Egyptian 4ply cotton, weighs 50g (1.764oz), measures 180m (196.85’), and is machine-washable (air dry flat). A different yarn of the same gauge may be substituted to yield the same results.

Gauge:
– 16 stitches and 20 rows in stockinette stitch = 5cm x 5cm (2″ x 2″) square on 3.25mm (US 3, UK 10) needles

Instructions:

Cast On:

– Using the YELLOW yarn and the magic cast-on for toe-up socks technique, cast on 24 stitches divided onto two needles (12 stitches per needle).
– Knit one round. Warning: Using the magic cast-on, the cast-on loops on your second needle will be twisted. To untwist, knit the stitches on this needle through the back of the loops on the first round only.

Shape toe:
– Round 1: On each needle, K1, M1, K to within last stitch on the needle, M1, K1.
– Round 2: Knit
– Repeat these two rounds until there are 40 stitches on your needles (divided 20-20).

Make instep:

– Knit every stitch in the round until sock measures 11cm from cast-on edge to end
to the last knit stitch.

Arrange heel stitches:

– Knit across 1st needle. The heel will be turned on the 20 stitches of the 2nd needle.

Set up short row heel:

– 1st row: (RS) K19. Move working yarn as if to purl. Slip 1. Turn.
– 2nd row: (WS) Slip 1. This will wrap the yarn around the first, slipped stitch. P18. Move working yarn as if to knit (“wrap”). Slip 1. Turn.
– 3rd row: (RS) Slip 1. K17. Wrap. Turn.
– 4th row: (WS) Slip 1. P16. Wrap. Turn.
– 5th row: (RS) Slip 1. K15. Wrap. Turn.
– 6th row: (WS) Slip 1. P14. Wrap. Turn.
– 7th row: (RS) Slip 1. K13. Wrap. Turn.
– 8th row: (WS) Slip 1. P12. Wrap. Turn.
– 9th row: (RS) Slip 1. K11. Wrap. Turn.
– 10th row: (WS) Slip 1. P10. Wrap. Turn.
– 11th row: (RS) Slip 1. K9. Wrap. Turn.
– 12th row: (WS) Slip 1. P8. Wrap. Turn.

This should yield 6 wrapped stitches, 8 “live” (unwrapped) stitches, and 6 more wrapped stitches, for a total of 20 stitches on the 2nd needle.

Turn short row heel:

– 1st row: (RS) K8. Pick up (PU) the wrap and next stitch and knit them together. Wrap the next stitch so that it now has two wraps. Turn.
– 2nd row: (WS) SL1 (double-wrapped) stitch. P9. PU wrap and next stitch and purl them together. Wrap the next stitch so that it now has two wraps. Turn.
– 3rd row: (RS) SL1 (double-wrapped) stitch. K10. Pick up (PU) the wrap and next stitch and knit them together. Wrap the next stitch so that it now has two wraps. Turn.
– 4th row: (WS) SL1 (double-wrapped) stitch. P11. PU wrap and next stitch and purl them together. Wrap the next stitch so that it now has two wraps. Turn.
– 5th row: (RS) SL1 (double-wrapped) stitch. K12. Pick up (PU) the wrap and next stitch and knit them together. Wrap the next stitch so that it now has two wraps. Turn.
– 6th row: (WS) SL1 (double-wrapped) stitch. P13. PU wrap and next stitch and purl them together. Wrap the next stitch so that it now has two wraps. Turn.
– 7th row: (RS) SL1 (double-wrapped) stitch. K14. Pick up (PU) the wrap and next stitch and knit them together. Wrap the next stitch so that it now has two wraps. Turn.
– 8th row: (WS) SL1 (double-wrapped) stitch. P15. PU wrap and next stitch and purl them together. Wrap the next stitch so that it now has two wraps. Turn.
– 9th row: (RS) SL1 (double-wrapped) stitch. K16. Pick up (PU) the wrap and next stitch and knit them together. Wrap the next stitch so that it now has two wraps. Turn.
– 10th row: (WS) SL1 (double-wrapped) stitch. P17. PU wrap and next stitch and purl them together. Wrap the next stitch so that it now has two wraps. Turn.
– 11th row: (RS) SL1 (double-wrapped) stitch. K18. Turn.
– 12th row: (WS) SL1 (double-wrapped) stitch. P19. Turn.
– 13th row: (RS) K20. Pick up one stitch from the gap between Needle 1 and Needle 2.

Set up body of leg:

– Return to knittng in the round.
– 1st round:
– 1st needle: Pick up 1 stitch from the gap between Needle 2 and Needle 1. K20. Pick up a stitch from the gap between Needle 1 and Needle 2. (22 stitches on Needle 1.)
– 2nd needle: Pick up 1 stitch from the gap between Needle 1 and Needle 2. K10. Switch to GREEN yarn. K9. K2 tog. (21 stitches on Needle 2.)
– 2nd round (you are now using GREEN yarn):
– 1st needle: K2 tog. K18. K2 tog. (20 stitches on Needle 1.)
– 2nd needle: K2 tog. K19. (20 stitches on Needle 2.)

Knit body of leg:
– K2, P2 on each needle until green stripe measures 3.5cm (1.4″) high. Switch to RED yarn.
– K2, P2 on each needle until red stripe measures 3.5cm (1.4″) high. Switch to YELLOW yarn.
– K2, P2 on each needle until yellow stripe measures 3.5cm (1.4″) high. Switch to GREEN yarn.
– K2, P2 on each needle until green stripe measures 3.5cm (1.4″) high. Switch to RED yarn.
– K2, P2 on each needle until green stripe measures 3.5cm (1.4″) high. Cast of loosely, or using a stretchy bind-off.

Repeat pattern in full to yield a second sock. Voila!

As usual, should you note any errata in this pattern, please let me know so that I can fix it. I don’t exactly have a bevvy of test knitters to help me catch mistakes.