Dill Pickle Bread

Last week on Facebook, Delish re-published their dill pickle bread recipe from May 2017. I wasn’t following their feed back then, so it was all new to me! Only days before, I had been having a conversation with a friend of mine about how she stretches the use of the dill pickles that I give her for Christmas by also using the brine. When this recipe popped up, I knew I had to make a loaf of dill pickle bread for her — and one for myself too, of course.

The only changes I made to this recipe were to use lactose-free cheddar and sour cream instead of the regular kind. I was worried that this would mess with the consistency a bit, but from what the instructional video shows it’s a very thick batter that doesn’t rise much anyway. If that’s what was intended, that’s what I got! The end result is a very heavy (heavier than whole-wheat banana bread), very savoury quick bread. I paired it for one breakfast with eggs over easy, but the pickle flavour completely overwhelmed the more delicate eggs. I would suggest eating it by itself, either plain or toasted with salted butter, or with more potent deli meats such as salami, pastrami, or Montreal smoked meat. If you love dill pickles, you’ll love this bread — but if you’re only a little on the fence, there’s a good chance you won’t like it at all. Don’t say I didn’t warn you.

Cheater Chicken Bacon Quesadillas

Basic quesadillas aren’t exactly difficult to make in the first place, but some nights I’m looking for an even quicker, easier meal. Not only that, but a meal that the kids can help me prep (although it’s debatable if they speed anything up, honestly). Truthfully, it’s more like a grilled cheese on tortillas than a true quesadilla, but everyone in the family likes it. It whips up nice and quickly while I make up a salad.


The dressing is for the salad, not the quesadilla… Although ranch and chicken and cheese are a proven taste combination.

It doesn’t really have a recipe per se, since it’s mostly made using leftovers. Each quesadilla starts with a tortilla on a baking sheet, then a layer of grated cheese (the kids like sharp cheddar, while my husband prefers mozzarella and cheddar mixed, and I stick with whatever I can get lactose-free). Next is a handful of leftover chicken — often from a store-bought rotisserie bird, but roasted does well too, and sometimes we’ll substitute whatever other leftover meat is in the fridge. If I’m lucky, I’ll already have some bacon made in advance, but most of the time I have to cook it fresh, which is easy enough in the microwave. Then it’s another tortilla on top. I bake it in a preheated oven at 350°F (175°C), checking every couple of minutes, until it is warmed through and the cheese is nice and melted. If we’re feeling particularly fancy, I’ll serve it with sliced avocado and sour cream (lactose-free again for me), and a salad. That’s all there is to it, really!

I know, I know, people who like genuine Mexican food are probably squirming by now. There aren’t even any onions or peppers or anything in this to give it any spice! And I do agree. This is Kraft Dinner to homemade macaroni and cheese, Wonder Bread to a fresh-baked loaf of rye. But it’s quick, it’s easy, it uses up leftovers, it’s not too unhealthy (especially when paired with veggies of some kind), it’s miles better for you than fast food… And some days that’s exactly what the doctor ordered.

Excellent Potato Bread Recipe

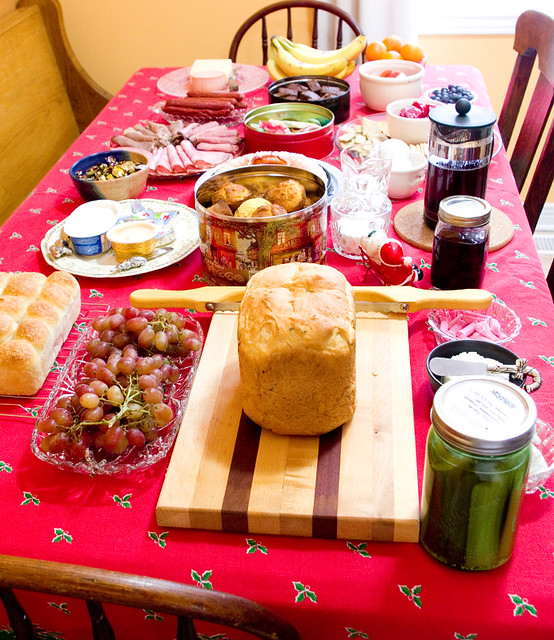
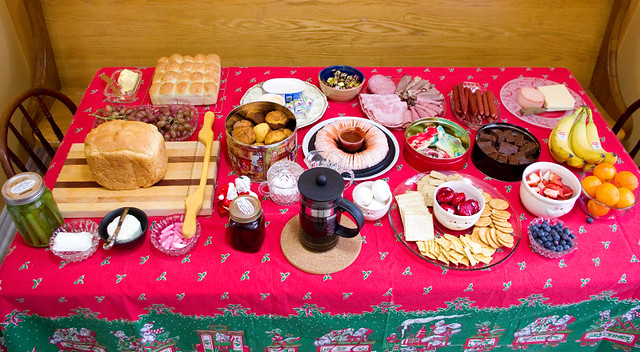
I finally had a chance to try out one of the recipes from the 1877 The Home Cook Book that I was so happy to find on Saint Patrick’s Day! It was a very interesting exercise to try to recreate such an old recipe. Here’s the original text:

EXCELLENT BREAD
Mrs. Geo. W. Pitkin.

Four potatoes mashed fine, four teaspoons of salt, two quarts of lukewarm milk, one-half cake compressed yeast dissolved in one-half cup of warm water, flour enough to make a pliable dough ; mould with hands well greased with lard ; place in pans, and when sufficiently light, it is ready for baking.

You’ll notice that it gives no cooking time or temperature, no approximate yield, no idea the volume of mashed potatoes, how big a cake of yeast measures (and what kind of yeast — the book gives multiple recipes for how to make your own), or how much flour to use. I’m really glad this wasn’t the first loaf of bread I’d ever made! Although I guess part of the point of these recipes is that they assume that all readers will have a certain breadth of knowledge base.

As it turns out, this recipe makes 4-5 loaves, depending on the size of your loaf pan. I honestly didn’t even have a bowl big enough to mix all of the ingredients, so I had to stir everything in shifts. It all turned out quite well, though, so I thought I’d share my interpretation of the recipe. Hopefully it’s a little more easily-repeatable than the original; I’ve also halved the quantities in my version for ease of cooking in a modern kitchen. The end result is a white bread that is still a little heavier and more filling, due to the potatoes. It also stays moist much longer than a straight white loaf.

Excellent Potato Bread
Yields 2 large loaves

In a small bowl, mix together:
2 packages (14g) quick-rise instant yeast
1/4 cup warm water
Wait for yeast to activate; if it foams up, it is good to use.
While waiting for yeast, peel and chop:
2 potatoes
Peeled, this should yield about 265g of uncooked potato.
Place potatoes in a stove-safe pot, cover with water, and bring to a boil. Reduce heat to a simmer and cook until the potatoes are easily pierced with a fork. Alternately, you can cook the potatoes in a microwave-safe casserole: place potatoes in the dish, cover with water, and cook on high until they can be easily pierced by a fork, about 12 minutes. No matter how you prepare the potatoes, drain them once cooked and mash them until they are no longer lumpy. Set aside to cool somewhat.
In a very large bowl, combine:
4 cups warm milk
2 tsp salt
Stir. Add the yeast mixture and the potatoes to the mixture, stir well.
While stirring with a sturdy wooden spoon, gradually add:
8 cups flour
As the end of adding the flour nears, the mixture may become too stiff to stir with a spoon. If it does, it can be stirred with floured hands in the bowl.

Flour a flat surface and hands generously. Turn the dough out of the bowl, scraping if necessary. Knead the bread for about 10 minutes, until it is springy. If the dough is too sticky on the hands or flat surface, add a bit more flour, but add it gradually and only add as much as absolutely necessary. The dough should be moist but not sticky.

Oil or use cooking spray on a large mixing bowl. Form the dough into a ball and place it in the bowl. Cover the bowl with a clean, damp tea towel. Place the bowl in a warm, dry area with no drafts. Allow the dough to rise until double, about 1 hour.

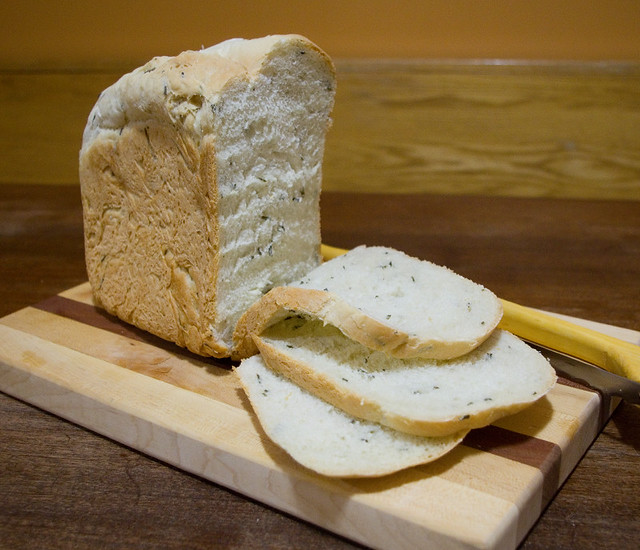
Grease two loaf pans. If you use smaller loaf pans (8.5″x4.5″), they will end up with a “mushroom top” loaf like the one pictured. If you use larger 9.5″x5.5″ pans, the bread will be a more uniform shape.
Divide the dough into two even portions, form each into a loaf shape and put each one into its own loaf pan. Cover with a damp towel and allow to rise again in a warm, draft-free area until double, about one hour.

Near the end of the rising time, preheat your oven to 350°F (175°F). Bake for about 30 minutes, checking often near the end of that time to make sure that they do not overcook. Verify that the bread is done by removing them from the pan and tapping them on the bottom. When cooked through, the loaf should make a hollow sound. Remove the loaves from the pans immediately and place them on a wire cooling rack.

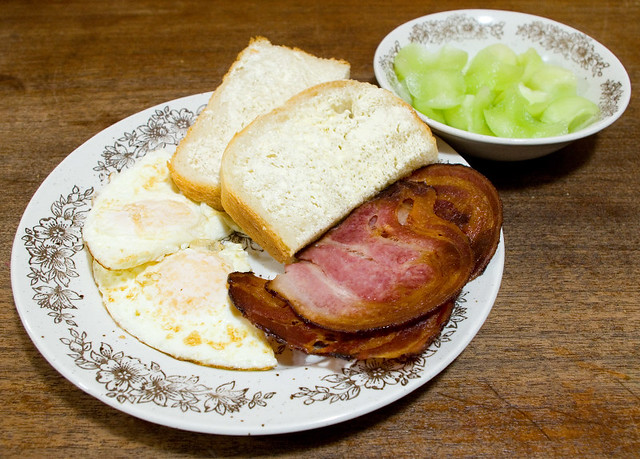
As with all bread, this kind is best served immediately. To keep it at its freshest, slice it only when it is about to be eaten. This bread will keep for four or five days if wrapped in a clean plastic bag. Make sure it is wrapped up only after totally cool, or it will go soggy.

Pulled Pork Sandwiches

It was inevitable. At least one of my kids has been sick since Saturday, and I’ve finally come down with whatever they have. Some kind of cold. But everyone needs to eat, so threw some ingredients in a slow-cooker and called it dinner. I’d never made pulled pork before, but a friend of mine taught me the basic technique:

– Cut a cheap cut of pork (in this case, pork loin) into large chunks, removing as much fat as possible.
– Put it in a slow cooker with the entire contents of a 500mL bottle of your barbecue sauce of choice. Stir.
– Cover and cook for four hours on high, until the meat pulls apart easily with a fork.
– Remove the meat from the cooker, pull it apart/shred it with two forks, and then return it to the cooker. Mix the meat back into the sauce.
– Cook for another hour on high.

The end result tastes really good, but it takes very little effort. I served the pulled pork in open-faced sandwiches that I made with homemade dinner rolls. Lest you think that it this took a great deal of effort, I just put the ingredients into the breadmaker and let it do most of the work. I used the Dinner Roll recipe from page 176 of Betty Crocker’s Best Bread Machine Cookbook (1999). Now, once the kneading is done, I did have to form the rolls by hand and bake them in the oven, but it was only about a dozen and a half of rolls, so that didn’t take long. I served the open-faced sandwiches with some of my homemade pickled beets, dilled carrot spears made with some of my monster carrots, and dill pickles. The acidity of the vinegar cut nicely through the sauce of the pulled pork.

We’re not quite at the stage where machines can do all of the cooking for us. However, having the option to just thrown ingredients into a something automated and then leave it ’till it’s done is a saving grace when you’re under the weather.

Bread Machine Fluffy Herb Bread Recipe

I’ve been meaning to post this recipe for a while, but I like to accompany my recipes with a picture, and my family keeps cutting into the loaves before I get a chance to take a photograph! This recipe is for a fluffy, high-rising loaf that stands up well on its own, but really shines when it is speckled generously with fresh or dried herbs. As a bonus, this bread is also dairy-free, nut-free, vegetarian, and can be made vegan with the proper sourcing of ingredients. Because of the herbs, it is a very savoury bread, and pairs well with eggs and meats — especially as toast with dipping eggs, and as sandwich bread for leftover roast or cold cuts.


A 2lb loaf made with rosemary.

Bread Machine Fluffy Herb Bread
Yields one loaf

A note about loaf size:
Quantities for a 1.5lb loaf are in bold, quantities for a 2lb loaf are in bold purple. However, this loaf is very light and fluffy — so it expands a lot. Use the settings for a 1.5lb loaf if your machine goes up to 2lbs; only make a 2lb loaf if your machine has the capacity to make a loaf that is 3lbs or greater.

A note about bread machines:
Every bread machine comes with an instruction booklet (most of which are also generally available online) that will specify the order that ingredients should be added. Mine says that liquids should be added first, then flour, then yeast. When preparing this recipe, the instructions for your specific bread machine should take first priority, so if your manual says to add the ingredients in a different order, do so.

Into the bread machine pan, pour:
1 1/4 cups (1 1/2 cups +3 Tbsp) water
2 Tbsp (2 Tbsp) olive oil
Over the liquids, sprinkle:
3 cups (4 cups) all-purpose flour*
Ensure that the flour covers the liquids entirely.
Into opposite corners of the pan, add:
1 Tbsp (1.5 Tbsp) sugar
1 1/2 tsp (2 tsp) salt
Create a well in the flour at the center of the bread pan, being sure not to go all the way down to the liquid. Into the well, add:
2 tsp (2 tsp) active dry yeast
Over the entire contents of the pan, sprinkle:
2 Tbsp (2 1/2 Tbsp) dried OR 4 Tbsp (5 Tbsp) chopped fresh herb of choice**

Set the bread machine to the basic/normal/white setting, with a light or medium crust to your preference. Press start. Running this cycle should take about four hours.

Remove the bread at the end of the baking cycle. Turn it out of the pan onto a wire rack to cool, making sure that the kneading paddle(s) are removed from the bread. Serve immediately (being careful to cut gently when it is warm), or when cool. Do not wrap the loaf or put it into a container until it is entirely cool, or it will become mushy.

* For a healthier loaf, substitute half of the all-purpose flour for whole-wheat flour. A whole wheat loaf will not rise as high, however.
**Suggestions: rosemary, dill, oregano, basil, chives, thyme, or sage.

Personal Pizza

I’ve been craving pizza lately, which is pretty much a no-no because of the issues that my digestive tract has with dairy. However, to my everlasting joy, I’ve discovered that I can eat lactose-free cheese so long as I don’t go overboard, since cheese is also quite greasy, especially when melted. Since none of the pizzerias around here carry lactose-free cheese as an option, I thought that a “make your own pizza” evening was in order.

It didn’t look spectacular because I put the toppings under the cheese, but it tasted great! I started with the dough from the Two-Cheese Pizza recipe on page 170 of Betty Crocker’s Best Bread Machine Cookbook (1999). This made enough for one 12″ pizza or four 4″ or so thin-crust-ish pizzas. (Next time I do this, I’m doubling the recipe.) You can’t actually cook pizzas in the bread machine, so I rolled out the dough into individual crusts and everyone topped their own. I used Healthy Veggie Tomato Sauce that I had in the freezer as the sauce, although I did simmer it a little to reduce it a little bit. I topped my pizza with ground beef and crumbled bacon, along with a few cremini mushroom slices. The rest of the family had theirs with more traditional mozzarella, but since cheddar was the only kind I could get lactose-free, I went with that.

I’ve tried Jamie Oliver’s Quick Family Pizza in the past, and although the kids liked it, one of the things I discovered about myself is that I’m not a big fan of the taste of self-rising flour. I think it’s just a little too salty for me. At any rate, I like the yeast dough a great deal more, and it’s just as easy as the quick bread version if I use the bread machine. So I think I’ll stick with this kind of dough for future pizza iterations.

Christmas Breakfast

Christmas breakfast was a big thing at my house when I was a kid. Mom and Dad pulled out all of the stops and bought all kinds of awesome food that we pretty much never had any other time of the year. I associated these foods so strongly with the holidays that it came as a great revelation to me when I moved out that I could buy Havarti cheese with dill or caraway seeds, or Babybel miniature cheeses, or Stoned Wheat Thins all year long.

We’ve been hosting Christmas breakfast at our house since the year that Thing 1 was born. Given that she would have needed to be fed and then probably put down for a nap sometime during the festivities, it just made sense for us to stay home and have the rest of my family come to us. Breakfast is generally served buffet-style, so that everyone can have a little bit of everything and then head over to the Christmas tree to open gifts, often while still munching.

This year I served (working roughly from left to right):

Nan’s pan rolls* with butter
– red grapes
– rosemary bread from the bread machine**
– homemade dill pickles
– Chevrai Original Goat Cheese
– Garlic & Fine Herbs Boursin cheese
Chicken Bones
– Daiya Plain Cream Cheeze Style Spread
– Crème Oka cheese
– Laughing Cow cheese
– my husband’s homemade cornmeal muffins
– homemade pickled beets
– coffee & tea with sugar & milk
– chocolate toffees
– meat platter with Hungarian salami, Montreal smoked meat, roast beef, and Black Forest ham
– shrimp ring with cocktail sauce
– Christmas Cookie Monster’s Shape Cookies (made, for the most part, by Thing 1 and Thing 2)
– cold hard-boiled eggs
– Babybel miniature cheeses
– cracker plate with Stoned Wheat Thins, Ritz, Vegetable Thins, and Rosemary & Olive Oil Triscuits
– pepperettes (all-beef by my hubby’s preference and European style for mine)
– Oka and Havarti cheeses
Fudgy Pumpkin Brownies (this time with no coffee)
– bananas
– strawberries
– clementines
– blueberries

In case you’re worried, no, the seven of us did not eat this all in one sitting. This much could have easily fed twice that amount of people, with food to spare! The point of this kind of meal (which only happens once a year) is that everyone can have as much as they like, and then it all gets packed away to become lunches and dinners for the next week or so. There were still a few leftovers as of New Year’s Day, but that was of the kind of thing that takes forever to go bad, like crackers. Some of it will probably even make its way into the kids’ lunches in the new year.

*I discovered that these rolls can be left to do their second rise overnight in the refrigerator, and then just popped into the oven to serve fresh-baked for breakfast. If you’re going to do so, make sure that the pan you use is metal and not glass, as it takes the glass longer to heat up and can make the bottom of the rolls take a little too long to cook. Also, if the top is browning but the bottom isn’t quite done yet, cover the top of the rolls with aluminum foil to prevent them going from “browned” to “burnt”.

**Classic White Bread, found on page 24 of Betty Crocker’s Best Bread Machine Cookbook (1999) — but with half the sugar, olive oil instead of margarine, and about 1/4 cup fresh chopped rosemary added.

Low-Prep Suppers

I kind of have my kitchen back again… Okay, not the whole thing, but the counters and table are clear again, so I can cook properly. I made shepherd’s pie for dinner (but without the cheese topping, to reduce the amount of dairy and make it better for my gut). However, the meal was running late and we dug into it much too fast for me to take pictures. Instead, I have photos of the bread that was cooking while we were eating dinner:

That’s Beer Bacon Bread found on page 44 of Betty Crocker’s Best Bread Machine Cookbook (Betty Crocker, 1999). I used a flat Guinness beer, a package of crumbled circular bacon, and chives from my window garden instead of green onion because that’s what I had on hand. It’s only the second time that I tried out any recipes for this book, and so far so good! There’s a Cottage Dill Loaf on page 152 and Brandied Pumpkin Bread on page 104 that I can’t wait to try.

Earlier in the week I had to make a few easy and quick meals that required little in the way of prep space, so I whipped up a loaf of Sally Lunn bread (page 25, also from Betty Crocker’s Best Bread Machine Cookbook), which I think called for an unreasonable amount of butter in the dough (6 Tbsp!), but I have to admit tasted quite nice. I used it to make grilled cheese sandwiches for the girls, with sides of sliced apples.

Of course I have issues with dairy (and at any rate I’d run out of cheddar), so I fried up a couple of eggs each for my hubby and I, and served it with the Sally Lunn, sliced apples, and mandarin oranges.

Earlier this week I went with a less bread-based meal and baked up some trout with in teriyaki sauce, which I served over rice with a side of asparagus.

I’m really looking forward to having this mini-reno complete so that I can try some new recipes! This hasn’t been nearly as time-consuming an affair as a full gutting of the kitchen (much as I’d love to be able to afford a 100% fresh new kitchen), but it’s still rather disruptive. At least it’s cheap!

Circular Bacon?

I’m trying my darndest to get the costume photos from this weekend edited, but it’s taking much longer than I had hoped, although I do acknowledge that this is mostly because I’m really picky. It would have been much too easy to just crop the photos to size. So it may be another day or two before I have it all done.

In the meantime, I did have to cook dinner last night, which had to be quick because I had to get the kids to extracurricular activities. Thing 2 requested bacon and eggs, which I thought was a perfectly acceptable solution. Earlier in the day I’d put some Milk Loaf (page 65, Bread Machine: How to Prepare and Bake the Perfect Loaf (Jennie Shapter (2002)) on to cook in my bread machine. I just microwaved some bacon (my preferred low-mess way to cook it), scooped out some honeydew melon, fried up some eggs, and buttered some fresh bread for a quick dinner.

You might note that the bacon in the above photo are shaped unusually. It’s not an illusion, the slices are actually more or less circular! They’re actually Presiden’t Choice Naturally Smoked Bacon Rounds, which are described as follows:

A real game changer when it comes to whipping up burgers, breakfast sandwiches and BLTs, bacon rounds make things so much easier. Cut from the pork belly, they’re everything you love about traditional bacon – only rolled prior to smoking and slicing. Not only are they the perfect fit for buns and English muffins, the edges curl up a little while cooking, creating a “cup” for toppings.

Well, my slices didn’t curl up on the edges, but maybe they do so when fried. I have to admit, I’ve never had any problem whatsoever fitting traditionally-sliced bacon into a sandwich or burger, so I think that these bacon rounds have been created to fix a problem that doesn’t really exist. I mean, if your bacon is too big for your bread, it can be broken if crispy or cut if soft. The rounds are more expensive than the same brand’s regularly-sliced bacon, too ($1.60/100g vs. $1.20/100g). I have a feeling that other shoppers agree, since I found my supply in the clearance section at the local grocery store and I haven’t seen them there since. I paid only $0.99 per package (so $0.26/100g if I did my math right), and at that price it was definitely worth it since the rounds taste exactly the same as regular bacon. Without another comparable sale, I can’t see myself buying these again though.

First Bake of the Christmas Season

I wanted to spend today working on my last-minute costume, but the weather has started to change for the colder, and that meant that I had to make some changes to my house. The Weather Network is calling for rain, freezing rain, and snow over the weekend, so I had to be prepared. First, I had to put up the Christmas lights, since climbing on a ladder in the ice and snow is not a good idea.

Second, I had to clean the garage. I know it may not look like much, but it took me the rest of the day to get my garage this tidy. I really prefer to park under a roof in the winter; the car starts easier, it takes less time to get out the door because I don’t have brush/scrape off snow/ice, and it’s just generally better for the longevity of the vehicle. In warmer weather, however, my garage becomes my workshop-slash-storage-space, and it becomes cluttered and messy, and there’s no way you can get a car in there for about six months. So every fall I have to give it a good clean, and this year I’d let it get bad enough that it took me most of the day.

We still had to eat, of course, so I kept in the same mind-set as yesterday’s Clean Out Your Refrigerator Day — this having nothing to do with the fact that I still hadn’t gone to the grocery store, of course. I made grilled cheese for the family using yesterday’s Light Rye and Caraway Bread (page 75, Bread Machine: How to Prepare and Bake the Perfect Loaf (Jennie Shapter (2002)) and leftover cheese from the cheese-and-crackers tray from the Halloween party, which I think was mostly cheddar and Havarti, possibly Gouda. Sadly, there was just toast for me, since I have yet to find a non-dairy cheese that I actually like. Alongside the sandwiches I served cream of carrot soup that I had made up around Easter and frozen.

This weekend there is an annual fundraiser to send the area Pathfinders on an excursion, for which the younger girls (Sparks, Brownies and Guides) help out. The fundraiser is a holiday tea held at a local church. Parents supply beverages and baked goods, the Pathfinders organize and run the kitchen, the Guides serve the hot drinks, the Brownies serve cold drinks and treats, and the little Sparks just serve treats. The younger girls only work in one-hour shifts and are always given the chance to sit down and have tea and treats afterwards, so they love participating in this fundraiser. Plus, it makes them feel really grown up.

Thing 1 helped me choose and bake the treats we’ll be providing, which after a perusal of my cookbooks Thing 1 proclaimed had to be brownies-without-the-capital-B. She picked the recipe from Cookies: Recipes for Gifting & Sharing (Publications International Ltd., 2016), the classic brownies on page 35. Other than taking longer to bake than the directions specified, they went off without a hitch! Of course, I had to try one of the brownies before I packaged them to drop off tonight, and they’re rich and chocolatey soft, firm on the outside with a soft, moist (but not under-cooked) center. I am definitely pleased with this recipe, and not only because it’s so easy! My only qualm is that it has a bit of dairy inside, so maybe in the future I’ll be able to come up with a non-dairy version.